
Are you looking for a way to connect your Geeni smart devices to your WiFi network? Look no further! This guide will walk you through the simple steps to get your Geeni devices connected and ready to use.

Connecting your Geeni smart device to your home Wi-Fi network lets you control it remotely using the Geeni app. Whether you are setting up a smart bulb, camera, or plug, getting them online is quite straightforward. As long as you have a stable internet connection, your Geeni devices will be up and running quickly.
This guide will walk you through the essential steps on how to connect geeni to wifi, ensuring that you can take full advantage of its smart features and conveniences. Follow these instructions carefully to get started on your smart home journey.
What Will You Need?
Before we dive into the steps, here are some things that you will need to successfully connect your Geeni devices to Wi-Fi:
- A stable Internet Connection: Ensure your internet is up and running before connecting your Geeni device to Wi-Fi.
- A Compatible Smartphone or Tablet: To use the Geeni app, you will need a smartphone or tablet with iOS 8.0+ or Android 4.1+.
- Your Geeni Device: This could be a smart bulb, camera, plug, or switch.
- The Geeni App: Download and install the free Geeni app from the App Store or Google Play Store.
- Your Wi-Fi Network Name (SSID) and Password: You will need these to connect your Geeni device to your home network.
10 Easy Steps on How to Connect Geeni to Wifi
Step 1: Set up Your Geeni Device
Begin by unpacking your Geeni device from its packaging. Make sure you have all the necessary components and instructions that may have come with it. Depending on the type of device, whether it’s a smart bulb, camera, plug, or switch, the initial setup may vary slightly.
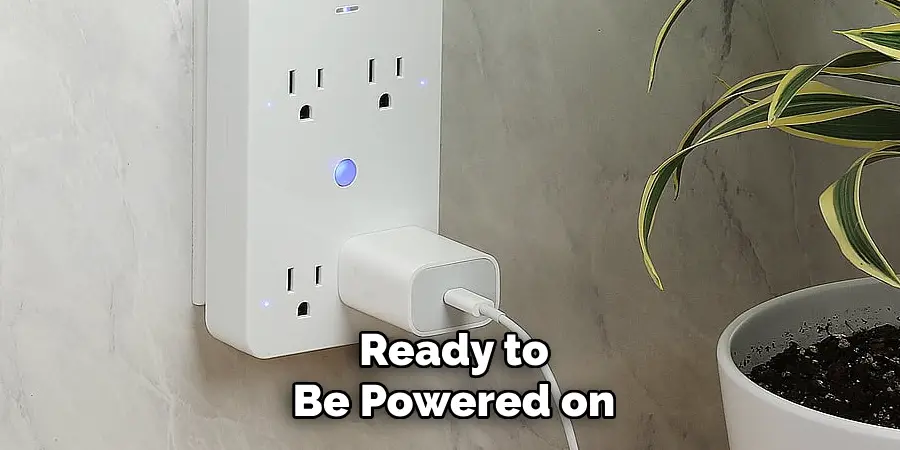
For a smart bulb, screw the bulb into the desired light fixture. For a smart camera, plug it into an appropriate power source and place it in the desired location within range of your Wi-Fi network. If you have a smart plug or switch, insert it into a wall socket or install it as per the manufacturer’s instructions. Whichever device you are setting up, ensure that it is ready to be powered on and connected to your Wi-Fi network.
Step 2: Download and Install the Geeni App
On your smartphone or tablet, navigate to the App Store (for iOS devices) or Google Play Store (for Android devices). Search for the Geeni app, which is free to download. Once you find the app, download and install it on your device. Open the app after installation.
Step 3: Create or Log In to Your Geeni Account
If you already have a Geeni account, simply enter your login credentials to access it. If you are new to Geeni, you will need to create an account to proceed. Here’s how you can do that:
- Open the Geeni App: Launch the Geeni app on your smartphone or tablet.
- Sign Up: Tap on the “Sign Up” button to create a new account.
- Enter Your Information: Fill in the required fields such as your email address, and create a secure password. Make sure to use an email address you can access, as you may need to verify your account.
- Agree to Terms and Conditions: Review Geeni’s terms and conditions, then tap the checkbox to agree. This step is important to proceed.
- Submit: Tap on the “Submit” or “Sign Up” button to create your account.
- Verification: Check your email for a verification link from Geeni. Click on the link to verify your account. This step may be required to activate your account fully.
Step 4: Add Your Geeni Device to the App
Once your account is ready, you can add your Geeni device to the app. Follow these steps:
- Open the App: Launch the Geeni app on your smartphone or tablet.
- Add Device: Tap on the “+” icon, which is usually located at the top right corner of the app’s homepage. This will take you to the “Add Device” screen.
- Choose Your Device: Select the type of Geeni device that you are setting up from the list provided. If your device is not listed, select “Other”.
- Follow Instructions: Depending on your device type, follow the instructions provided by the app to set it up and prepare it for connection.

Step 5: Connect Your Geeni Device to Wi-Fi
Once your device is ready, go through these steps to connect it to your Wi-Fi network:
- Connectivity Mode: On the app, select “Wi-Fi” as your connectivity mode. This will enable your device to connect to a Wi-Fi network.
- Choose Wi-Fi Network: Select your home Wi-Fi network from the list of available networks provided by the app. If your network is not listed, click on “Other” and enter your network name manually.
- Enter Password: If prompted, enter the password for your Wi-Fi network.
- Power On Your Device: Plug in or turn on your Geeni device if it isn’t already powered on. The app should automatically detect and connect the device to the selected Wi-Fi network.
Step 6: Wait for Connection
The app will initiate the connection process after entering your Wi-Fi network credentials and ensuring your Geeni device is powered on. This may take a few moments as the device attempts to connect to your Wi-Fi network. During this time, you might see a progress indicator within the app, showing you the status of the connection attempt. It is important to remain patient during this step, as complex devices sometimes require extra time to connect successfully.
If the device connects successfully, you will see a confirmation message in the app, and your device will appear in the list of connected devices. This means your Geeni device is now connected to your Wi-Fi network and can be controlled remotely using the app.

Step 7: Troubleshooting Connection Issues
Sometimes, the connection process may not go as smoothly as planned. If the connection fails, you can try the following troubleshooting tips:
- Check Signal Strength: Ensure that your Geeni device is within the effective range of your Wi-Fi router. Weak signals can hinder the connection process.
- Restart Your Device: Power off your Geeni device and turn it back on. Sometimes, a simple reboot can resolve connectivity issues.
- Verify Credentials: Double-check that you have entered the correct Wi-Fi network name and password. Even a small typo can prevent the device from connecting.
- Update App/Device Firmware: Ensure that you are running the latest version of the Geeni app and that your device firmware is current. Sometimes, updates include bug fixes that can resolve connection problems.
- Try a Different Network: If possible, connect your Geeni device to a different Wi-Fi network to determine if the issue lies with your primary network.
Step 8: Name Your Device
Once successfully connected, the app will prompt you to name your Geeni device. Giving your device a distinctive name helps you easily identify it within the app, especially if you have multiple Geeni devices. For example, you may name a smart bulb “Living Room Light” or a camera “Front Door Camera.” After naming, save the changes by tapping the appropriate button within the app.

Step 9: Customize Device Settings
Now that your Geeni device is connected and named, you can customize its settings to fit your preferences. Depending on your device type, customization options may include:
- Scheduling: Set specific times for your device to turn on or off automatically.
- Brightness and Color Adjustment: For smart bulbs, adjust the brightness and color to match your mood or time of day.
- Notifications: Configure alert settings for devices like cameras so you get notified of any detected activity.
- Scenes: Create scenes that allow multiple devices to work together with a single command (e.g., setting a “Goodnight” scene to turn off all lights and lock doors).
Step 10: Start Using Your Geeni Device
With your Geeni device fully configured, you can now use its smart features. Use the app to control your device remotely, set schedules, receive notifications, and integrate it with other smart home systems for enhanced functionality. Enjoy the convenience and efficiency that your Geeni smart device brings to your home.
Following these simple steps, you can easily connect any Geeni device to your home Wi-Fi network.
Conclusion
How to connect geeni to wifi is a straightforward process when following the outlined steps.
You can achieve a seamless connection by ensuring your account is active, your devices are prepared, and your app is up-to-date. Remember to follow each step carefully, from adding your device to the app and selecting your Wi-Fi network to naming and customizing your device settings. Should any issues arise, the troubleshooting tips provided can assist in resolving common connectivity problems.
With persistence and attention to detail, you will soon be able to enjoy the convenience and smart capabilities your Geeni devices offer, enhancing your home automation experience. Thank you!