
Are you having trouble connecting your Merkury camera to a new Wi-Fi network? Don’t worry—we’ve got you covered! This guide will walk you through the steps to connect your camera to a new Wi-Fi network quickly.
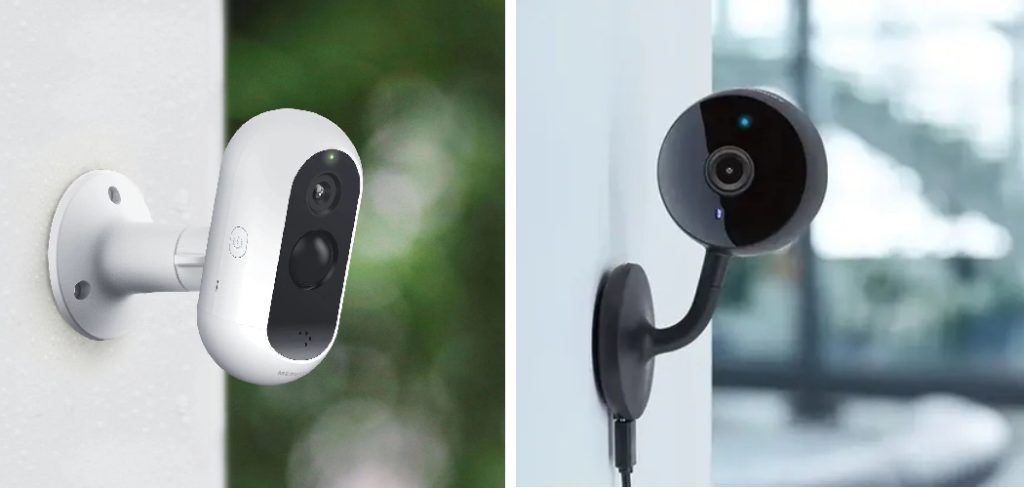
How to connect Merkury camera to new wifi network might seem daunting, but this guide will walk you through each step to make the process as smooth as possible. Whether you’ve recently changed your WiFi settings or relocated your camera to a new spot with different network credentials, we’ll ensure you’re back up and running in no time.
By following these instructions, you can reconnect your Merkury camera to the new WiFi network quickly and efficiently, ensuring continuous monitoring and access to your camera’s features.
What Will You Need?
Before we dive into the steps, here’s a quick list of things you’ll need to have on hand:
- Your Merkury camera
- A stable WiFi connection
- The login credentials for your new WiFi network (network name and password)
Once you have these items ready, we can move on to the steps for connecting your camera to a new WiFi network.
10 Easy Steps on How to Connect Merkury Camera to New Wifi
Step 1: Prepare Your Camera
First, make sure your Merkury camera is powered on and functioning correctly. Ensure it is in a location where it can receive a strong WiFi signal.
Positioning it close to your router during the setup process is a good idea to avoid any connectivity issues. If your camera has an indicator light, check that it is functioning as expected. This light typically blinks or changes color based on the camera’s status, so refer to your camera’s manual to understand what these signals mean.
Additionally, ensure your camera’s firmware is up to date. You can check for firmware updates in the Merkury app, which helps maintain compatibility and performance. With your camera adequately prepared, you can now proceed to connect it to your new WiFi network.
Step 2: Reset Your Camera

To connect your camera to the new WiFi network, you’ll need to reset it first. Look for the reset button on your camera, which is often a small pinhole button that may require a paperclip or similar tool to press.
Hold the reset button for about 10-20 seconds until you see the indicator light blink or hear a specific sound indicating the reset is complete. Resetting the camera will erase the old WiFi settings, allowing you to configure the new network details afresh.
Step 3: Open the Merkury Smart App
Now, open the Merkury Smart app on your smartphone or tablet. Ensure you have the latest app version installed from the App Store or Google Play Store. Log in with your credentials if you are not already signed in.
If you do not have an account, you must create one by following the on-screen instructions. Once logged in, navigate to the main dashboard to begin adding your camera.
Step 4: Add a New Device
In the Merkury Smart app, locate the “+” icon or the option that says “Add Device.” This feature is typically found on the main dashboard or in the menu settings. Tap on it to start adding a new device.
You will be presented with a list of devices compatible with the app, so scroll down and select “Security Camera” or the specific model of your Merkury camera if listed.

After selecting your device type, the app will guide you through several prompts to ensure your camera is ready to connect. Confirm that your camera is powered on and that you have reset it as described in Step 2. Once you’ve confirmed these details, click “Next” to proceed.
The app will now search for your camera. This might take a few moments, so be patient. If the app fails to find your camera, ensure it is close to your router and that the indicator lights are functioning correctly. If the camera is still not discovered, you may need to retry the reset process.
Once the app successfully detects your camera, it will prompt you to enter your new WiFi network credentials. Carefully type in the network name (SSID) and password, ensuring there are no typos or errors. Double-check the information before continuing, as incorrect credentials will prevent the camera from connecting to the network.
After entering the WiFi details, the app will attempt to connect your camera to the specified network. You’ll see a progress bar or animation indicating the connection process. This step can take a few minutes, so do not close the app or turn off your camera during this time.
You will receive a confirmation message in the app when the connection is successful. Your Merkury camera is now linked to the new WiFi network. You can proceed to customize the camera settings within the app, such as renaming the device, setting up motion alerts, or adjusting video quality preferences.
Step 5: Confirm Connection and Test Camera

Once your camera is connected to the new WiFi network, it is essential to confirm that everything is functioning correctly.
Within the Merkury Smart app, navigate to the live view section for your newly connected camera. Ensure you can see the live video feed without any lag or connection issues.
Test the camera’s responsiveness by adjusting its settings or activating features such as motion detection or two-way audio. If all operations are smooth, your camera is successfully connected.
If you encounter any problems, double-check your WiFi credentials and consider redoing the reset and connection steps. By verifying the connection early, you can ensure reliable surveillance and functionality from your Merkury camera.
Step 6: Customize Camera Settings
With your Merkury camera now successfully connected to your new WiFi network, take some time to customize the camera settings to suit your needs. In the Merkury Smart app, navigate to the settings menu for your camera.
Here, you can rename the camera for easy identification, which is especially helpful if you have multiple cameras. Adjust the video quality settings based on your preferences and network bandwidth.
Higher resolution provides clearer images but may consume more data. You can also configure motion detection alerts to receive real-time notifications on your smartphone whenever the camera detects movement. Fine-tune the sensitivity of these alerts to avoid false alarms triggered by minor movements.
Additionally, explore other features such as setting up recording schedules, integrating with other smart home devices, or enabling two-way audio for communication through the camera. Customizing these settings ensures that your Merkury camera operates optimally, providing the security and convenience you require.
Step 7: Place Your Camera in the Desired Location
With your camera properly connected and settings customized to your liking, the next step is to position your camera in the optimal location for surveillance.
Choose a spot that provides a clear, unobstructed view of the area you wish to monitor. Ensure that the camera is mounted at an appropriate height and angle to capture the desired field of view. If you are installing the camera outdoors, consider using a weatherproof housing to protect it from the elements.
Securely mount the camera using the provided brackets or mounts, and double-check that it is firmly in place. Once installed, recheck the live feed in the Merkury Smart app to confirm that the camera is capturing the desired angle and making any necessary adjustments.
A well-placed camera enhances its effectiveness and ensures comprehensive coverage of your surveillance area.
Step 8: Maintain and Troubleshoot Your Camera
Regular maintenance and troubleshooting are essential to ensure your Merkury camera continues to function effectively. Periodically clean the camera lens to remove any dust or debris that may obstruct the view.
Check for firmware updates in the Merkury Smart app, as updates can include important security patches and feature enhancements. Additionally, inspect the camera and its connections to ensure they remain secure.
If you encounter any camera issues, consult the app’s help section for troubleshooting tips. Common problems may include connectivity issues, poor video quality, or malfunctioning features.

Try rebooting the camera and restarting the app to resolve minor issues. For persistent problems, resetting the camera and repeating the setup process can often restore proper functionality. If these steps do not resolve the issue, consider reaching out to Merkury’s customer support for further assistance.
Regular upkeep and prompt resolution of any issues will ensure your camera provides reliable surveillance and peace of mind.
Step 9: Secure Your Camera
Security is a paramount concern when managing smart home devices. To protect your Merkury camera from unauthorized access, take some additional security measures.
Begin by changing the default password of your camera to a strong and unique password. This password should combine uppercase and lowercase letters, numbers, and special characters. Avoid using easily guessable information such as birthdates or common words.
Furthermore, enable two-factor authentication (2FA) within the Merkury Smart app if available. 2FA adds an extra layer of security by requiring a secondary verification method, such as a code sent to your mobile device before access is granted.
Keep your app and camera firmware up to date to protect against newly discovered vulnerabilities. Periodically check for updates within the app and enable automatic updates if possible. Additionally, secure your WiFi network by using strong encryption (WPA2 or WPA3) and a robust network password.
Implementing these security practices can safeguard your camera from potential threats and ensure that your surveillance system remains secure and reliable.
Step 10: Review Your Camera’s Performance
After you have set up, customized, and secured your Merkury camera, it’s crucial to periodically review its performance to ensure it continues to meet your surveillance needs.
Regularly check the live feed to verify that the camera captures clear, high-quality footage and that motion detection alerts function correctly. Monitor the video recordings to ensure they are stored correctly and can be easily accessed.
If you notice any discrepancies in performance, such as lag in the video feed or missed motion detection alerts, consider troubleshooting these issues promptly. Revisit the settings in the Merkury Smart app to adjust video quality, sensitivity levels, or recording schedules as necessary.
Lastly, assess the overall effectiveness of your camera’s placement and field of view. Make any necessary adjustments to the camera position or angle to enhance coverage.
By following these steps and regularly reviewing your camera’s performance, you can ensure that your Merkury camera remains a reliable and valuable tool in safeguarding your home.
5 Additional Tips and Tricks
- Ensure Strong Signal Strength: Before starting the connection process, verify that your new Wi-Fi network has a strong and stable signal in the camera’s location. This can prevent intermittent connectivity issues during the setup process.
- Update Firmware and App: Check for any updates for your Merkury camera’s firmware and the accompanying app. Keeping both up-to-date can resolve potential compatibility issues and improve overall performance.
- Reset the Camera: If you’re having trouble connecting, try resetting the camera to its factory settings. This can clear any previous network configurations and provide a clean slate for the new connection.
- Use the Correct Password: Double-check that you are entering the correct Wi-Fi network password. Since it is case-sensitive, ensure that there are no typos or extra spaces.
- Check Router Settings: Ensure that your router’s settings are compatible with the Merkury camera. This includes confirming that the Wi-Fi network is set to a 2.4 GHz band, as many smart cameras do not support 5 GHz networks. Also, disable security settings like MAC address filtering that could block the camera from connecting.
With these additional tips and tricks, you can troubleshoot any issues that may arise during the setup process of your Merkury camera.
5 Things You Should Avoid
- Ignoring Compatibility Requirements: Do not overlook the specific requirements of your Merkury camera, such as ensuring it connects to a 2.4 GHz network. Attempting to connect to an unsupported 5 GHz network can lead to frustration and failed setup attempts.
- Skipping Firmware Updates: Avoid neglecting firmware updates for your camera. Outdated firmware can cause compatibility issues and hinder the successful connection to your new Wi-Fi network.
- Using Weak or Unstable Wi-Fi: Don’t try to connect your camera to a network with a weak or unstable signal. A poor connection can result in unreliable performance, intermittent connectivity, or failure to connect entirely.
- Overlooking Security Settings: Be cautious not to ignore important security settings on your router. Features like MAC address filtering, firewall settings, or network isolation can prevent the camera from successfully connecting to the Wi-Fi network.
- Making Assumptions About Network Passwords: Avoid assuming you know the correct Wi-Fi password without verifying it. A single incorrect character or an unnoticed typo can prevent the camera from connecting, causing unnecessary troubleshooting.
By being mindful of these common pitfalls, you can ensure a smoother and more efficient setup process for your Merkury camera on your new Wi-Fi network.
What is Merkury Camera Compatible With?
Merkury cameras are compatible with a wide range of devices and platforms, making it a versatile option for home security. Some examples include:
- iOS and Android devices: You can use the Merkury app on both iOS and Android devices to view real-time footage, adjust settings, and receive notifications.
- Amazon Alexa and Google Assistant: If you have a smart home setup, you can use voice commands to control your Merkury camera and integrate it with other smart devices.
- Web Browsers: You can access the Merkury app through a web browser on any computer or laptop, allowing you to remotely access and manage your camera.
By being compatible with various devices and platforms, Merkury cameras offer flexibility and convenience in monitoring and managing your home security. Overall, following these tips and knowing the compatibility options can help you successfully set up your Merkury camera on a new Wi-Fi network without any hassle.
Is a Merkury Camera Waterproof?
It depends on the model of the Merkury camera. Some models, such as the Merkury Innovations Smart Wi-Fi Security Camera with Pan-Tilt-Zoom (PTZ), are weatherproof for outdoor use. However, other models may not be designed to withstand water or extreme weather conditions.
If you plan to use your Merkury camera outdoors, check the specifications and features of your specific model to confirm its water resistance capabilities.
Additionally, suppose you are unsure or have any concerns about using your camera in certain weather conditions. In that case, it is always best to err on the side of caution and keep it protected indoors.
Overall, it is essential to research and understand the features and limitations of your Merkury camera to ensure its proper usage and longevity.
Conclusion
How to connect merkury camera to new wifi network can be a smooth and straightforward process if you follow the outlined steps and guidelines. Ensuring that you have a strong signal, updating firmware, and verifying security settings are all critical components to a successful setup.
Avoiding common pitfalls such as ignoring compatibility requirements and skipping firmware updates can prevent unnecessary troubleshooting and ensure reliable connectivity.
If needed, remember to always check the compatibility of your specific camera model with outdoor usage conditions. With these insights and tips, you can achieve a seamless connection, enhancing your home’s security and monitoring capabilities.
Follow these steps carefully, and your Merkury camera will be up and running on the new Wi-Fi network in no time.