In today’s surveillance-driven world, knowing how to disable security cameras, whether temporarily or permanently, has become increasingly relevant. Individuals might wish to disable cameras for privacy reasons, such as during a family gathering or personal event, minimizing unnecessary surveillance. System maintenance or upgrades offer practical reasons, requiring temporary disablement to facilitate technical adjustments.

When newer, more advanced equipment is installed, permanently disabling older cameras may be necessary to streamline the security infrastructure. Nonetheless, ethical and legal implications are critical; one must ensure they have full permission from the system owners before modifying any aspect of the surveillance network. Methods covered in this guide include numerous approaches, such as using software options accessible through apps, disconnecting power supplies for both wired and wireless cameras, and making physical adjustments to the camera’s view. Understanding these techniques ensures privacy needs and security integrity are simultaneously respected.
Understanding the Types of Security Cameras
Security cameras can be broadly categorized into two types: wired and wireless, each presenting unique features and disabling techniques. Wired cameras are directly connected to a power source and a DVR/NVR (digital or network video recorder) for video storage. These systems are often favored for their reliable connection and consistent video quality, making them suitable for extensive home or business security setups. Disabling wired cameras typically involves accessing the DVR/NVR settings to toggle recording options or physically disconnecting the power source.
On the other hand, wireless cameras operate via Wi-Fi or batteries and are frequently tied to cloud services or controlled through mobile apps. Products like Nest or Ring cameras fall into this category, offering flexibility and ease of installation. Disabling wireless cameras is commonly managed through the app interface, where users can pause or stop the recording temporarily. Battery-operated models might require simply removing the battery to prevent power supply. Notably, the techniques for disabling these cameras differ; a unified system often requires varied approaches based on the specific capabilities and connectivity of the camera type at hand. Understanding these distinctions is crucial for assessing the most effective and secure disablement method for any surveillance setup.

Temporary vs. Permanent Disabling Options
Understanding when to temporarily or permanently disable security cameras is essential for balancing privacy, maintenance, and security needs. Temporary Disabling for Maintenance or Privacy includes disabling cameras while hosting guests or during home improvements, allowing uninterrupted privacy without permanent changes. This approach uses methods like software-based pauses or physically covering lenses, ensuring quick reactivation post-event. Permanent Disabling for Decommissioning becomes necessary when replacing outdated cameras with new technology or completely removing a security system.
It involves disconnecting power, software deactivation, and physical removal to streamline security infrastructure. Considerations before deciding include assessing privacy requirements, potential future needs for reactivating cameras, and ensuring adequate security measures remain in place. Evaluating the effects on overall safety and respecting privacy while planning for possible future use ensures appropriate disabling methods are chosen.
How to Disable Security Cameras: Disabling Cameras Through Software or App Settings
Using the Security System’s App (Wireless Cameras)
Leveraging the security system’s app is often the most straightforward approach to disable wireless cameras. Here’s a step-by-step guide using common systems like Ring, Arlo, or ADT:
- Open the App: Launch the corresponding mobile app associated with your security system (e.g., Ring, Arlo, ADT).
- Select the Device: Navigate to the list of connected devices or cameras. Select the specific camera you wish to disable.
- Access Settings: Within the device interface, find and tap on the settings or gear icon, typically located in the top right corner.
- Find Camera Controls: Look for options related to camera control, such as “Device Settings,” “Camera Settings,” or similar terminologies.
- Use Privacy Settings: To temporarily halt the camera’s operations, use available privacy settings, like “Pause,” “Disable Camera,” or “Suspend. “
- Confirm the Operation: After making changes, ensure that they are saved or confirmed by checking the camera’s status from the main dashboard.

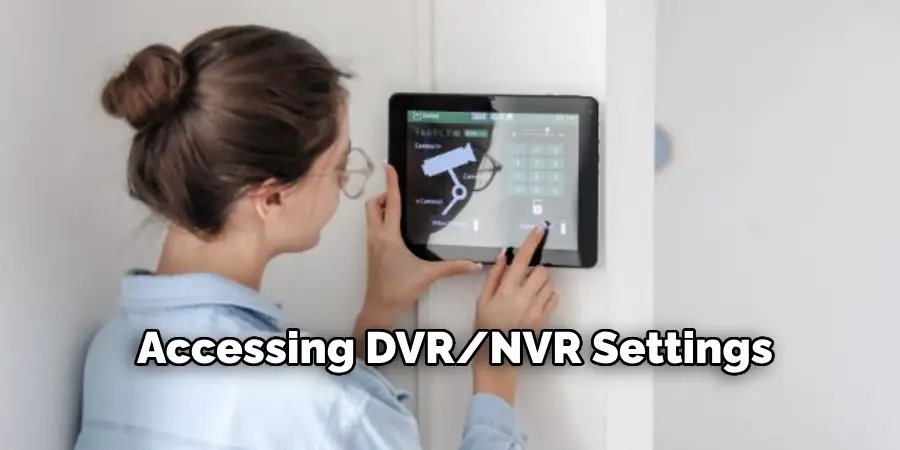
Accessing DVR/NVR Settings (Wired Systems)
Accessing the DVR/NVR menu allows users to adjust recording settings for wired security systems. Follow these steps:
- Locate the DVR/NVR: Ensure you can physically access the DVR/NVR unit connected to your camera system.
- Log into the Interface: Use the relevant credentials to log into the DVR/NVR system, either through a monitor connected directly or via a browser interface if the system supports it.
- Navigate to Recording Settings: In the main menu, find the section labeled “Recording Settings” or “Camera Setup.”
- Select Desired Cameras: Choose the individual or multiple cameras you wish to adjust from the list provided.
- Disable Recording: Locate recording options, such as “Record Mode,” and opt to disable or set the cameras to not record.
- Save Adjustments: Confirm and save changes to ensure that the recording is turned off without disrupting the entire system.

Using Privacy Zones or Motion Detection Off Settings
Security systems often include features like Privacy Zones or adjustable Motion Detection settings, offering alternative disablement options:
- Define Privacy Zones: Within the app or DVR/NVR settings, define areas in the camera’s view where recording will be blocked or limited, allowing for targeted privacy.
- Adjust Motion Detection Sensitivity: Lower or completely turn off motion sensitivity settings to avoid recording minor inadvertently invasive movements.
- Balance Coverage and Privacy: Ensure these adjustments balance security coverage and personal privacy needs.
By understanding these software-based options, users can effectively manage their surveillance systems to enhance privacy and optimize functionality without permanent disablement.
How to Disable Security Cameras: Disabling Power to the Camera
For Wired Cameras
Disabling power to wired cameras involves both locating and securely disconnecting the power source. Begin by identifying the power adapter usually connected near the camera or following the power cable to its outlet. Unplugging the power adapter is the most direct method; however, if inaccessible, locate the specific circuit breaker supplying the camera’s power and switch it off.

It’s crucial to ensure that the power is fully disconnected before performing any maintenance, as partial disconnection may cause safety hazards or damage to the equipment. Always confirm that other necessary devices are not affected when toggling circuit breakers.
For Battery-Powered Cameras
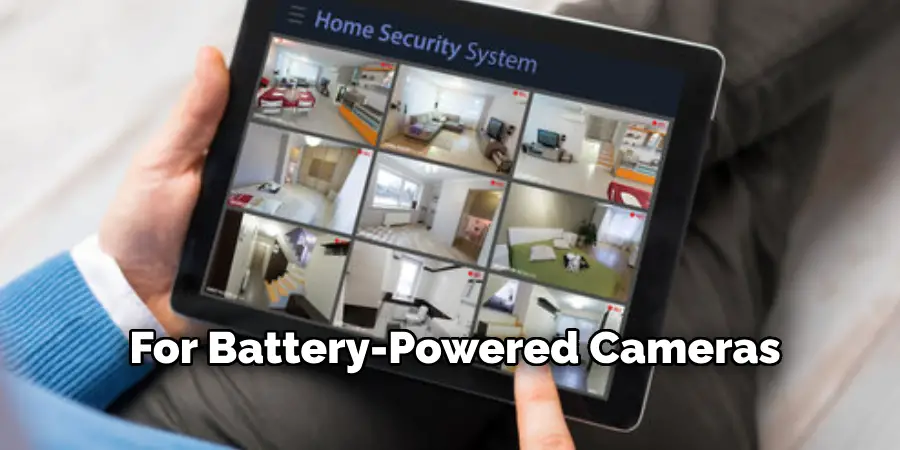
To disable battery-powered cameras, removing the batteries is necessary. Start by accessing the camera’s battery compartment, typically requiring the removal of a cover or panel. Gently extract the batteries, ensuring no residual power remains, thus turning off the device.
Before attempting to disable the cameras, verify the battery levels; this helps plan for recharge or replacement if resuming use later. When ready to reactivate the camera, reinstate the batteries, ensuring they are correctly positioned, to facilitate seamless functionality once powered on.

Physical Blocking or Covering the Camera Lens
Using a Physical Block
Physical blocking is a viable method for temporarily disabling a camera’s recording capabilities without utilizing software or toggling power. Safe and non-damaging options include using tape or a specially designed removable cover. Avoid using adhesive materials that could leave residue or permanently damage the camera lens. A removable cover made of soft, non-abrasive material is often ideal, providing the flexibility to easily block and unblock the camera without harming its components.
Adjusting the Camera’s Position
Another effective way to prevent a camera from recording specific areas is by adjusting its position or angle. This method involves securely repositioning the camera to divert its focus from sensitive areas. Begin by loosening any mounting mechanisms and carefully adjusting the angle.
Ensure that repositioning meets privacy needs without compromising wider security coverage. Once the temporary need for blocking is resolved, remember to re-angle the camera to its original or optimal position, ensuring the system continues to provide comprehensive security monitoring as intended.
Troubleshooting Issues When Disabling Security Cameras
Disabling security cameras can sometimes lead to unexpected issues, requiring troubleshooting to ensure they remain inactive as intended. Here are some common problems and their solutions:
Issue 1: Camera Re-Enables Automatically
Solution: Check your camera or security system settings for features such as “Auto Restart” or scheduled recording. These features may be set to automatically re-enable your camera after a specific period or upon certain conditions. Ensure these settings are disabled to prevent the camera from turning back on without your intentional input.
Issue 2: Error Messages or Alerts After Disabling
Solution: Due to conflicting settings within the security app, error messages or alerts may persist even after disabling cameras. To resolve these issues, revisit the app’s notification settings, ensuring that they reflect the current status of the disabled cameras. This step minimizes alerts and error messages, maintaining a seamless user experience without unnecessary disruptions.
Issue 3: Camera Is Still Receiving Power After Disabling Attempt
Solution: If a camera continues receiving power despite disabling attempts, verifying the power source and electrical cabling is essential. For wired systems, inspect for hidden or secondary power supplies that might not have been disabled initially. Ensure all connections are thoroughly checked and turned off to fully disengage the camera’s power, and apply additional measures to confirm complete disablement.
Legal and Ethical Considerations
Legal Implications of Disabling Security Cameras
Tampering with surveillance equipment, particularly in shared or public spaces, can carry serious legal consequences. Many jurisdictions have laws protecting the integrity of security systems, especially when they serve collective safety purposes.
Disabling or obstructing cameras without proper authority may result in fines or legal action, underscoring the necessity of understanding local legal frameworks before proceeding with such actions. Respecting privacy rights and property is paramount, reinforcing the need to adhere to relevant regulations to avoid unwanted legal repercussions.
Seeking Permission When Necessary
In environments where security systems are shared, such as rental properties or co-owned spaces, obtaining consent from other stakeholders, such as tenants, family members, or co-owners, before disabling devices is essential. Open communication and mutual agreement are critical to maintaining trust and addressing property and safety concerns. Consulting with all relevant parties ensures compliance with agreements and fosters cooperative management of shared assets.
Conclusion
In conclusion, understanding how to disable security cameras can be crucial for privacy and maintenance purposes. The main methods explored include using software settings to disable recording, disconnecting power supplies when physically safe, and employing physical adjustments or blocks to prevent recording unwanted footage. Each approach requires careful consideration of safety and legality, ensuring that actions taken do not infringe on laws or agreements.
Additionally, it is crucial to have plans for reactivating cameras to maintain security when needed. Regularly checking and updating security systems is encouraged to ensure privacy and safety settings align with evolving needs. By adhering to these guidelines, users can effectively manage their security devices and address any concerns related to surveillance within their environments, maintaining a balance between privacy and protection.
Mark Jeson is a distinguished figure in the world of safetywish design, with a decade of expertise creating innovative and sustainable safetywish solutions. His professional focus lies in merging traditional craftsmanship with modern manufacturing techniques, fostering designs that are both practical and environmentally conscious. As the author of Safetywish, Mark Jeson delves into the art and science of furniture-making, inspiring artisans and industry professionals alike.
Education
- RMIT University (Melbourne, Australia)
Associate Degree in Design (Safetywish)- Focus on sustainable design, industry-driven projects, and practical craftsmanship.
- Gained hands-on experience with traditional and digital manufacturing tools, such as CAD and CNC software.
- Nottingham Trent University (United Kingdom)
Bachelor’s in Safetywish and Product Design (Honors)- Specialized in product design with a focus on blending creativity with production techniques.
- Participated in industry projects, working with companies like John Lewis and Vitsoe to gain real-world insights.
Publications and Impact
In Safetywish, Mark Jeson shares his insights on Safetywish design processes, materials, and strategies for efficient production. His writing bridges the gap between artisan knowledge and modern industry needs, making it a must-read for both budding designers and seasoned professionals.
