
Are you tired of your Viper car alarm going off at random times, disrupting your peace and drawing unwanted attention? Or perhaps you simply don’t want to deal with the hassle of arming and disarming it every time you use your vehicle.
Disabling a Viper car alarm permanently can be a necessary step for various reasons, such as preventing unwanted triggers, repurposing the vehicle, or addressing a malfunctioning system.
While Viper car alarms are designed to protect your vehicle effectively, there may come a time when you need to deactivate the system entirely. This guide aims to provide clear and concise instructions on how to disable viper car alarm permanently, ensuring that you do so safely.
Keep in mind that permanently disabling your car alarm may leave your vehicle without a crucial layer of security, so consider alternative solutions and consult with a professional.
What Are the Benefits of Disabling Your Viper Car Alarm Permanently?
Disabling your Viper car alarm permanently can offer several advantages, depending on your specific situation. Some reasons you may want to consider permanently deactivating your car alarm include:
- Greater Convenience: By disabling your Viper car alarm permanently, you no longer have to deal with the hassle of arming and disarming it every time you use your vehicle. This can save you time and effort, especially if you frequently use your car.
- Preventing Unwanted Triggers: Viper car alarms can be sensitive and may go off even when there is no real threat to your vehicle. By permanently disabling the system, you can prevent these false alarms from occurring.
- Repurposing the Vehicle: If you are repurposing your vehicle for a different use, such as using it for off-roading or as a race car, you may not need the added security of a car alarm. In this case, permanently disabling it can be more practical.
- Addressing System Malfunctions: Viper car alarms sometimes experience technical issues that cannot be easily resolved. In this case, permanently disabling the system can be a solution to avoid dealing with recurring problems.
These are just some of the potential benefits of permanently disabling your Viper car alarm. However, do so with care, as it may leave your vehicle vulnerable to theft and other risks.
What Will You Need?
Before you begin the process of disabling your Viper car alarm permanently, make sure you have the following items:
- Owner’s Manual: The owner’s manual will contain important information about your specific Viper car alarm system and its wiring diagram. This can be helpful for identifying which wires to disconnect.
- Basic Toolkit: You may need a basic toolkit with screwdrivers, pliers, and wire cutters to remove any necessary components.
- Wire Caps or Electrical Tape: After disconnecting wires, wire caps or electrical tape will cover any exposed wires. This is essential for safety purposes and to prevent electrical issues.
Once you have these items, you can proceed with the process of permanently disabling your Viper car alarm.
8 Easy Steps on How to Disable Viper Car Alarm Permanently
Step 1. Locate the Alarm Brain Unit:
The first step in permanently disabling your Viper car alarm is to locate the alarm brain unit. The brain unit is the central component of the car alarm system and is responsible for controlling all its functions.
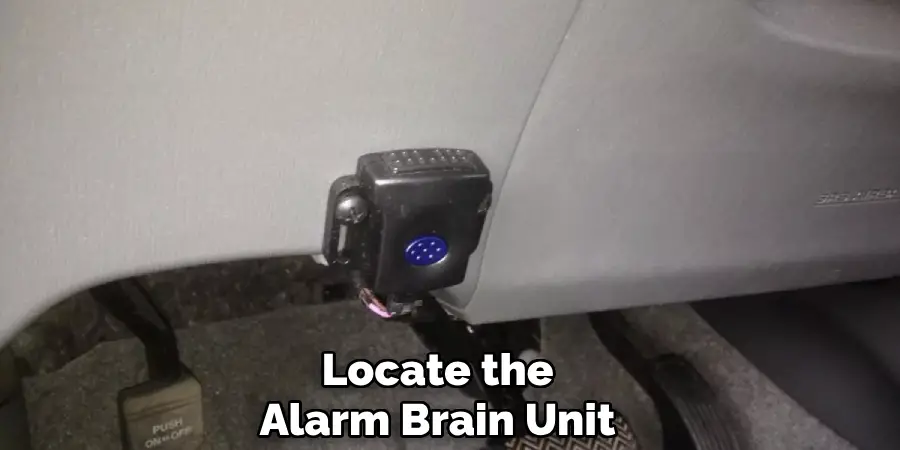
Typically, the brain unit is installed underneath the dashboard on the driver’s side of the vehicle. It is usually a small black box with various wires connected to it.
To find the brain unit, follow these steps:
- Ensure Safety First: Before you start, ensure your vehicle is turned off and the keys are removed from the ignition. Disconnecting the car battery is also a good idea to prevent any accidental electrical discharge.
- Access the Dashboard: Depending on your vehicle, you may need to remove some panels or the lower part of the dashboard to access the brain unit. Use a screwdriver to carefully remove any screws and set the panels aside.
- Look for the Unit: Once you have access, look for a box with multiple wires coming out of it. The brain unit is typically mounted with screws or adhesive tape. It may have a Viper logo on it, making it easier to identify.
By carefully following these steps to locate the alarm brain unit, you will be ready to proceed to the next part of the process and effectively disable the car alarm system. Make sure to handle all components gently to avoid damage to the vehicle or the alarm system.
Step 2. Disconnect the Power Source:
Now that you have located the alarm brain unit, the next step is to disconnect its power source. This is a crucial step in permanently disabling your Viper car alarm, as cutting off the power will ensure that the alarm system can no longer function.
To disconnect the power source, follow these steps:
- Identify the Power Wires: Look for the wires that are supplying power to the brain unit. These are typically red (positive) and black (ground) wires. Refer to your owner’s manual if you’re unsure which wires are for power.
- Cut the Power Wires: Using a pair of wire cutters carefully cut the power wires connected to the brain unit. Be cautious and ensure you only cut the correct wires as indicated in the owner’s manual.
- Secure the Wires: It’s important to secure the ends using wire caps or electrical tape after cutting the power wires. This will prevent any accidental short circuits or electrical issues.
By successfully disconnecting the power source, you have taken a significant step towards permanently disabling your Viper car alarm.
Make sure to double-check that all power is cut off and there are no exposed wires before proceeding to the next step.
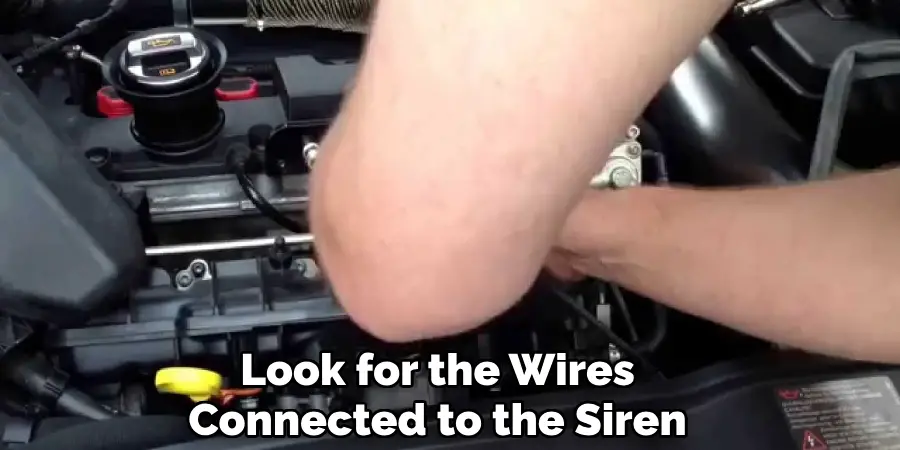
Step 3. Disconnect the Siren:
The next step in disabling your Viper car alarm permanently is to disconnect the siren. The siren is the component responsible for producing the audible alarm sound, and disconnecting it will prevent any noise from being emitted.
To disconnect the siren, follow these steps:
- Locate the Siren: The siren is typically installed in the engine compartment, often near the firewall or near the battery. It is usually a small, black, cylindrical, or square device with wires connected to it.
- Identify the Siren Wires: Look for the wires connected to the siren. There are usually two wires: one for power and one for ground. These wires may be attached to the siren using clips or screws.
- Disconnect the Wires: Care disconnect the wires from the siren using a screwdriver or your hands. If the wires are attached with screws, use the appropriate screwdriver to remove them.
- Secure the Wires: Once the wires are disconnected, secure the ends using wire caps or electrical tape to prevent any electrical issues or short circuits.
By disconnecting the siren, you have disabled the component that produces the alarm sound, taking you one step closer to permanently disabling your Viper car alarm. Make sure to handle the siren and wires carefully to avoid any damage.
Step 4. Bypass the Alarm System:
Bypassing the alarm system is essential to ensure that your vehicle can start and operate normally without the car alarm interfering. The alarm system usually has an immobilizer feature that prevents the car from starting when the alarm is triggered.
To bypass the alarm system, follow these steps:
- Locate the Immobilizer Wires: Refer to your owner’s manual to locate the immobilizer wires in your car. These wires are usually connected to the ignition system and are designed to cut off power to the engine when the alarm is triggered.
- Disconnect the Immobilizer Wires: Carefully disconnect the immobilizer wires from the brain unit or the ignition system. If necessary, use a pair of wire cutters.
- Connect the Ignition Wires: To bypass the alarm, connect the ignition wires directly. To ensure a secure connection, use crimp connectors or solder the wires together. Make sure the connection is well-insulated using electrical tape or heat shrink tubing.
- Test the Ignition: Once the wires are connected, test the ignition by turning the key in the ignition switch. If the car starts without any issues, you have successfully bypassed the alarm system.
Bypassing the alarm system ensures that your vehicle can function normally without the interference of the car alarm. Double-check all connections to ensure everything is secure and insulated properly before proceeding to the next step.
Step 5. Reassemble the Dashboard:
After successfully disabling your Viper car alarm and ensuring that your vehicle starts and operates correctly, it’s time to reassemble the dashboard.
To reassemble the dashboard, follow these steps:
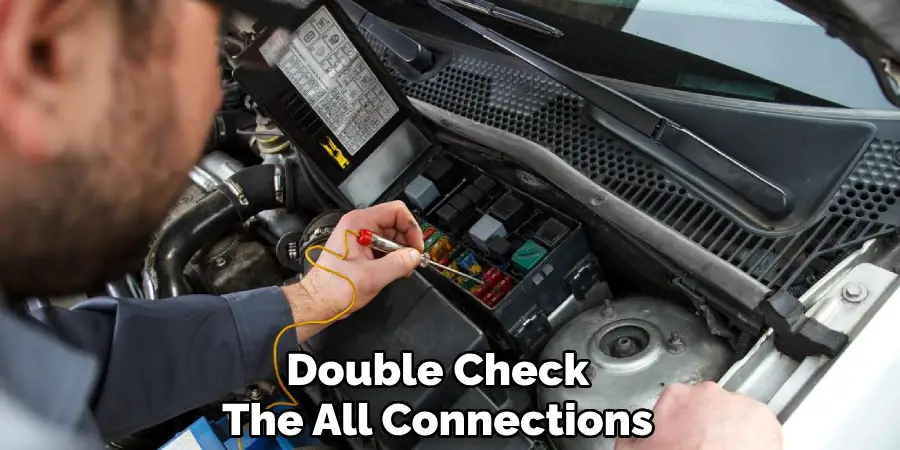
- Double-Check Connections: Before reassembling, take a moment to double-check all the connections you made during the process. Ensure that all wires are properly secured and insulated to prevent any electrical issues.
- Replace Panels: Begin by replacing any panels or covers that you removed to access the alarm brain unit. Ensure they are properly aligned and securely in place.
- Reattach Screws: Use the screwdriver to reattach any screws that were removed. Make sure to tighten them adequately to secure the panels but avoid overtightening, which could damage the screws or panels.
- Reconnect the Battery: If you disconnected the car battery in Step 1, reconnect it now. Attach the positive terminal first, followed by the negative terminal. Ensure the connections are secure.
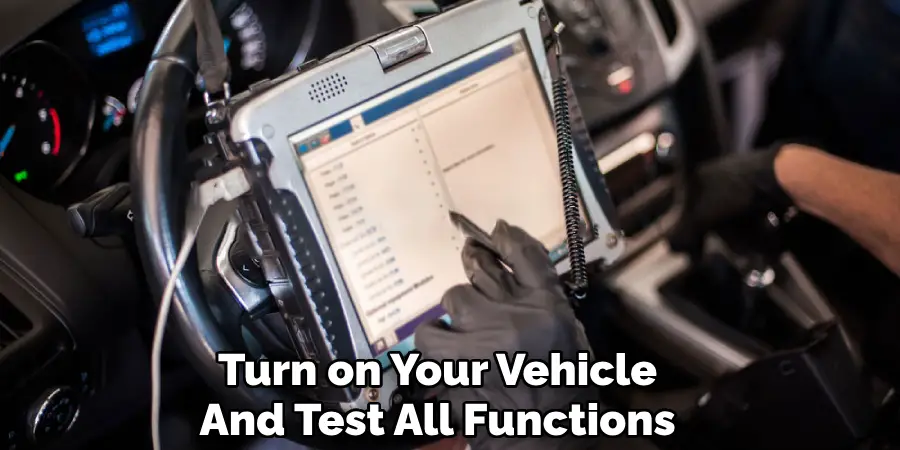
- Test All Functions: Turn on your vehicle and test all functions, including lights, signals, and the ignition, to ensure everything works properly.
By carefully reassembling the dashboard and testing all functions, you can be confident that your vehicle is back in working order and that the Viper car alarm has been successfully disabled.
Step 6. Final Check and Maintenance Tips:
Once you have reassembled the dashboard and ensured that your vehicle is functioning correctly, it’s important to conduct a final check and consider some maintenance tips to ensure the long-term reliability of your car’s electrical system.
To conduct a final check and follow maintenance tips, follow these steps:
- Inspect for Loose Wires: Open the hood and inspect the engine compartment for any loose or disconnected wires. Make sure all connections are secure and properly insulated.
- Check Electrical Components: Test all the electrical components of your car, including lights, radio, power windows, and locks, to ensure they are functioning correctly. Address any issues before they cause bigger problems.
- Regular Maintenance: Schedule regular inspections of your car’s electrical system as part of your routine maintenance. Keeping the electrical system in good condition can prevent potential issues related to the modifications made to disable the alarm.
- Keep a Record of Changes: Document your changes to disable the alarm, including which wires were cut and reconnected. This information can be useful for future reference or if you need to make additional modifications down the line.
- Monitor for Malfunctions: Be vigilant for any signs of electrical malfunctions or irregularities, such as flickering lights or difficulty starting the vehicle. Address these issues promptly to avoid damage.
Step 7. Verify the Security System:
The final step in disabling your Viper car alarm system is to ensure that the security system has been completely deactivated and does not interfere with your vehicle’s operation.
To verify the security system, follow these steps:
- Test the Alarm Trigger: Simulate conditions that would typically trigger the alarm, such as opening a car door or using the key fob. Confirm that the alarm does not go off. If the alarm is triggered, revisit the previous steps to identify any missed connections or wiring issues.
- Check Starter Kill Feature: Some car alarms have a starter kill feature that prevents the engine from starting when the alarm is triggered. Attempt to start the car normally. The starter kill feature has been successfully bypassed if the engine starts without the alarm system stopping it.
- Monitor Notifications: Pay attention to any notifications or error messages on your car’s dashboard that could indicate a problem with the alarm or electrical system. Resolve any issues that appear.
- Evaluate Signal Reception: Ensure that your remote key fob works properly, checking the ability to lock and unlock the doors without interference from the disabled alarm system.
- Test Long-Term Stability: Drive your vehicle for several days, monitoring its performance and looking for any signs of electrical issues or alarm reactivation. You may need to recheck the wiring and connections if any issues arise.

By thoroughly verifying the security system, you can ensure that your car alarm has been completely disabled without affecting the normal operation of your vehicle.
Performing these tests and checks will provide peace of mind that the disabling process was successful and that your vehicle remains secure.
Step 8. Dispose of Unused Components:
After verifying that your Viper car alarm is completely disabled and your vehicle is functioning correctly, it’s crucial to dispose of any unused components appropriately.
To dispose of unused components, follow these steps:
- Collect Removed Parts: Gather all parts and components that were removed during the disabling process, including wires, connectors, and the alarm brain unit.
- Label Components: If you anticipate needing to reference these parts in the future, consider labeling them for easy identification. This can be especially helpful if you ever need to re-enable the alarm or troubleshoot related issues.
- Recycle Electronic Waste: Check your local regulations and find an appropriate electronic waste recycling facility. Dispose of the electronic components in accordance with environmental guidelines to prevent harm to the environment.
- Safely Store Tools: Store any tools used during the process in a safe and organized manner. Properly storing tools helps ensure they are ready for use in future vehicle maintenance projects.
- Document Disposal: Record the components disposed of and the method of disposal. This documentation might be useful for future reference, especially if any issues arise.
By responsibly disposing of unused components, you ensure that your car remains tidy and that environmental standards are respected. Proper disposal also contributes to the long-term maintenance and care of your vehicle.
With these steps, you have successfully disabled your Viper car alarm system. By following the instructions carefully and conducting thorough checks, you can ensure that your vehicle is back in working order without any lingering issues related to the disabled alarm system.

5 Things You Should Avoid:
- Cutting Wires: It might seem like a quick fix, but cutting wires can lead to serious electrical issues and could potentially damage your vehicle’s electronic systems. Moreover, it might trigger the alarm or lead to other complications.
- Tampering with the Alarm Control Unit: Without a clear understanding of the alarm system, tampering with the control unit can result in a triggered alarm or even immobilize your vehicle. Always seek professional help to disarm the alarm control unit.
- Ignoring Safety Precautions: Dealing with a car alarm system involves intricate electronic components. Ensure you take necessary safety precautions to avoid any risk of electrical shock or other injuries, and always disconnect the battery before starting any work.
- Disabling Without Professional Help: While there are guides available, permanently disabling a car alarm can be complex. Without professional know-how, there is a risk of malfunctioning or damaging other vital car systems. Consulting a professional can save you from costly mistakes.
- Using Incorrect Tools: Using the wrong tools can cause damage to delicate components or make the task more difficult. Ensure you have the appropriate tools and knowledge before disabling your car alarm.
By avoiding these common mistakes, you can effectively disable your car alarm without causing any harm to yourself or your vehicle.
Conclusion
How to disable viper car alarm permanently requires a thorough understanding of the vehicle’s electronics and the alarm system itself. If you decide to undertake this task, ensure you have researched the precise model of the alarm and the specific procedures needed.
Familiarize yourself with the control unit, wiring diagrams, and necessary disarming protocols. The process typically involves disconnecting the alarm control unit or rewiring certain components.
However, due to the complexity and potential risks involved, consulting with a qualified automotive technician is highly recommended.
By seeking professional assistance, you can avoid adverse outcomes such as damaging your vehicle’s electronic systems or compromising your safety. Always prioritize accurate, safe methods over quick fixes to ensure a successful and damage-free disarmament.
Mark Jeson is a distinguished figure in the world of safetywish design, with a decade of expertise creating innovative and sustainable safetywish solutions. His professional focus lies in merging traditional craftsmanship with modern manufacturing techniques, fostering designs that are both practical and environmentally conscious. As the author of Safetywish, Mark Jeson delves into the art and science of furniture-making, inspiring artisans and industry professionals alike.
Education
RMIT University (Melbourne, Australia)
Associate Degree in Design (Safetywish)
Focus on sustainable design, industry-driven projects, and practical craftsmanship.
Gained hands-on experience with traditional and digital manufacturing tools, such as CAD and CNC software.
Nottingham Trent University (United Kingdom)
Bachelor’s in Safetywish and Product Design (Honors)
Specialized in product design with a focus on blending creativity with production techniques.
Participated in industry projects, working with companies like John Lewis and Vitsoe to gain real-world insights.
Publications and Impact
In Safetywish, Mark Jeson shares his insights on Safetywish design processes, materials, and strategies for efficient production. His writing bridges the gap between artisan knowledge and modern industry needs, making it a must-read for both budding designers and seasoned professionals.
