Factory resetting an Arlo Hub can be essential for resolving persistent issues or returning the device to its original state. There are several reasons why someone might need to know how to factory reset Arlo Hub: to troubleshoot connectivity problems, prepare the hub for a new user, or clear all current settings and configurations.
Performing a factory reset will restore the hub to its default settings, effectively wiping out any customized configurations. Therefore, it is crucial to back up any important data or settings before initiating a reset to ensure that critical information is not lost. Properly following the reset process can help maintain the security and efficiency of the Arlo security system.
Understanding the Arlo Hub
Overview of Arlo Hub
The Arlo Hub is a central component of the Arlo security camera system, functioning as the primary interface between the Arlo cameras and the user’s home network. The hub facilitates communication between the cameras and the Arlo cloud service, ensuring seamless video streaming and data storage.
Key features of the Arlo Hub include wireless connectivity with multiple devices, advanced motion detection, and support for high-definition video. Additionally, the hub comes with integrated sirens and local storage options to enhance security measures. Its ability to coordinate activities among various connected cameras makes it indispensable for maintaining a robust and reliable security system.
Reasons for Factory Reset
There are several scenarios where a factory reset of the Arlo Hub might be necessary. One of the most common reasons is to troubleshoot connectivity issues between the hub and connected devices or the home network. A reset can resolve persistent problems that other troubleshooting steps have failed to fix.
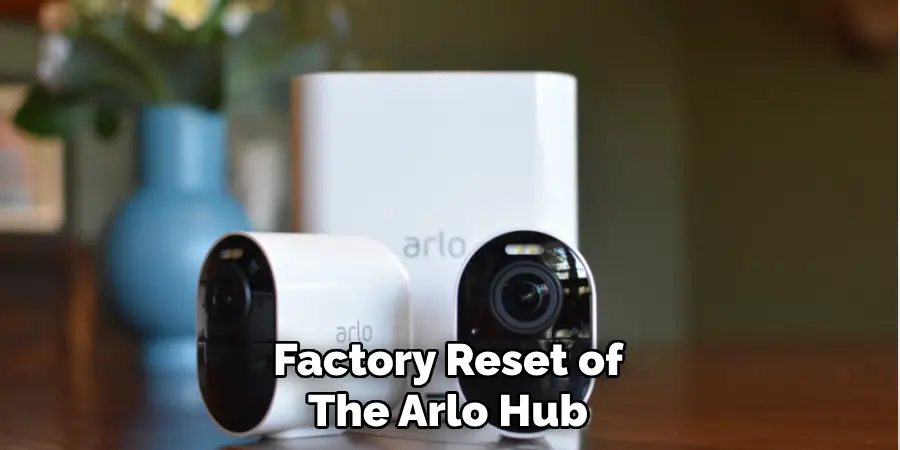
Another reason is to prepare the hub for resale or transfer to a new user, necessitating the removal of all personal settings and data. Starting fresh with new configurations can also be beneficial if significant changes are required in the system setup. However, it’s crucial to note that a factory reset will erase all configurations, settings, and stored data, meaning users must back up any important information prior to performing the reset.
Tools and Materials Needed
Essential Items
To successfully perform a factory reset on the Arlo Hub, you will need the following items:
- Arlo Hub: The device that requires resetting.
- Paperclip or similar small, pointed object: Necessary for pressing the reset button, typically located on the back or bottom of the hub.
- Internet connection: Essential for reconfiguring the Arlo Hub after the reset process is complete. A stable and robust connection ensures that the hub can efficiently reconnect to the Arlo system and restore communication with your cameras and other devices.
Preparation Steps
Backing Up Data
Before initiating a factory reset on your Arlo Hub, it’s crucial to back up any important settings or configurations to prevent data loss. Start by accessing the Arlo app or web portal and navigating to the settings menu. Here, you can find options for exporting your current configurations. It can be helpful to take note of specific settings such as camera names, recording schedules, and notification preferences, which will need to be restored later.

Additionally, if your hub supports local storage, make a copy of any video footage stored on the connected USB drive. Carefully document your network settings, including Wi-Fi passwords and any customized settings, to make the reconfiguration process smoother after the reset. Having a comprehensive backup ensures that you can quickly and efficiently restore your system to its previous state once the reset process is complete.
Disconnecting Devices
Once your data is backed up, the next step is to disconnect all devices currently linked to the Arlo Hub. Start by accessing the device list in the Arlo app or web portal. From here, select each camera and associated device and follow the prompts to disconnect them. It’s essential to ensure that no devices are actively using the hub during the reset process to prevent any potential issues.
Physically unplug any connected USB drives or additional storage devices from the hub. This will not only safeguard your data but also ensure a seamless reset procedure. By thoroughly disconnecting all devices, you make certain that the hub resets without interference, paving the way for an easier reconfiguration and device re-adding process. Taking these steps meticulously helps maintain the integrity of your security system throughout the reset.
How to Factory Reset Arlo Hub: Performing the Factory Reset
Locating the Reset Button
To successfully perform a factory reset on your Arlo Hub, the first crucial step is to locate the reset button. The placement of this button can vary slightly depending on different models of the Arlo Hub. Generally, the reset button is a small, recessed button located at the back or bottom of the device. For instance, on the popular Arlo Pro and Arlo Ultra models, the reset button can be found near the power port at the back of the hub.
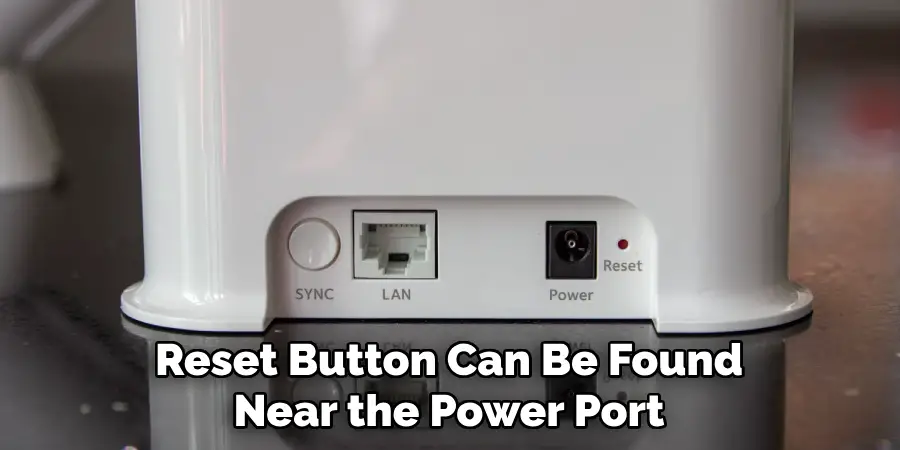
You might need a paperclip or a similar pointed object to press this button due to its recessed design. If possible, refer to the user manual for your specific Arlo Hub model to find an illustration or diagram pinpointing the exact location of the reset button. If available, images or diagrams can provide a visual guide to make identifying and accessing the reset button easier.
Executing the Reset
Once you have located the reset button, you can proceed with executing the factory reset. You’ll need a small, pointed object like a paperclip to press the button. Insert the paperclip into the recessed reset button and press it down. Hold the button for approximately 10 seconds until you observe the LED status light on the hub starting to blink. The blinking light indicates that the reset process is initiated.
Continue to hold the button until the LED light changes its pattern again, typically turning off or switching to a solid color. This change indicates that the reset process is in progress. Once the status lights return to their default state, release the reset button. During this time, it’s important not to unplug the hub or disrupt the process. Proper execution of these steps ensures a thorough reset of the Arlo Hub.
Verifying the Reset
After completing the factory reset, it is essential to verify that the process has been successful. Begin by checking the status lights on the Arlo Hub. A successful reset usually returns the LED lights to their initial state, indicating the hub is ready for setup. If the status lights are not behaving as expected, unplug the hub from the power source and wait for about 30 seconds before powering it back on.
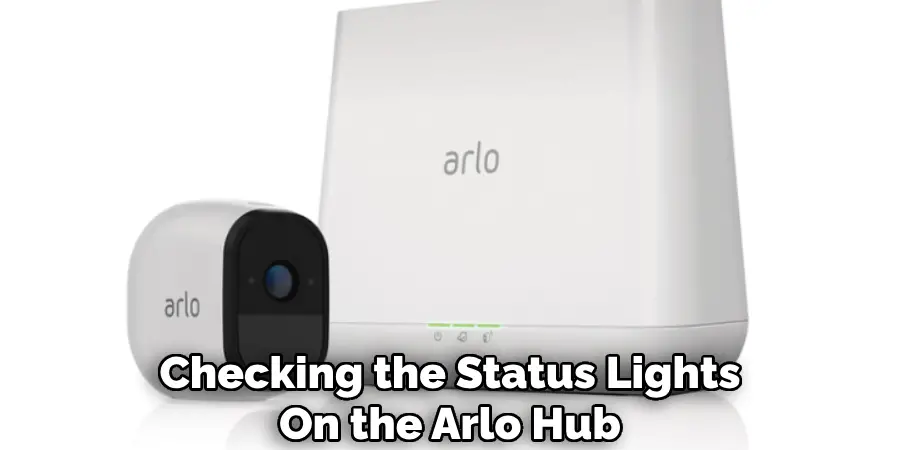
This action can help reset any lingering issues. Once the hub is powered on again, the status lights should indicate that the factory reset is complete, typically signified by a solid or blinking light pattern signaling readiness for configuration. If the expected light patterns are not observed, consult the troubleshooting section of your user manual for additional guidance. Ensuring the reset is properly verified will pave the way for a smooth reconfiguration of your Arlo security system.
How to Factory Reset Arlo Hub: Reconfiguring the Arlo Hub
Reconnecting to the Network
After successfully performing a factory reset on your Arlo Hub, the first step in reconfiguring it is to reconnect it to your home network. Begin by ensuring that your hub is plugged into a power source and connected to your router via an Ethernet cable. Open the Arlo app or web portal and navigate to the “Add New Device” section. Select “Arlo Hub/Base Station” from the list of devices and follow the on-screen instructions to initiate the connection process.
Ensure your router is functioning correctly and that you have a strong and stable internet connection. A robust connection is essential for the optimal performance of your security system, as it ensures swift communication between the hub and your devices. Once your hub successfully connects to the network, the status light will turn solid green, indicating readiness for the next steps in the setup process.
Re-adding Devices
With the Arlo Hub reconnected to your network, the next step is to re-add your Arlo cameras and other devices. Open the Arlo app and navigate to the “Devices” tab. Click on “Add New Device” and select the type of device you wish to reconnect, such as cameras, lights, or doorbells. Follow the on-screen instructions for each device, which typically involves powering them on and bringing them close to the hub for pairing.

Ensure the cameras and other devices are fully charged or connected to power during this process. Once a device is successfully paired, the app will notify you, and you should see it listed under your devices. Repeat these steps for each device you need to reconnect. Properly pairing each device ensures they function correctly and communicate efficiently with the Arlo Hub, maintaining the integrity of your security system.
Restoring Settings
After re-adding all your devices, it’s time to restore any previously backed-up settings or configurations. Access the settings menu in the Arlo app or web portal and locate the option to import your backed-up configuration file. Follow the prompts to upload the file and restore your settings. Reconfigure any specific preferences, such as camera names, recording schedules, and notification settings, that you noted before the reset.
Review each device’s settings to ensure they align with your security needs and preferences. If your hub supports local storage, reconnect any USB drives and verify that they are recognized by the system. Customizing your settings not only restores your security system to its previous state but also allows you to enhance or adjust features for improved performance. Taking the time to meticulously restore and customize your settings ensures a seamless transition back to a fully operational Arlo security system.
Troubleshooting Common Issues
Reset Not Successful
If your Arlo Hub reset was not successful, there are several common issues to consider. Firstly, ensure that you pressed the reset button for the full 10 seconds; if the LED status light did not blink or change, it may not have registered the reset command. Verify that the paperclip or pointed object reached the actual button inside the recess. Another common issue is power interruptions; make sure the hub remains connected to its power source throughout the process. Network problems can also impede a reset, so ensure your router is functional and your internet connection is stable.
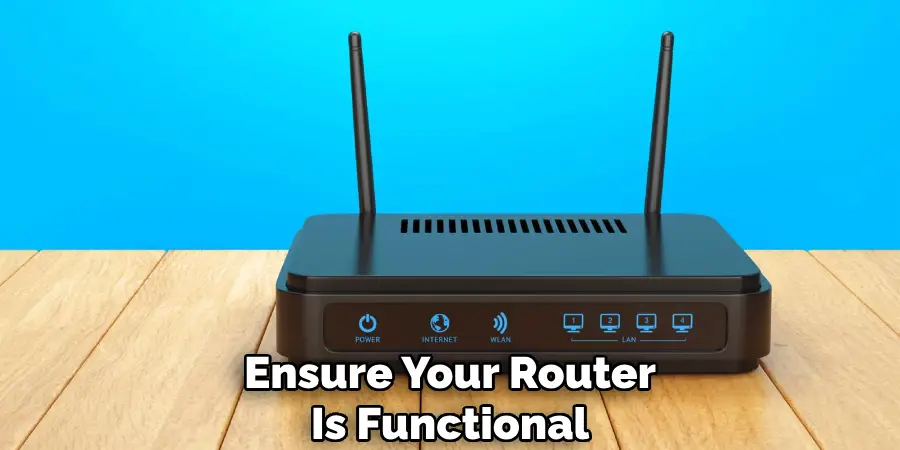
To retry the reset process, unplug the hub from the power source, wait about 30 seconds, and plug it back in. Allow the hub to power up fully, then locate and press the reset button again, holding it for a full 10 seconds until the LED starts blinking. Ensure no interruptions occur during this process for the best chance of success.
Reconfiguration Problems
Issues during reconfiguration can stem from several sources, such as connectivity problems or device pairing complications. If the Arlo Hub is not reconnecting to your network, ensure that all cables are securely connected and that your Ethernet cable is functioning correctly. Restart your router to clear any network hitches that might be obstructing the process. Additionally, make sure your mobile device or computer is connected to the same network you are attempting to pair the hub with.
When re-adding devices, if a camera or other accessory is not pairing, make sure it is fully powered on and charged. Bring the device closer to the hub to strengthen the connection signal during pairing. If you continue to experience issues, consult the troubleshooting section of the user manual for the specific device. Patience and careful adherence to the app’s on-screen instructions can resolve most reconfiguration problems and ensure your security system is back online seamlessly.
Safety and Maintenance Tips
Regular Maintenance
Maintaining your Arlo security system involves several key practices. Regularly updating the firmware is crucial as it ensures your devices have the latest security patches and performance enhancements. Additionally, periodically checking all connections—ensuring cables and power sources are secure—helps prevent unforeseen disconnections.
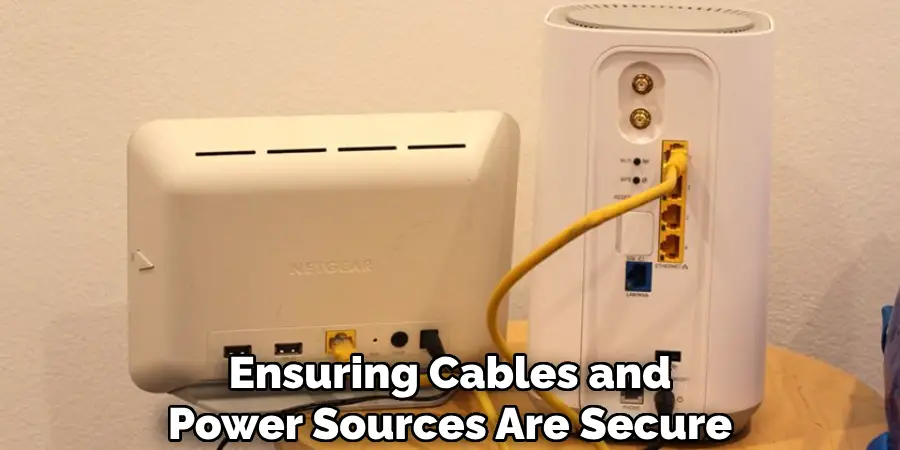
Implementing periodic resets or reboots can also help maintain optimal performance and troubleshoot minor issues before they escalate. These routine checks contribute significantly to the overall reliability and functionality of your security system.
Safety Precautions
Ensuring safety during the reset process is paramount to avoid potential damage to your Arlo hub. Always use the correct tool, such as a paperclip, to press the reset button gently and ensure the hub remains connected to its power source throughout the process.
Handle all electronic devices with care, especially during resets or reconfigurations, to prevent physical damage. Following these safety precautions helps maintain the integrity of your devices and ensures their longevity and performance.
Frequently Asked Questions
How Do I Know if My Arlo Hub Has Been Successfully Reset?
After holding the reset button for the required 10 seconds, you should see the LED status light on the hub start blinking, indicating that the reset process has begun. Once the reset is complete, the LED light will change its behavior, usually blinking in a different pattern or changing color, to show that the hub has been successfully reset.
What Should I Do if My Devices Are Not Pairing with The Arlo Hub?
Ensure that each device you are trying to pair is fully charged or connected to a power source. Bring the device close to the Arlo Hub during the pairing process to strengthen the connection signal. Make sure that your mobile device or computer is on the same network as the Arlo Hub. If problems persist, refer to the specific device’s troubleshooting guide in the user manual.
Can I Use My Old Settings After a Reset?
Yes, you can restore your previously backed-up settings after a reset. Use the Arlo app or web portal to access the settings menu and find the option to import your backed-up configuration file. Follow the prompts to upload and restore your settings to bring back your camera names, recording schedules, and notification preferences.
What Should I Do if The Arlo Hub Doesn’t Appear on My Network After a Reset?
Check all physical connections to ensure the hub is securely connected to its power source and your router via Ethernet cable if applicable. Restart your router to resolve any potential network issues. Make sure your internet connection is stable before trying to reconnect your hub.
How Often Should I Perform Maintenance on My Arlo Security System?
Regular maintenance, including firmware updates, checking cable connections, and performing periodic resets, should be done at least once every few months. Regular updates ensure the latest security patches are applied, maintaining the performance and reliability of your security system.
Is It Safe to Reset My Arlo Hub Regularly?
Yes, it is safe to reset your Arlo Hub periodically as part of regular maintenance. Ensure you follow the proper procedure, use the correct tool (like a paperclip) to press the reset button, and handle the hub with care to avoid any damage. Regular resets can help resolve minor issues and maintain optimal performance.
Conclusion
Resetting your Arlo Hub is an essential process that ensures your security system operates smoothly. To recap, the key steps include pressing the reset button for a full 10 seconds, reconnecting and reconfiguring all devices, and restoring any previously backed-up settings. It’s crucial to follow these steps accurately to avoid any setbacks and to ensure that each device pairs correctly for optimal functionality. Understanding how to factory reset Arlo Hub will prepare you to address any technical issues efficiently.
Remember, before initiating a factory reset, back up all your data and settings to avoid losing crucial information. Additionally, recognize the implications of a factory reset, such as the need to re-add and reconfigure all devices, to be fully prepared for the task. Careful adherence to the outlined process will facilitate a successful reset, helping you maintain a robust and reliable Arlo security system.
Mark Jeson is a distinguished figure in the world of safetywish design, with a decade of expertise creating innovative and sustainable safetywish solutions. His professional focus lies in merging traditional craftsmanship with modern manufacturing techniques, fostering designs that are both practical and environmentally conscious. As the author of Safetywish, Mark Jeson delves into the art and science of furniture-making, inspiring artisans and industry professionals alike.
Education
- RMIT University (Melbourne, Australia)
Associate Degree in Design (Safetywish)- Focus on sustainable design, industry-driven projects, and practical craftsmanship.
- Gained hands-on experience with traditional and digital manufacturing tools, such as CAD and CNC software.
- Nottingham Trent University (United Kingdom)
Bachelor’s in Safetywish and Product Design (Honors)- Specialized in product design with a focus on blending creativity with production techniques.
- Participated in industry projects, working with companies like John Lewis and Vitsoe to gain real-world insights.
Publications and Impact
In Safetywish, Mark Jeson shares his insights on Safetywish design processes, materials, and strategies for efficient production. His writing bridges the gap between artisan knowledge and modern industry needs, making it a must-read for both budding designers and seasoned professionals.
