Zosi security cameras are renowned for their advanced features, providing users with peace of mind through high-definition video quality, exceptional night vision, and seamless remote viewing capabilities. These features enable comprehensive monitoring of your premises around the clock, ensuring enhanced safety and security. Installing security cameras is crucial for both home and business owners to deter potential intruders and keep a vigilant eye on valuable assets. This article focuses on the detailed installation and setup process, demonstrating how to hook up Zosi security cameras effectively.
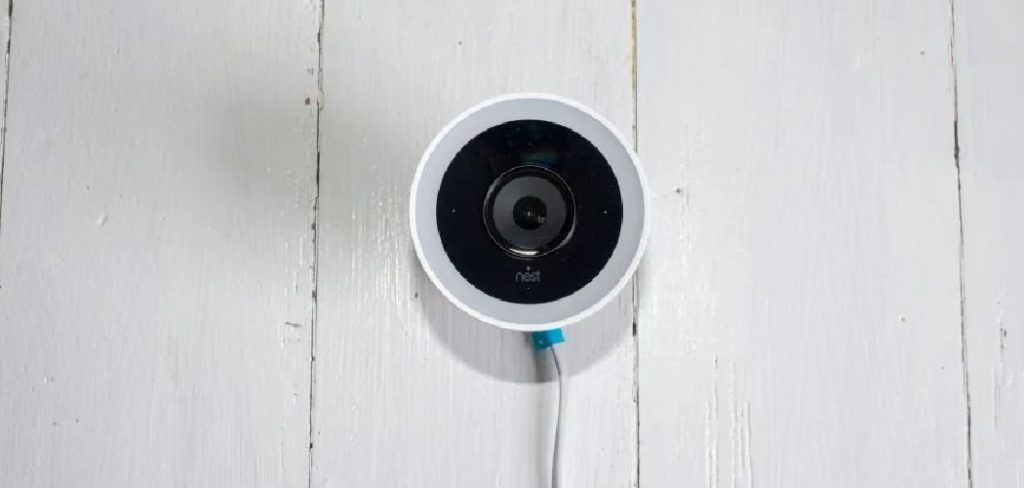
From unboxing and inspecting the components to configuring internet connectivity and troubleshooting common issues, this guide will provide you with the essential steps needed to maximize the functionality and reliability of your security system. With easy-to-follow instructions, you’ll be able to secure your property with confidence and gain peace of mind knowing you are protected.
Unboxing and Inspecting Your Zosi Security Camera System
Upon receiving your Zosi security camera system, the first step is to carefully unbox the package to ensure a thorough understanding of its contents. Typically, the box should contain several key items: the cameras themselves, a DVR/NVR unit, power adapters for each camera, necessary cables for connectivity, and mounting hardware, including brackets and screws. Take note that there might also be a quick start guide or user manual to assist you throughout the installation process.
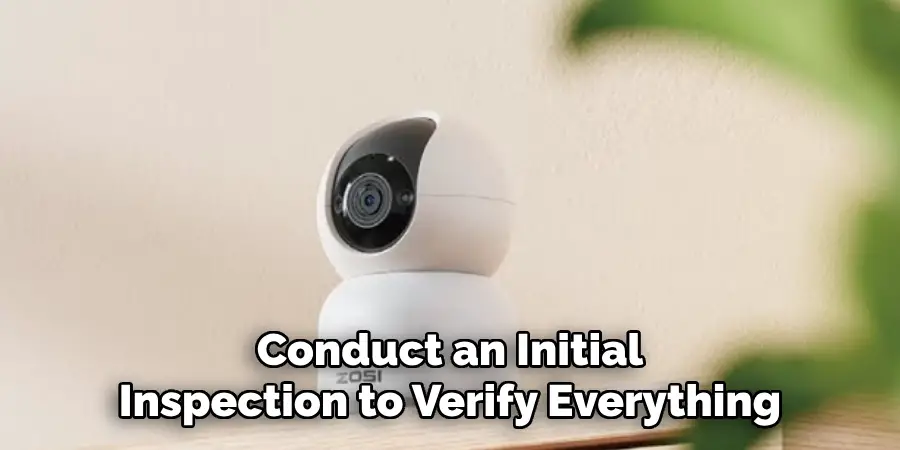
Once you’ve accounted for all components, conduct an initial inspection to verify everything is in good condition. Look for any signs of physical damage, such as cracks, chips, or dents in the cameras or DVR/NVR unit. This inspection is crucial as any issues detected should be reported to Zosi or your retailer immediately to arrange for replacements or repairs before proceeding with the setup.
Next, familiarize yourself with your security system’s features. Examine the camera specifications, like resolution or night vision capabilities, to ensure they meet your needs. The included manuals or quick start guides provide essential information on setup procedures, camera operation, and additional features, making them valuable resources during installation and initial use.
Preparing for Installation
Careful preparation is key before you start installing your Zosi security camera system to ensure a smooth and effective setup process.
Choosing Camera Locations
When selecting camera locations, consider areas that provide optimal coverage for your specific security needs. Entry points such as doors and windows are critical, as well as areas that are often out of view. Higher locations that cover a wide area are preferable for outdoor installation while considering potential obstacles that might block the view. Ensure that power sources are within reach, especially for wired cameras. For wireless models, verify that locations have strong Wi-Fi signals to prevent picture loss or lagging. Use your smartphone to test signal strength if needed.
Assessing Power Requirements
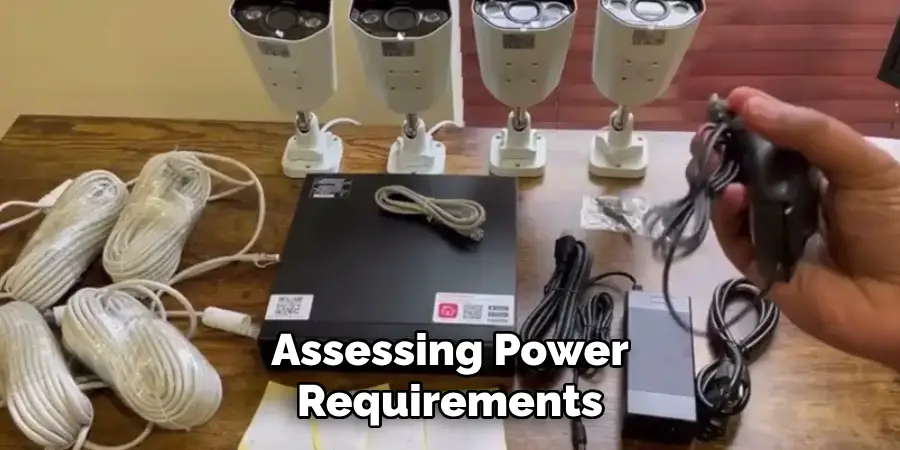
Understanding power source requirements is crucial for the smooth operation of your cameras. Wired cameras typically need an AC power source, so plan the location accordingly to minimize visible cabling. Wireless cameras also require power, usually via rechargeable batteries or AC adaptors. Make sure battery charging or replacement plans are in place to prevent downtime.
Gathering Necessary Tools
Before installation, gather the following tools to ensure you have everything needed: a drill for making holes, a screwdriver for securing mounts, a level to confirm proper alignment, measuring tape for precise distances, and wire cutters for cable management. Having these tools ready will streamline the installation process and avoid unnecessary interruptions.
Setting Up the DVR/NVR Unit
Properly configuring your DVR/NVR unit is essential for effectively recording and managing video feeds from your Zosi security cameras. Begin by selecting a suitable installation location, ideally in a secure and centrally located area with easy access to power outlets and network connections. This location ensures stable operation and facilitates maintenance or troubleshooting when needed.
Connect the DVR/NVR unit to a monitor using an HDMI or VGA cable, allowing you to view the camera feeds and configure settings. Next, connect the cameras to the DVR/NVR using the provided BNC cables, ensuring a secure connection to permit reliable video transmission. Plug the power adapter into the DVR/NVR and switch the unit on.
Once powered on, follow the on-screen setup wizard to configure your system settings, including date and time. Connecting the DVR/NVR to your network is crucial for remote viewing; utilize an Ethernet cable for a stable connection between the DVR/NVR and your router. Use the provided user manual to assist with network settings and ensure proper configuration. Finally, schedule regular backup times and specifics on where video footage should be stored, whether on a local hard drive or a cloud storage service, to guarantee data security and availability.
How to Hook up Zosi Security Cameras: Installing the Cameras
Installing your Zosi security cameras involves several crucial steps to ensure they function optimally and maintain a secure connection to your DVR/NVR unit. Follow these guidelines to complete the installation process effectively:
Step 1: Mounting the Cameras
Begin by selecting strategic mounting locations that offer the best surveillance coverage for your property. Ideal areas include entrances, driveways, and any vulnerable points previously assessed in your planning phase. Use a ladder if necessary to reach high positions that provide wider coverage and deter tampering. Once you’ve identified these locations, mark the positions, considering potential obstructions and aesthetics.
Securely attach the cameras to walls or ceilings using the provided mounting hardware. For optimal security, use the included brackets and screws, ensuring the mounts are firmly fitted to prevent camera movement. For concrete or brick surfaces, you may need to use a drill to create holes for the anchors before screwing in the brackets. Double-check that all fasteners are tight and the camera housing is safely attached to its mount.
Step 2: Connecting Power and Video Cables
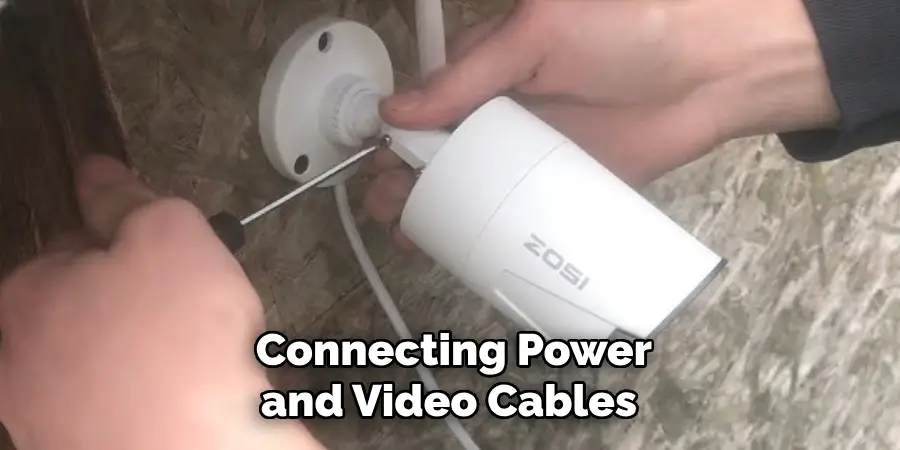
After the cameras are mounted, it’s time to connect them to the DVR/NVR unit. Run the power and video cables from each camera to the central unit, ensuring a neat and organized setup. Use cable clips to affix cords along walls or ceilings, keeping them out of the way and maintaining a clean appearance. If cables cross open spaces, consider using protective tubing for a discreet installation.
For outdoor setups, weatherproof cable covers can protect connections from harsh elements. When drilling holes through walls to run cables indoors, ensure holes are sealed with silicone or caulk to prevent moisture ingress. Once inside, carefully hide cables along baseboards or within walls using wire moldings, reducing visible clutter and enhancing the overall look of your installation.
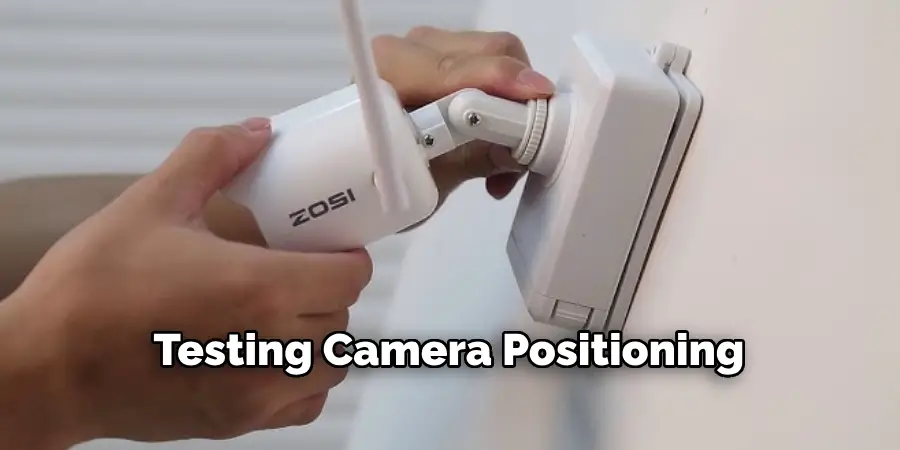
Step 3: Testing Camera Positioning
Before finalizing the setup, test each camera’s angle and field of view. Use the DVR/NVR interface or linked monitor to adjust the cameras, ensuring they cover the intended areas without blind spots. If needed, enlist the help of another person to make real-time adjustments while you observe the feed. Check for adequate lighting, both day and night, ensuring the cameras’ infrared or low-light functionality operates correctly.
During this stage, confirm the clarity of the video feed and adjust camera focus if necessary. This step is crucial to ensuring your cameras capture detailed images, which may prove vital in security situations. Note that some cameras offer remote pan, tilt, and zoom features that can be optimally configured after installation.
Step 4: Securing the Cameras
Once positioning and connection are verified, ensure that the cameras are properly secured to minimize tampering or accidental movement. Tighten any adjustment knobs or screws on the camera brackets to lock the field of view in place. Consider adding security screws or covers over camera housings for added protection, making unauthorized removal or tampering exceedingly difficult.
Implementing these simple yet effective measures will help ensure the longevity and reliability of your Zosi security camera system, providing continuous protection and peace of mind. Regularly inspect the installation for signs of wear or damage, addressing issues promptly to sustain optimal performance.
Connecting to the Internet (for Wireless Models)
Wired Connection (if applicable)
Connect the DVR/NVR unit to your router using an Ethernet cable for a stable internet connection using a wired setup. Locate the Ethernet port on the DVR/NVR and one of the available ports on your router. Firmly insert both ends of the cable into the respective ports. A successful connection will provide a reliable network link, essential for accessing remote viewing capabilities while minimizing latency or interference associated with wireless connections.
Configuring Wireless Settings
Access the DVR/NVR’s setup menu via the connected monitor if your model supports Wi-Fi. Navigate to the network settings section and select Wi-Fi as your preferred connection type. Choose your home Wi-Fi network from the list of available networks and enter the password when prompted. Ensure the signal strength is adequate for minimal interruptions; you may need to reposition the DVR/NVR or adjust the router’s location for better coverage. Save all settings after completing the setup to secure the connection.
Testing Internet Connection
To verify the internet connection, attempt to access the system’s remote viewing features through a mobile app or desktop client. Check the live video feed for each camera to confirm the connection’s functionality. If access is smooth and uninterrupted, your setup is complete. Otherwise, troubleshoot connectivity issues by ensuring the password is correct, the Wi-Fi signal is strong, and that there are no interference sources within proximity, adjusting settings as necessary. Regular testing ensures consistent remote access and system reliability.
Configuring Camera Settings
Accessing Camera Settings
To access the camera settings, open the Zosi app on your smartphone or navigate to the Zosi web interface via your computer. Log in using your account credentials to reach the main dashboard. From there, select the desired camera you wish to configure, either by clicking on the camera icon within the app or selecting it from the list of connected devices online.
Adjusting Video Quality and Recording Settings
Fine-tuning video quality is crucial for achieving the best performance from your cameras. Navigate to the video settings section, where you can adjust the resolution and frame rate. For a balance between video clarity and storage space, choose a resolution of 1080p with a standard frame rate, such as 15-30 frames per second. Additionally, a recording schedule should be set up under the recording settings to manage storage efficiently. Opt for continuous recording or motion-triggered recording based on your security needs.
Setting Up Motion Detection Alerts
To enhance security, configure motion detection settings to alert you of any unusual activity. Access the motion detection tab and define your desired detection zones by dragging bounding boxes over critical areas. Adjust sensitivity levels to avoid false alarms, such as those triggered by small animals. Lastly, alert notifications through the app are enabled, allowing real-time updates via push notifications or emails whenever motion is detected within the set zones.
Downloading the Zosi App
Accessing the App
To begin utilizing the full potential of your Zosi security system, download the Zosi app from the App Store for iOS devices or the Google Play Store for Android devices. Search for “Zosi Smart” in the search bar and locate the official app, ensuring it is by Zosi Technology. Click on “Install” or “Get” to start downloading and wait for the app to install completely on your mobile device.
Creating an Account or Logging In
Once installed, open the Zosi app to create a new account or log into an existing one. For new users, select “Sign Up” and enter your email address and a secure password. An activation email will be sent to the address you provided; click the link in the email to verify your account. If you already have an account, simply select “Log In” and enter your credentials to gain access to your camera feeds.
Connecting Cameras to the App
After logging in, you must connect your cameras to the app for easy remote viewing and management. Choose “Add Device” from the main dashboard and follow the onscreen instructions. Use the camera’s unique QR code or manually enter the device ID and password to link each camera. Upon successful connection, your cameras will populate within the app, allowing you to monitor your security system from anywhere at any time.
Troubleshooting Common Issues
Issue 1: Cameras Not Connecting to the DVR/NVR
If your cameras are not connecting to the DVR/NVR, first ensure all cables are securely plugged in. Verify that the power supply is operational and that all devices are switched on. Examine the Ethernet or video cables for signs of damage or fraying and replace them if necessary. Additionally, confirm that each camera is properly assigned to a channel on the DVR/NVR.
Issue 2: Poor Video Quality
Review the camera’s video settings in the app or web interface to address poor video quality. Ensure the resolution and frame rate are set appropriately, opting for a higher resolution if storage allows. Check your internet bandwidth using a speed test; inadequate bandwidth can cause streaming issues, thus consider upgrading your internet plan if needed. Also, confirm that the camera lenses are clean and unobstructed.
Issue 3: Remote Access Problems
Make sure the DVR/NVR is still connected to the internet for remote access issues. Recheck the Wi-Fi or Ethernet connection and ensure no changes to network settings or security configurations have been made. Update the Zosi app to the latest version to address compatibility problems and confirm that login credentials are accurate. Restart the app and device to resolve temporary glitches and facilitate a fresh connection.
Conclusion
Setting up your Zosi security cameras involves a series of crucial steps that ensure robust home and business security. Beginning with understanding how to hook up Zosi security cameras, you systematically configure their settings to suit your monitoring needs. This process includes adjusting video quality, setting up motion detection alerts, and connecting your cameras to the Zosi app for seamless remote access. The benefits of having a reliable security system are manifold, providing peace of mind and safeguarding your premises.
Regularly checking camera settings and keeping the software up to date further optimizes performance and functionality. Additionally, maintaining the system by ensuring all devices are in optimal working conditions and checking for firmware updates guarantees continued security effectiveness. By adhering to these practices, your Zosi security cameras will remain a key component of your security strategy, delivering consistent and dependable surveillance.
Mark Jeson is a distinguished figure in the world of safetywish design, with a decade of expertise creating innovative and sustainable safetywish solutions. His professional focus lies in merging traditional craftsmanship with modern manufacturing techniques, fostering designs that are both practical and environmentally conscious. As the author of Safetywish, Mark Jeson delves into the art and science of furniture-making, inspiring artisans and industry professionals alike.
Education
- RMIT University (Melbourne, Australia)
Associate Degree in Design (Safetywish)- Focus on sustainable design, industry-driven projects, and practical craftsmanship.
- Gained hands-on experience with traditional and digital manufacturing tools, such as CAD and CNC software.
- Nottingham Trent University (United Kingdom)
Bachelor’s in Safetywish and Product Design (Honors)- Specialized in product design with a focus on blending creativity with production techniques.
- Participated in industry projects, working with companies like John Lewis and Vitsoe to gain real-world insights.
Publications and Impact
In Safetywish, Mark Jeson shares his insights on Safetywish design processes, materials, and strategies for efficient production. His writing bridges the gap between artisan knowledge and modern industry needs, making it a must-read for both budding designers and seasoned professionals.
