
Installing Night Owl cameras is a straightforward process that enhances the security of your home or business. These cameras are designed with user-friendly features, making them accessible to both tech-savvy individuals and beginner-level users.

In this guide on how to install night owl cameras, we will take you through the steps involved in setting up Night Owl cameras.
What is Night Owl Cameras?
Night Owl cameras are a popular brand of security cameras that provide high-quality video surveillance for your home or business. They come with various features such as night vision, motion detection, and remote access, allowing you to monitor your property at any time.
You can choose from a variety of Night Owl camera models, including wired and wireless options, dome or bullet-shaped cameras, and different resolution capabilities. These cameras offer peace of mind and help deter potential intruders from targeting your property.
Why Are Night Owl Cameras Beneficial?
Easy to Install and Use:
Night Owl cameras are designed for easy installation, making them accessible to users of all technical levels. The package comes with detailed instructions and all the necessary components, making the setup process quick and hassle-free.
High-Quality Video:
Night Owl cameras provide high-resolution video footage that allows you to see clear details, even in low-light conditions. This feature is especially useful for identifying intruders or suspicious activity on your property.
Remote Access:

With Night Owl’s free remote viewing app, you can access your cameras from anywhere at any time using a smartphone or tablet. This feature is convenient for keeping an eye on your property while away and provides peace of mind when traveling.
Motion Detection Alerts:
Night Owl cameras come equipped with motion detection technology that sends alerts to your phone or email when activity is detected. This feature allows you to quickly respond to potential threats and keep tabs on any unusual movements.
9 Steps on How to Install Night Owl Cameras
Step 1: Choose the Right Location
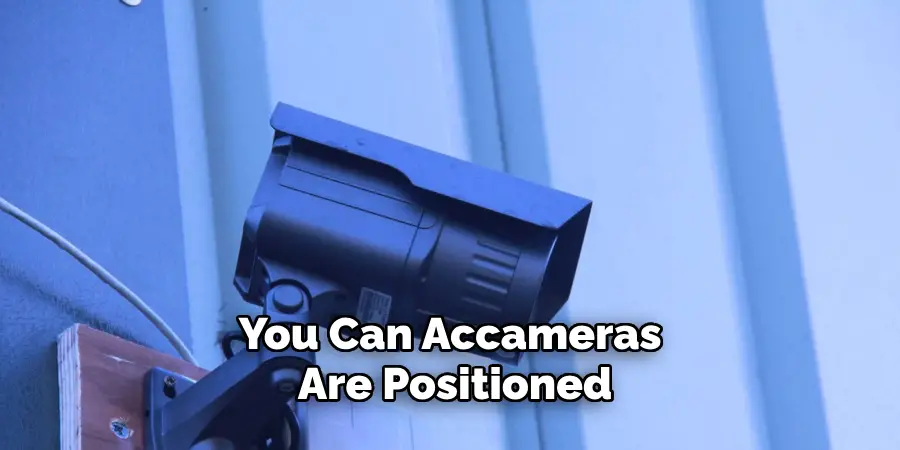
Before installing your Night Owl cameras, it’s crucial to choose the optimal locations for placement. Start by identifying high-traffic areas and potential points of entry such as doors, windows, and driveways.
Ensure that each camera provides a clear, unobstructed view of the area it needs to monitor. When selecting locations, consider the height and angle of the installation to avoid blind spots and maximize coverage.
Additionally, keep in mind the camera’s proximity to power sources if you’re using wired models, or ensure a strong Wi-Fi signal for wireless cameras. Proper placement will enhance the effectiveness of your surveillance system and provide comprehensive coverage of your property.
Step 2: Mount the Cameras
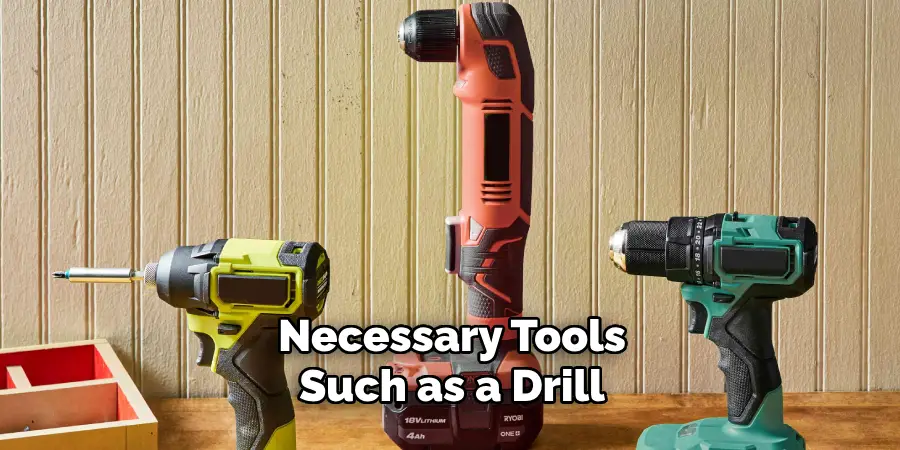
Once you have identified the optimal locations for your Night Owl cameras, it’s time to mount them. Begin by gathering the necessary tools, such as a drill, screws, and anchors (which are usually included in the camera package).
If you are mounting the cameras on a wall or ceiling, use the provided template to mark the drilling points.
Drill the holes at the marked points and insert the anchors to secure the mounting screws. Attach the camera base to the mounting surface using the screws provided, ensuring it is firmly attached and won’t wobble or detach.
For dome cameras, you may need to adjust the dome cover to align it correctly after mounting.
Next, attach the camera to its base, making sure it snaps into place securely. Adjust the camera’s angle to cover the desired area.
Most Night Owl cameras come with adjustable mounts, allowing you to tilt and swivel the camera to achieve the best viewing angle. Double-check the camera’s view using the live feed on your smartphone or monitor to ensure it covers the intended area without any obstructions.
Finally, if you are installing wireless cameras, follow the manufacturer’s instructions for pairing the camera with your Wi-Fi network. For wired models, run the necessary cables to connect the camera to your DVR or power source, ensuring all connections are secure and protected from the elements.
Step 3: Set Up the DVR
Once your cameras are securely mounted and positioned, the next step is to set up the Digital Video Recorder (DVR) to manage and record your camera feeds. Begin by placing the DVR in a central location that is easily accessible for maintenance and within reach of power sources and network connections.
Connect the DVR to a monitor using the provided HDMI or VGA cable, allowing you to view live footage and adjust settings.
Next, plug the power supply into the DVR and turn it on. Follow the on-screen instructions to complete the initial setup process, which typically includes selecting your preferred language, setting the date and time, and configuring your network settings.

Ensure the DVR is connected to your router using an Ethernet cable to enable remote viewing capabilities and firmware updates.
Step 4: Configure Camera Settings
After setting up the DVR, the next step is to configure the camera settings to ensure optimal performance and coverage. Begin by accessing the DVR’s main menu using the remote control or mouse. Navigate to the camera settings section, where you can adjust various parameters for each connected camera.
First, the resolution and frame rate for each camera are set to balance video quality and storage capacity. Higher resolutions and frame rates provide clearer images but consume more storage space.
Next, configure the motion detection settings, specifying the sensitivity level and the areas within the camera’s field of view that should trigger alerts. This customization helps minimize false alarms caused by non-critical movements such as tree branches swaying or pets moving.
You can also set up recording schedules to optimize storage usage. For instance, you might choose continuous recording during nighttime hours and motion-triggered recording during the day. Additionally, enables night vision mode for better visibility in low-light conditions and adjusts the brightness and contrast settings to enhance image clarity.
Step 5: Test the System
Once you have completed setting up your Night Owl cameras, it’s essential to test the system to ensure everything is working correctly. Begin by checking each camera’s live feed on the monitor or smartphone app, ensuring they cover the intended areas and provide clear images. Then, trigger motion detection alerts to check their responsiveness and accuracy.
Next, review footage from previous recordings to ensure they are saved correctly and can be accessed without any issues. Check for any technical glitches or connectivity problems that may need addressing. It’s also a good idea to test remote viewing capabilities by accessing your cameras from a different Wi-Fi network or using cellular data.
Step 6: Set Up Additional Features (Optional)
Night Owl cameras offer various additional features that can enhance your surveillance system’s effectiveness and usability. Depending on the model, you may be able to set up email alerts for motion detection, enabling you to receive notifications of potential threats in real time.
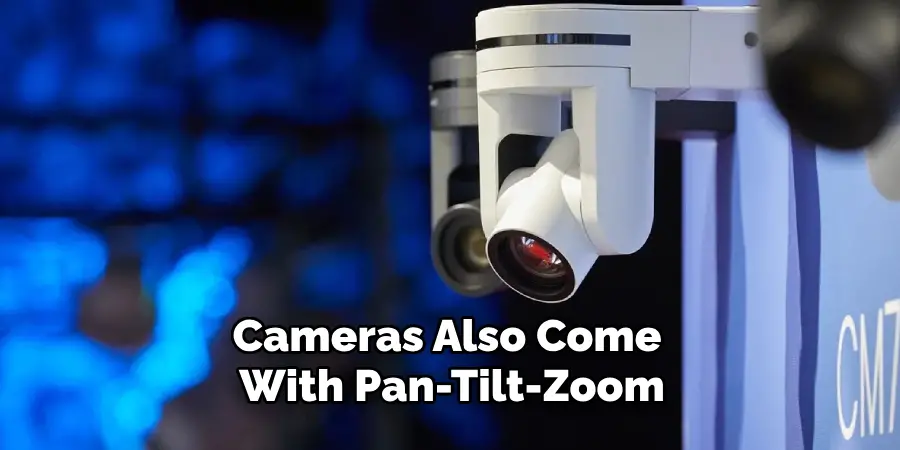
Some cameras also come with pan-tilt-zoom (PTZ) capabilities, allowing you to adjust their direction and focus remotely using the DVR or smartphone app. Some models also offer two-way audio communication, which can be useful for monitoring children or communicating with visitors at your doorstep.
Step 7: Secure Your System
As with any electronic device connected to a network, security is a crucial aspect when installing Night Owl cameras. Ensure your DVR is password protected and change the default credentials to prevent unauthorized access. Additionally, keep your DVR’s firmware up to date to address any security vulnerabilities.
If you are using remote viewing capabilities, make sure to secure your network with a strong password and enable encryption on your router. It’s also advisable to create separate user accounts for each person accessing the system and limit their permissions accordingly. Regularly review your camera settings and update them as needed to ensure maximum security.
Step 8: Maintenance and Troubleshooting
To keep your Night Owl cameras functioning optimally, it’s essential to perform regular maintenance tasks such as cleaning the lenses and checking for any loose connections. It’s also recommended to set up a maintenance schedule for firmware updates and system checks.
In case of any technical issues or malfunctions, refer to the user manual or contact Night Owl customer support for assistance. They offer troubleshooting services and can guide you through solutions if you encounter any problems with your system. Regularly reviewing footage can also help identify and address any issues that may arise.
Step 9: Enjoy Your Enhanced Security
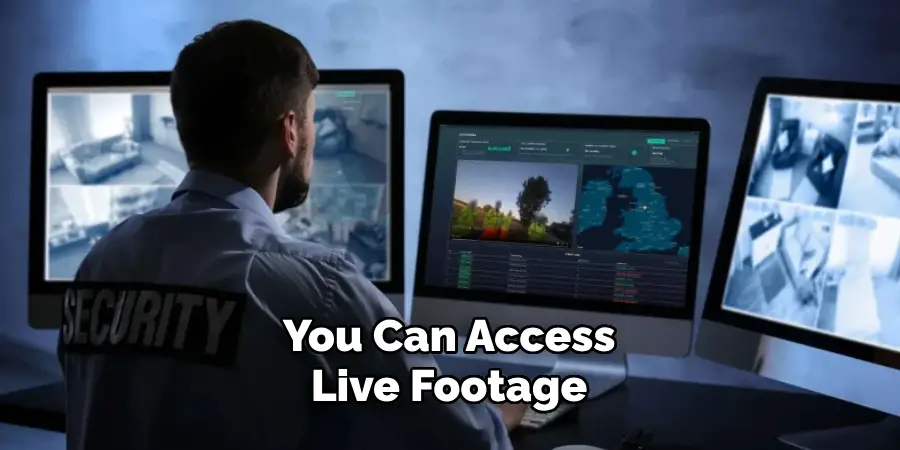
With your Night Owl cameras securely installed and configured, you can now enjoy peace of mind knowing that your property is under constant surveillance. Whether you are at home or away, you can access live footage and receive alerts in case of any suspicious activity.
By following these steps, you can make the most out of your Night Owl camera system and ensure its effectiveness in keeping your property safe. Remember to regularly maintain and update your system for continued security benefits.
Following these steps on how to install night owl cameras, you can make the most out of your Night Owl camera system and ensure its effectiveness in keeping your property safe. Remember to regularly maintain and update your system for continued security benefits.
Additionally, it’s crucial to educate yourself about any relevant laws and regulations regarding surveillance in your area to avoid any legal issues. With a properly installed and configured Night Owl camera system, you can have enhanced security and peace of mind knowing that your property is being monitored at all times.
Do You Need to Get Help From a Professional?
While installing and setting up Night Owl cameras can be a straightforward process for those with technical know-how, there are instances where seeking help from a professional installer might be beneficial.
If you find any part of the installation process challenging or lack the time and expertise to ensure a secure and optimal setup, hiring a professional can save you significant time and frustration.
A certified installer can ensure that your cameras are positioned for maximum coverage and effectiveness, properly configure your DVR settings, and secure your network against potential vulnerabilities. They can also provide you with valuable tips on maintaining your system and making the most of its features.
Additionally, professional installers often offer post-installation support, helping you troubleshoot any issues that may arise in the future. By opting for professional help, you can ensure that your Night Owl camera system is set up correctly and efficiently, providing you with enhanced security and peace of mind.
How Much Will It Cost?
The cost of installing a Night Owl camera system can vary widely based on several factors, including the number of cameras, camera specifications, and whether you choose to hire a professional installer.
On average, a Night Owl camera system with four cameras can range from $200 to $500, depending on the model and included features. High-end systems with advanced capabilities like 4K resolution, PTZ, and two-way audio will typically fall on the higher end of the price spectrum.
Additionally, should you decide to hire a professional for installation, you should budget for labor costs, which can range from $100 to $200 per camera, depending on the complexity of the setup and local labor rates.
Some professionals may offer package deals for multiple cameras or additional services, such as network security enhancements and maintenance agreements.
It’s also important to consider ongoing expenses, such as cloud storage subscriptions, if you opt to store your footage online, which can range from $10 to $30 per month.

While these costs can add up, investing in a high-quality, professionally installed Night Owl camera system can provide invaluable security and peace of mind, protecting your property and loved ones.
Frequently Asked Questions
Q: Can I Install Night Owl Cameras Myself?
A: Yes, you can install Night Owl cameras by yourself. The installation process is designed to be user-friendly, with detailed instructions provided in the user manual that comes with the system.
Basic steps include mounting the cameras, connecting them to the DVR, and configuring the settings to suit your needs.
While professional installation services are available and can ensure optimal placement and setup, many users find that with a little bit of time and effort, they can successfully install the cameras on their own.
If you encounter any difficulties, Night Owl customer support is also available to offer assistance and troubleshooting guidance.
Q: Can I Access My Night Owl Cameras Remotely?
A: Yes, you can access your Night Owl cameras remotely. Most models come with a smartphone app that allows you to view live footage and receive motion detection alerts on your mobile device.
To enable this feature, make sure your DVR is connected to the internet and follow the instructions in the user manual or app settings to set up remote viewing capabilities. Some models also offer remote access through a web browser on a computer.
With remote access, you can monitor your property from anywhere in the world as long as you have an internet connection. This is a useful feature for those who travel frequently or want to keep an eye on their property while away.
Q: How Much Storage Space Do I Need for Night Owl Cameras?
A: The amount of storage space needed for your Night Owl cameras depends on various factors such as the number of cameras, recording quality, and recording mode. Continuous recording at high resolution will require more storage space compared to motion-triggered recording at a lower resolution.
Night Owl camera systems come with pre-installed hard drives, and you can also choose to add additional storage if needed. It’s recommended to calculate your estimated storage needs before purchasing a system to ensure you have enough space for your surveillance footage.
Q: Are Night Owl Cameras Weatherproof?
A: Yes, most Night Owl cameras are weatherproof and designed for outdoor use. They come with an IP66 or higher rating, which means they can withstand dust, water, and extreme temperatures. However, it’s essential to check the specifications of your specific model before installing them in harsh weather conditions.
If you live in an area with severe weather conditions, it’s recommended to purchase additional weatherproofing accessories for added protection. Regular maintenance, such as cleaning the lenses and checking for any damage, can also help ensure your cameras continue to function properly in all weather conditions.
Conclusion
Installing and configuring a Night Owl security camera system involves several crucial steps, from securely mounting each camera to fine-tuning the settings for optimal performance. By following the detailed instructions provided, you can ensure thorough surveillance coverage, enhance your home’s security, and achieve peace of mind.
Whether you opt for a wired or wireless setup, taking the time to test the system, explore additional features, and implement robust security measures will maximize the effectiveness and reliability of your surveillance network.
Regular maintenance and updates will keep your system running smoothly, providing ongoing protection for your property and loved ones. Thanks for reading this article on how to install night owl cameras.