Are you looking for an easy and efficient way to secure your home? Look no further than the Ring Alarm Home Security Kit. This comprehensive system offers a range of features to keep your home safe and give you peace of mind.
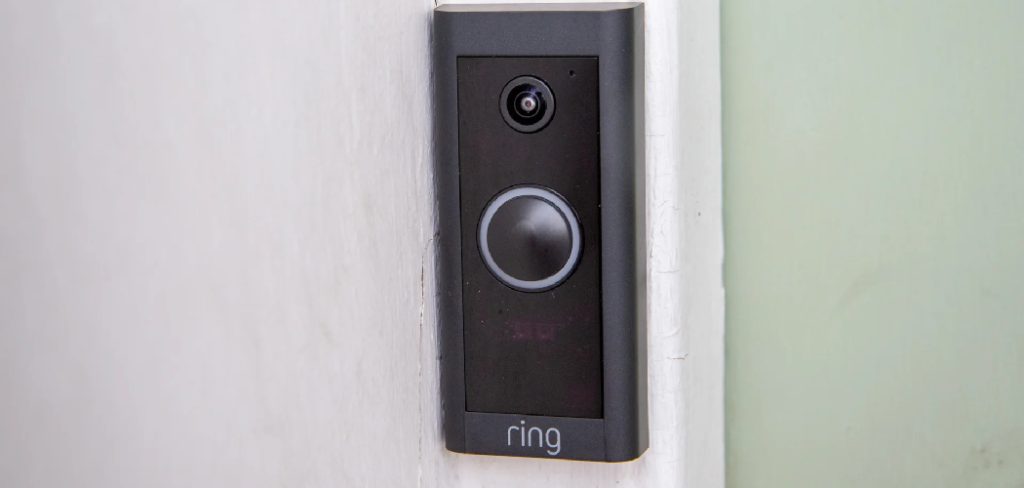
How to install Ring Alarm Home Security Kit can significantly enhance the safety of your home, offering peace of mind through comprehensive security features. This guide will walk you through the installation process, ensuring that even if you’re not particularly tech-savvy, you can set up the system with ease. By following a few simple steps, you’ll be able to monitor your home and receive real-time alerts, keeping your property and loved ones secure.
Whether you’re a new homeowner or looking to upgrade your existing security measures, this installation guide will help you get your Ring Alarm up and running in no time.
What Will You Need?
Before beginning the installation process, it’s important to make sure you have all the necessary materials. Here’s a list of items you’ll need:
- Ring Alarm Base Station
- Keypad
- Contact Sensor(s)
- Motion Detector(s)
- Range Extender (optional)
- Power cords and batteries for each device
It’s also recommended that you have a smartphone or tablet on hand to download the Ring app, which will be used to set up and monitor your system. You’ll also need a stable internet connection for the installation process.
10 Easy Steps on How to Install Ring Alarm Home Security Kit
Step 1. Unbox Your Ring Alarm Kit
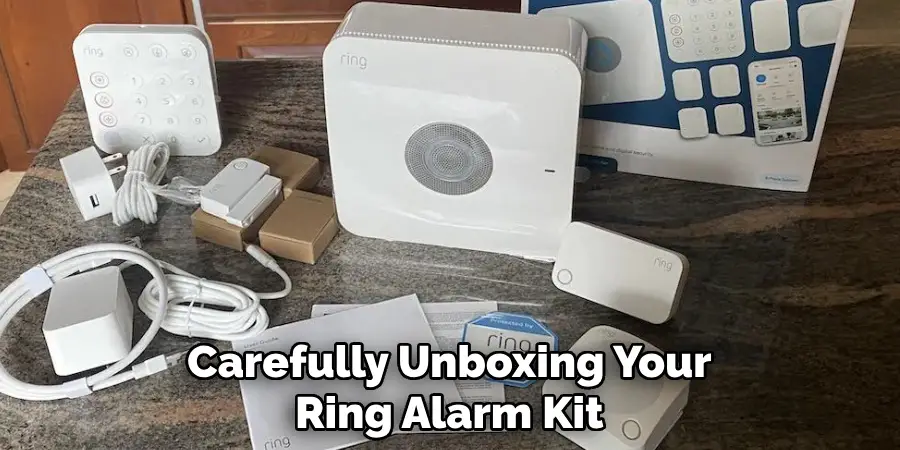
Begin by carefully unboxing your Ring Alarm Kit. Lay out all the components on a flat surface to ensure you have all the items listed in the “What Will You Need?” section. This will help you identify each part and make the installation process smoother. Additionally, make sure to remove any packaging material or protective film from the devices.
Step 2. Install Batteries in Devices
Next, you’ll need to install the batteries in each of the Ring devices that require them. Start with the Contact Sensors and Motion Detectors. Open the battery compartments on these devices, which are usually accessible through a small latch or sliding cover. Insert the included batteries, ensuring that they are aligned according to the polarity markings inside the compartment. Double-check to make sure each battery is seated properly to ensure a stable power supply.
For the Keypad, locate the battery compartment on the back or underside of the device. Again, insert the provided batteries following the indicated polarity. Some devices may have rechargeable batteries, in which case you should make sure they are charged before installation.
Once the batteries are installed, you might notice a small LED light blinking on each device, which usually indicates that the device is powered on and ready to be paired with the Base Station. If no lights appear, double-check the battery installation. Keep all battery covers securely closed to protect the batteries and maintain the integrity of the devices.
Step 3. Download and Install the Ring App
To set up and monitor your Ring Alarm Home Security Kit, you will need the Ring app. Download the app from the App Store (for iOS devices) or Google Play Store (for Android devices). Once downloaded, open the app and either log in to your existing Ring account or create a new one if you don’t already have an account. The app will guide you through the initial setup process, including configuring your home location and preferences. Ensure that your smartphone or tablet has a stable internet connection during this process to prevent any interruptions.
Step 4. Set Up the Base Station
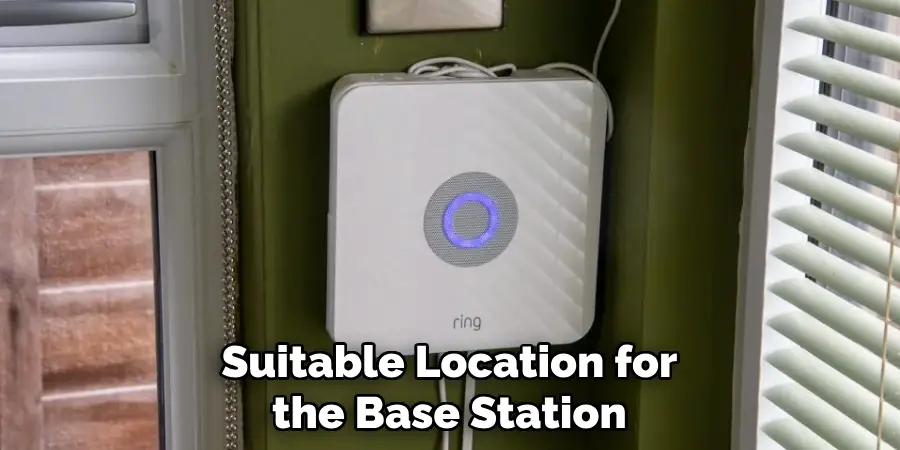
With the batteries installed in your devices and the Ring app ready, it’s time to set up the Base Station. First, find a suitable location for the Base Station, ideally in a central area of your home to ensure optimal connectivity with all your Ring devices. Plug the Base Station into a power outlet using the provided power cord.
Next, open the Ring app on your smartphone or tablet. In the app, select “Set Up a Device” and choose “Base Station” from the list of options. Follow the on-screen instructions to connect your Base Station to your Wi-Fi network. Ensure that your Wi-Fi router is functioning properly and that the signal is strong in the area where you have positioned the Base Station.
Once the Base Station is connected to the Wi-Fi, the app will prompt you to complete the setup process. This may include naming your device and setting preferences for notifications. The Base Station will also update its firmware if necessary, which could take a few minutes. After the setup is complete, the Base Station is ready to be paired with the other devices in your Ring Alarm Home Security Kit.
Step 5. Pair Devices with the Base Station
Now that your Base Station is set up, you can start pairing the other devices in your Ring Alarm Home Security Kit. Open the Ring app and select the option to “Set Up a Device.” Choose the type of device you want to add, such as a Contact Sensor or Motion Detector. The app will provide specific instructions for each device, guiding you through the pairing process.
For Contact Sensors, locate the small pairing button, usually on the side or back of the sensor. Press and hold this button until the LED light starts blinking. This indicates that the sensor is in pairing mode. The app will search for the sensor and, once found, will prompt you to complete the setup by assigning it a name and location within your home.
For Motion Detectors, the process is similar. Press and hold the pairing button until the LED light blinks. The app will detect the Motion Detector and guide you through naming and positioning it for optimal performance.
Step 6. Install Contact Sensors
Now that your Contact Sensors are paired with the Base Station, it’s time to install them in your home. Contact Sensors are typically used on doors and windows to detect when they are opened or closed. Select a door or window where you want to install a sensor and clean the surface thoroughly to ensure proper adhesion.

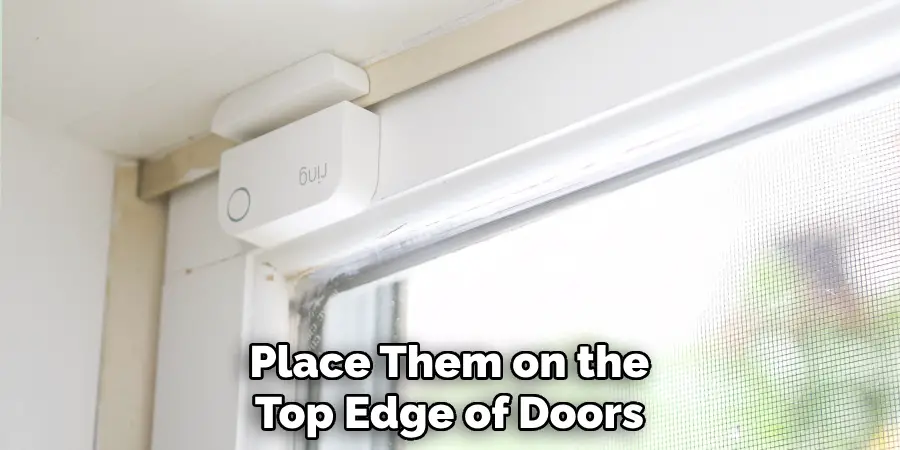
Each Contact Sensor consists of two parts: the sensor and the magnet. The larger piece contains the batteries and pairing button, while the smaller piece is the magnet. Position the sensor on the stationary part of the door or window frame and the magnet on the moving part, ensuring that they align closely when the door or window is closed.
Peel the backing off the adhesive strips on both the sensor and the magnet, then firmly press them into place. For optimal performance, ensure that the gap between the sensor and magnet is no more than half an inch when closed. The app will confirm that the sensor is correctly installed and operational. Repeat this process for any additional Contact Sensors in your kit.
Step 7. Install Motion Detectors
Having paired and named your Motion Detectors in the Ring app, the next task is to install them in your home. Motion Detectors can monitor movement in areas such as hallways, living rooms, or entry points. Choose a location that covers the maximum portion of the desired area while minimizing potential false alarms from pets or ceiling fans.
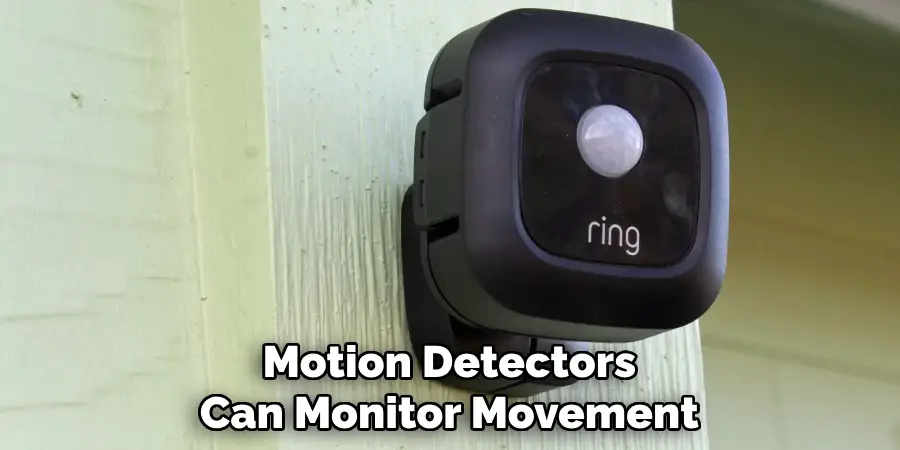
To begin, determine the installation height recommended for your specific Motion Detector model, generally around 7 feet above the floor. Clean the selected surface to improve adhesion. Peel off the backing from the adhesive strips on the Motion Detector and press the device firmly against the surface.
Install the detector at a slight downward angle for better coverage, and ensure it is clear of obstructions that could block its field of view. After installation, check the app to confirm the detector is functional and properly positioned. Adjust the placement if necessary to optimize performance.
Step 8. Test Your System
After installing and positioning all the devices in your Ring Alarm Home Security Kit, it’s crucial to test the entire system to ensure everything is functioning correctly. Open the Ring app on your smartphone or tablet and navigate to the main dashboard. Here, you will find the option to perform a system test.
Begin by testing the Contact Sensors. Open and close the doors and windows where the sensors are installed, and check the app to verify that each action is detected and recorded. The app should notify you when a door or window is opened or closed.
Next, test the Motion Detectors by walking in front of each one and observing the notifications in the app. Ensure that movements are accurately detected and that there are no false alarms. If the detectors fail to respond or trigger inaccurately, adjust their positions and retest.
Finally, check the Base Station and any additional accessories you have installed, such as Keypads or Range Extenders. Ensure all devices are communicating with the Base Station and appear in the app’s device list. If necessary, follow the troubleshooting steps provided in the app to resolve any issues.
Step 9. Set Up Professional Monitoring
With your Ring Alarm system installed and tested, the next step is to set up professional monitoring for an added layer of security. Professional monitoring services ensure that emergency responders can be dispatched to your home if any alarm is triggered, providing peace of mind whether you’re at home or away.
To set up professional monitoring, open the Ring app on your smartphone or tablet and navigate to the “Settings” menu. From there, select “Monitoring” and then choose “Professional Monitoring.” You will be guided through a series of steps to activate the service, including verifying your address and entering emergency contact information.
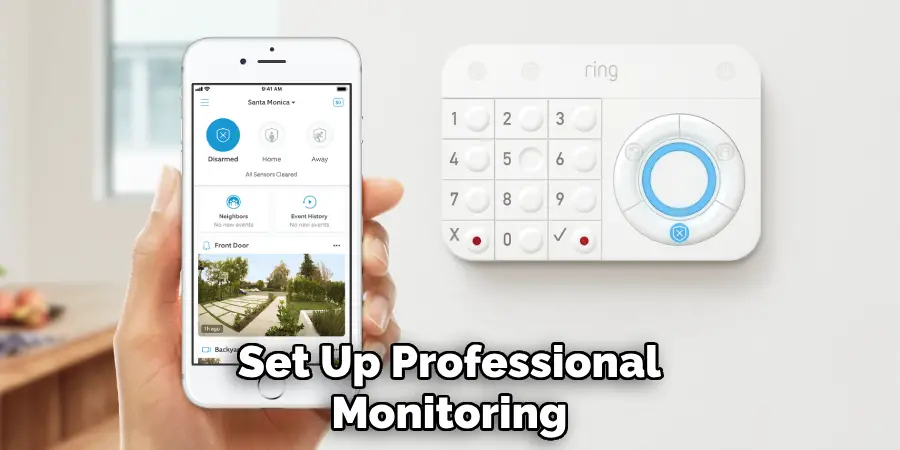
During the setup process, you may be required to provide a secure passcode that will be used to verify your identity in the event of an alarm. This passcode is essential for preventing false alarms and ensuring that emergency services are only dispatched when necessary.
Once professional monitoring is activated, you can customize various settings such as the types of alerts you receive and the actions taken during an emergency. This level of customization allows you to tailor the monitoring experience to meet your specific needs and preferences.
Step 10. Customize Your Security Settings
With professional monitoring set up, it’s time to customize your security settings to ensure they meet your specific needs. Open the Ring app and navigate to the “Settings” menu. From there, select “Alarm Alerts” to manage notifications for different events, such as doors or windows being opened, motion detection, and system arming or disarming.
Next, configure the “Alarm Modes” to suit your routine. You can choose from three preset modes: Disarmed, Home, and Away. In the Disarmed mode, all sensors and motion detectors are turned off, allowing you to move freely without triggering the alarm. The Home mode activates the Contact Sensors, typically used when everyone is home but you want to secure your windows and doors. The Away mode arms all sensors and motion detectors, ideal for when the house is empty. Customize each mode by selecting which sensors are active and adjusting the entry and exit delays to give you enough time to arm or disarm the system without triggering an alarm.
Lastly, set up “Device Schedules” to automatically adjust your system’s settings at different times of the day. For example, you can schedule the system to arm in Home mode every night at a specific time and disarm in the morning. This feature ensures that your home is always protected without needing constant manual adjustments.
By following these steps, you can successfully install and customize your Ring Alarm Home Security Kit to suit your specific needs.
5 Additional Tips and Tricks
- Optimize Sensor Placement: When installing Contact Sensors, place them on the top edge of doors and windows where they are less likely to be tampered with or accidentally triggered. Ensure that the sensor and magnet are aligned properly and that there is no significant gap between them, which could prevent accurate detection.
- Utilize the Mobile App Effectively: The Ring app is a powerful tool for managing your home security system. Familiarize yourself with its features, such as setting up shared access with family members or friends, reviewing past events and videos, and managing your subscription plan.
- Consider Adding External Sirens: While the Base Station has a built-in siren to alert you of any emergencies, adding external sirens can increase the alarm’s loudness and potentially deter intruders. You can connect multiple external sirens to your Ring Alarm system for maximum effectiveness.
- Integrate Other Ring Devices: Take advantage of the compatibility between different Ring devices, such as Video Doorbells and Spotlight Cams. By integrating these devices with your Ring Alarm system, you can create a more comprehensive security network for your home.
- Add Emergency Contacts: In addition to setting up professional monitoring, consider adding emergency contacts in the Ring app that can be notified in case of an alarm. This ensures that multiple people are aware of any potential emergencies and can take appropriate action if necessary.
Overall, by following these additional tips and tricks, you can maximize the effectiveness and functionality of your Ring Alarm Home Security Kit.
5 Things You Should Avoid
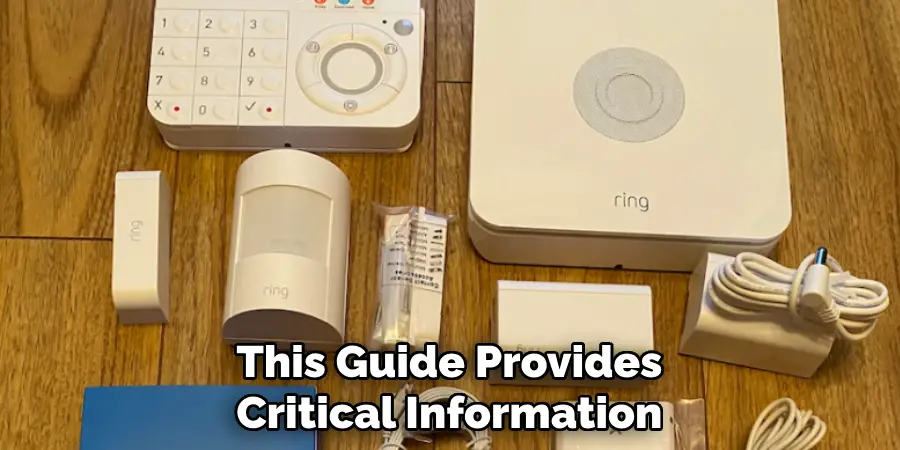
- Ignoring the User Manual: One of the most common mistakes people make is failing to thoroughly read the user manual. This guide provides critical information on proper installation and troubleshooting. Skipping it can lead to improper setup and functionality issues.
- Improper Sensor Placement: Incorrectly placing your sensors can lead to false alarms or undetected breaches. Avoid installing Contact Sensors and Motion Detectors near heat sources, vents, or areas with heavy foot traffic that could trigger unnecessary alerts.
- Neglecting Firmware Updates: The Ring system, like any smart home device, requires regular firmware updates to function optimally. Ignoring these updates can leave your system vulnerable to security breaches and reduce its overall performance.
- Overlooking Internet Connection: A stable internet connection is crucial for the Ring Alarm Home Security Kit to operate effectively. Ensure that your Base Station and all connected devices have a reliable internet connection to avoid disruptions in monitoring and alerts.
- Forgetting to Test the System: After installation, it’s essential to test the entire security system to confirm that all components are working correctly. Neglecting this step can result in undetected issues that compromise your home’s security. Regularly test the system to ensure it remains operational.
By avoiding these common mistakes, you can ensure that your Ring Alarm Home Security Kit functions smoothly and provides optimal protection for your home.
Conclusion
How to install Ring Alarm Home Security Kit is a straightforward process that empowers you to protect your home with confidence. By following the detailed steps outlined in this guide, you can set up your system effectively and tailor it to meet your specific security needs. From unboxing the components and connecting the Base Station to configuring the sensors and customizing the settings in the Ring app, each step is designed with user-friendliness in mind.
Furthermore, the additional tips and tricks provided enhance the overall functionality and reliability of your home security system. Ensuring proper sensor placement, utilizing the mobile app, and integrating other Ring devices can significantly boost your home’s protection. Simultaneously, being aware of potential pitfalls—such as neglecting firmware updates or improper sensor placement—helps maintain the system’s efficacy and longevity.
Ultimately, taking the time to thoroughly read the user manual, regularly testing the system, and keeping your Ring devices updated and connected ensures that your home remains secure against any possible threats. By avoiding common mistakes and embracing best practices, you can make the most out of your Ring Alarm Home Security Kit, achieving peace of mind and a well-protected home environment.
