
Are you wondering how to install a Safety First car seat for your little one?
Well, you have come to the right place! In this guide, we will provide step-by-step instructions on how to install safety first car seat.
Ensuring your child’s safety while traveling is paramount, and a properly installed car seat can make all the difference.
The Safety First Car Seat is designed to provide top-tier protection, but it’s crucial that it’s installed correctly to maximize its effectiveness. This guide will take you through each step of the installation process, making it simple and straightforward.
Whether you’re a new parent or looking to upgrade your current car seat, this introduction will help you understand the basic principles and steps necessary to ensure a secure installation. Let’s get started on making your vehicle a safer place for your little one.
What are the Benefits of a Safety First Car Seat?
A car seat is an essential investment for every parent, and the Safety First Car Seat offers several benefits that make it a popular choice. Some of these advantages include:

- Enhanced Safety Features: The Safety First Car Seat has been designed with advanced safety features to protect your child in case of a collision or sudden stop.
- Comfortable Design: The car seat features soft padding and adjustable headrests, ensuring your little one stays comfortable during the ride.
- Easy to Clean: Children can be messy, but the Safety First Car Seat comes with removable and washable covers, making it easy to keep clean.
- Multiple Installation Options: Depending on your child’s age and weight, the car seat can be installed both forward-facing and rear-facing, giving you the flexibility to choose what works best for your child.
- Longevity: The Safety First Car Seat can be used for an extended period as it accommodates children weighing between 5 lbs and 65 lbs, making it a long-term investment.
Now that we have covered the benefits of the Safety First Car Seat let’s move on to the installation process.
What Will You Need?
Before you begin installing the Safety First Car Seat, make sure you have all the necessary tools and equipment. These may include:
- A flathead screwdriver
- A ruler or measuring tape
- The car seat manual (always refer to the manual for specific installation instructions)
Once these items are ready, let’s move on to the installation process.
8 Easy Steps on How to Install Safety First Car Seat
Step 1: Read the Manual
It may seem obvious, but reading the manual is essential before installing any car seat. The manual contains detailed instructions specific to your Safety First Car Seat model and will guide you through each step of the installation process. Make sure to read it thoroughly and follow all the safety guidelines.
Step 2: Choose a Suitable Location
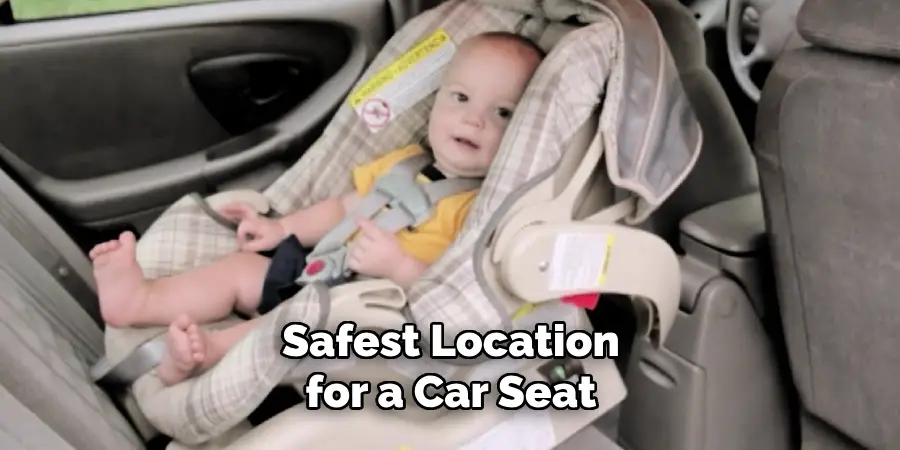
Selecting the right spot for installing your Safety First Car Seat is crucial for both safety and convenience. Generally, the safest location for a car seat is in the rear middle seat, as it is the furthest from potential impact points in a collision. However, this might not always be feasible depending on your vehicle’s configuration or if you have multiple car seats to install.
When choosing a location, consider the following factors:
- Access to LATCH Anchors: Many modern vehicles come equipped with Lower Anchors and Tethers for Children (LATCH) systems that make car seat installation simpler. Check your vehicle’s manual to identify LATCH anchor points.
- Seat Belt Route: If you’re using the seat belt to install your car seat, ensure the seat belt’s path is clear and can be locked securely. Some vehicles offer a locking mechanism specifically designed for car seat installation.
- Airbags: Never place a rear-facing car seat in the front passenger seat with an active airbag. The force of an airbag deployment could be fatal to a child in a rear-facing car seat.
- Comfort and Space: Make sure the selected location offers enough space for both the car seat and passengers. Some car seats can be quite bulky, so ensure the front seats can still be adjusted comfortably for the driver and passengers.
Having determined the best location, you’re now ready to move on to the next step, which involves securing the car seat base or the seat itself, depending on your Safety First Car Seat model.
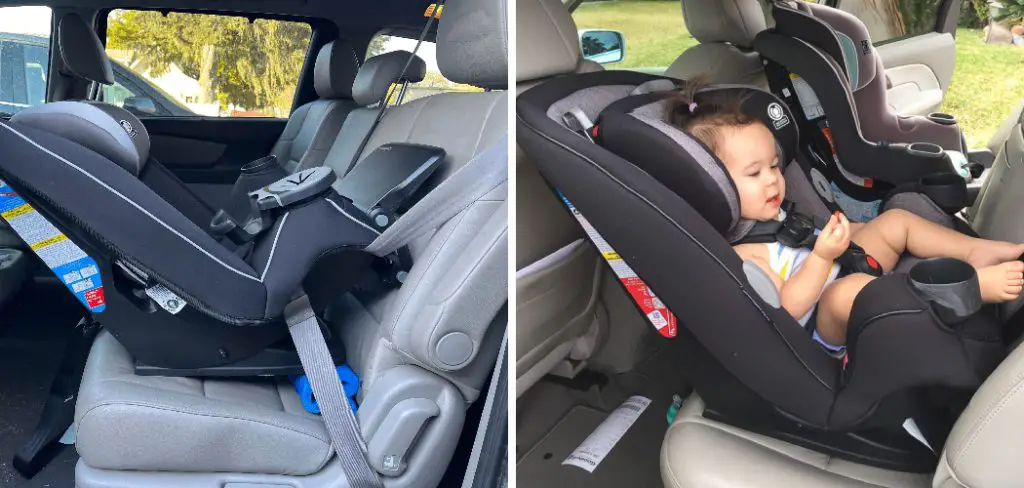
Step 3: Secure the Car Seat Base
If your Safety First Car Seat comes with a detachable base, begin by securing the base to the vehicle seat. The process may differ depending on your car seat model, but it generally involves the following:
- Placing the base on the selected location.
- Threading the seatbelt through designated slots on the base and buckling it.
- Tightening the seatbelt until there is no slack.
- If your base has a built-in level indicator, make sure it’s parallel to the ground.
- Push down on the car seat and tighten the seatbelt more if needed.
- Checking for any movement or wiggle in the base after installation – there shouldn’t be any.
Step 4: Attach the Car Seat to the Base
Now that the base is securely installed, it’s time to attach the car seat to it. Follow these steps to ensure a proper and safe attachment:
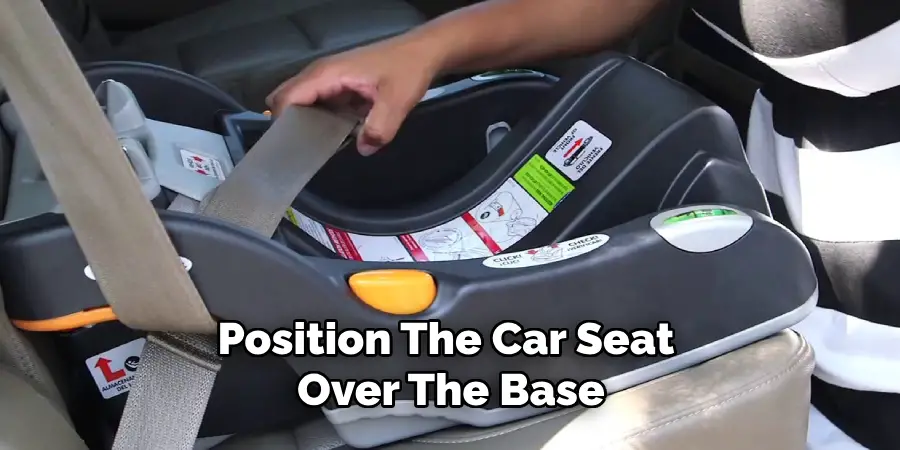
- Align the Car Seat: Position the car seat over the base, making sure it is correctly aligned with the attachment points. Most Safety First Car Seats have visual indicators or guides to help with alignment.
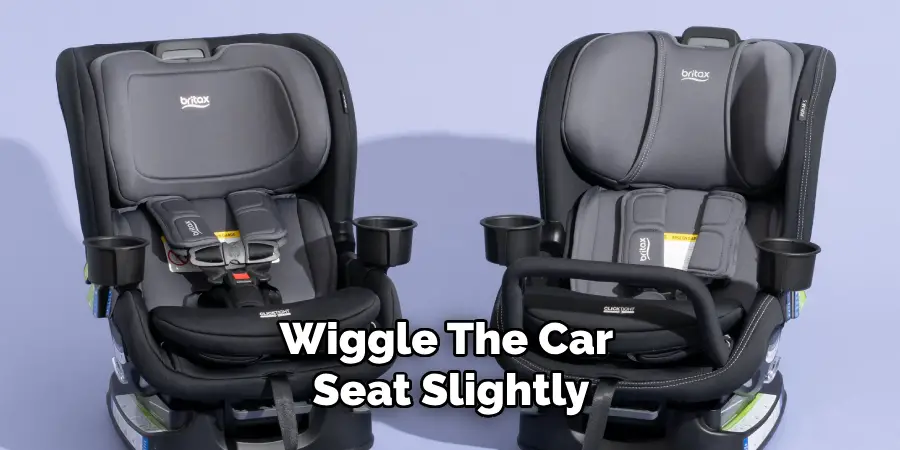
- Lock the Car Seat In Place: Once aligned, push down firmly on the car seat until you hear an audible click, indicating that the car seat is securely locked into the base. Gently tug on the car seat to ensure it is firmly attached and does not move excessively.
- Check Recline Angle: Ensure the car seat maintains the proper recline angle, particularly for rear-facing installations. Many car seats have a built-in indicator or level to help you verify the angle is correct. Adjust if necessary according to the manufacturer’s guidelines.
- Double-Check Everything: Perform a final check to ensure that all components are securely fastened and that the car seat is stable. Wiggle the car seat slightly to ensure minimal movement, which indicates a snug fit.
With the car seat securely attached to the base, your child is protected and ready for the road. We will now proceed to install the car seat using a seat belt directly if the base is not used.
Step 5: Install the Car Seat Using a Seat Belt
If your Safety First Car Seat does not use a base, or if you prefer to install the car seat using a seat belt directly, follow these steps to ensure a safe and secure installation:
- Position the Car Seat: Place the car seat on the chosen seat in your vehicle, ensuring it lies flat against the vehicle seat and does not tilt or rock.
- Thread the Seat Belt: Locate the belt path on the car seat, as specified in your car seat manual. Thread the vehicle’s seat belt through this belt path. For rear-facing car seats, the belt path is typically at the foot of the seat, while for forward-facing car seats, it is usually at the back.
- Buckle the Seat Belt: Securely buckle the seat belt, making sure it is not twisted during the ride.
- Lock the Seat Belt: Pull the seat belt all the way out to engage the locking mechanism. This step is crucial to ensure the seat belt will not loosen.
- Remove Slack: While pressing down on the car seat, pull the seat belt to remove any slack. The car seat should be tightly and securely fastened, with minimal movement when wiggling it.
- Check Angle and Position: Verify the proper angle and positioning of the car seat, especially for rear-facing installations. Use the car seat’s built-in indicators or levels to help adjust as needed according to the manufacturer’s guidelines.
- Final Check: Perform a thorough check to ensure all components are securely fastened and there is minimal movement. Wiggle the car seat slightly to confirm it is snugly fitted.
Once the car seat is properly installed using the seat belt, you can be confident in the safety and security of your child while traveling. Next, we’ll cover tips and additional checks to ensure ongoing safety.
Step 6: Tips and Additional Safety Checks
Ensuring the car seat is installed correctly is crucial, but maintaining safety during every trip is equally important. Follow these tips and perform these additional checks regularly to ensure ongoing safety:
- Regularly Check Tightness: Over time, car seats can shift or loosen, especially if you frequently remove and reinstall them. Before each trip, always give the car seat a firm tug at the belt path to ensure it’s still securely attached.
- Inspect Straps and Belts: Make sure that all straps and belts are in good condition with no fraying or tears. Also, check that the harness fits snugly around your child without any slack. The chest clip should be at the armpit level.
- Keep Buckles Clean: Ensure that buckles and latches are free from debris. Dirt and crumbs can interfere with their functionality, compromising the security of the harness.
- Monitor Car Seat Expiry Dates: Car seats have expiry dates due to the degradation of materials over time and evolving safety standards. Check the manufacturer’s label for the expiration date and replace the seat if it has expired.
- Follow Seasonal Adjustments: Make sure that your child’s clothing doesn’t interfere with the proper harness fit. In colder weather, bulky coats can create a false sense of tightness. Consider using a blanket over the harness instead.
- Be Mindful of Recalls: Stay informed about any recalls or safety notices related to your car seat model. Register your car seat with the manufacturer to receive timely updates.
- Conduct Periodic Professional Inspections: Consider visiting a certified child passenger safety technician (CPST) for a professional inspection. They can provide expert advice and ensure your car seat is installed correctly.
By adhering to these tips and performing these additional safety checks regularly, you can enhance your child’s protection and comfort during every car journey. Safe travels!
Step 7: Transitioning to a Booster Seat
As your child grows, they will eventually transition from a car seat to a booster seat. This step is crucial for ensuring your child’s safety as they graduate to using the vehicle’s seat belt. Follow these guidelines to make a safe and smooth transition:
- Check Readiness: Ensure your child meets the height and weight requirements specified by the booster seat manufacturer. They should be able to sit with their back against the vehicle seat and their knees bending comfortably at the edge of the seat.
- Choose the Right Booster: There are two types of booster seats: high-back and backless. High-back boosters provide head and neck support and are ideal for vehicles without headrests. Backless boosters are suitable for vehicles with built-in headrests.
- Position the Booster: Place the booster seat flat on the vehicle seat. Ensure it sits firmly and does not wobble. For high-back boosters, make sure the backrest aligns with the vehicle’s seat.
- Use the Vehicle’s Seat Belt: Guide the vehicle’s seat belt through the appropriate belt path on the booster seat. The lap belt should lie flat and snug across your child’s upper thighs, not the stomach. The shoulder belt should cross the chest and rest comfortably on the shoulder, not the neck or face.
- Secure the Belt: Fasten the seat belt and double-check that both the lap and shoulder belts are properly positioned. Make sure the seat belt stays in the correct position and doesn’t get twisted.
- Adjust as Needed: Continuously check the fit of the seat belt as your child grows. The belt-positioning should always be checked at the start of every journey.
- Educate Your Child: Teach your child the importance of sitting properly in the booster seat and not playing with the seat belt. Explain the safety reasons behind using a booster seat.
- Regularly Inspect the Booster Seat: Just like car seats, regularly check the booster seat for any wear and tear. Make sure it’s still in good condition and functioning as intended.
- Follow Manufacturer’s Guidelines: Always refer to the booster seat’s manual for specific instructions and safety tips. Adhere to any weight, height, and age-related recommendations provided by the manufacturer.

Transitioning to a booster seat is a significant milestone in your child’s journey to independent car travel. Following these steps ensures that the shift is done safely, maintaining your child’s protection on the road.
Step 8: Transitioning Out of a Booster Seat
When your child outgrows their booster seat, it is essential to ensure they are ready to solely rely on the vehicle’s seat belt for protection. Follow these guidelines to make a safe transition:
- Check Seat Belt Fit: Ensure the seat belt fits your child properly. The lap belt should lie snugly across the upper thighs, not the stomach. The shoulder belt should cross the chest and rest comfortably on the shoulder, not on the neck or face.
- Assess Readiness: Your child should be able to sit all the way back against the vehicle seat with their knees bending naturally at the edge of the seat. They should be able to sit properly without slouching or leaning forward during the entire trip.
- Height Requirement: A child must be at least 4 feet 9 inches tall to safely use just the vehicle’s seat belt. Check your local regulations as requirements might vary.
- Educate Your Child: Teach your child the importance of always using the seat belt correctly and the reasons behind each safety guideline. Emphasize that the seat belt must always be worn when the vehicle is in motion.
- Regular Fit Check: Continuously monitor the seat belt’s fit as your child grows. Conduct periodic checks, especially after any growth spurts, to ensure the seat belt still fits properly and sits in the correct position.
- Back Seat Safety: Encourage your child to sit in the back seat until they are at least 13 years old, as it is generally the safest spot in the vehicle in the event of a crash.
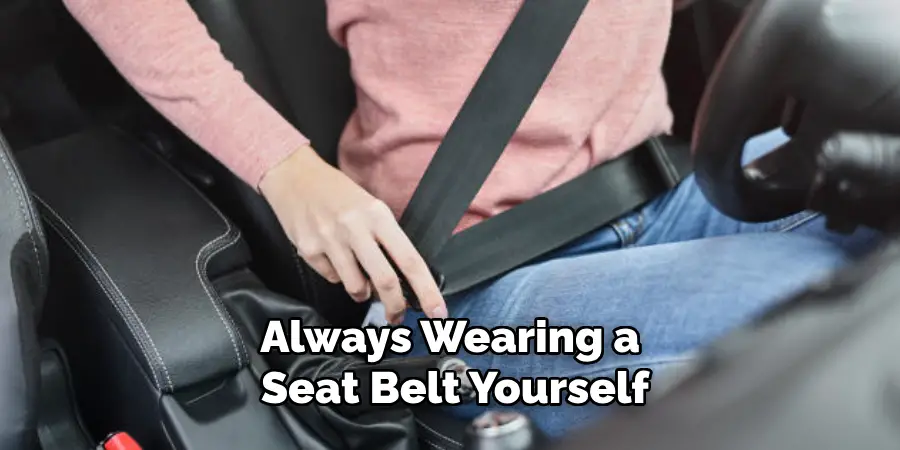
- Lead by Example: Demonstrate good habits by always wearing a seat belt yourself. Your child will follow suit if you set a consistent example.
Transitioning out of a booster seat marks a significant step towards your child’s independent use of the vehicle’s safety features.
By following these guidelines and maintaining diligence, you can ensure your child’s continued safety on the road.
Conclusion
How to install Safety First Car Seat correctly is paramount for ensuring the utmost protection for your child during every car journey. By following the comprehensive steps outlined in this guide, you can confidently navigate through the various stages of car seat use—from installation to transitioning to a booster seat and eventually to the vehicle’s seat belt.
Ensure that your car seat is securely installed using either the vehicle’s seat belt or the LATCH system and that it is rear-facing or forward-facing according to your child’s age and size. Regularly inspect the car seat, conduct routine maintenance, and never skip professional inspections to guarantee that the car seat remains in optimal condition.
Educating yourself and others who transport your child about proper car seat use, along with teaching your child appropriate safety habits, will contribute significantly to their safety and well-being on the road.
By maintaining vigilance and adhering to the best practices outlined, you can enjoy peace of mind knowing that you are providing the highest level of safety for your child.
Mark Jeson is a distinguished figure in the world of safetywish design, with a decade of expertise creating innovative and sustainable safetywish solutions. His professional focus lies in merging traditional craftsmanship with modern manufacturing techniques, fostering designs that are both practical and environmentally conscious. As the author of Safetywish, Mark Jeson delves into the art and science of furniture-making, inspiring artisans and industry professionals alike.
Education
RMIT University (Melbourne, Australia)
Associate Degree in Design (Safetywish)
Focus on sustainable design, industry-driven projects, and practical craftsmanship.
Gained hands-on experience with traditional and digital manufacturing tools, such as CAD and CNC software.
Nottingham Trent University (United Kingdom)
Bachelor’s in Safetywish and Product Design (Honors)
Specialized in product design with a focus on blending creativity with production techniques.
Participated in industry projects, working with companies like John Lewis and Vitsoe to gain real-world insights.
Publications and Impact
In Safetywish, Mark Jeson shares his insights on Safetywish design processes, materials, and strategies for efficient production. His writing bridges the gap between artisan knowledge and modern industry needs, making it a must-read for both budding designers and seasoned professionals.
