
Are you wondering how to open a SimpliSafe Glass Break Sensor? If so, you’ve come to the right place! This guide provides step-by-step instructions.
Opening your Simplisafe Glass Break Sensor may seem daunting, but it is a straightforward process that requires minimal tools and effort. Whether you need to replace the batteries, troubleshoot issues, or simply check the internal components, understanding how to properly access the interior of your device is essential.
This guide will walk you through each step on how to open SimpliSafe Glass Break Sensor, ensuring that you can confidently open your Simplisafe Glass Break Sensor without causing any damage. Let’s get started on maintaining the efficiency and functionality of your home security system.
What Will You Need?
Before we dive into the steps, let’s make sure you have all the necessary tools and materials handy. Here are a few items you may need to open your Simplisafe Glass Break Sensor:
- A small Phillips head screwdriver
- A flathead screwdriver (optional)
- Replacement batteries (if needed)
- Cleaning cloth or compressed air (for maintenance purposes)
It’s always a good idea to gather all of your supplies beforehand so you don’t run into any unexpected obstacles during the process.
10 Easy Steps on How to Open Simplisafe Glass Break Sensor
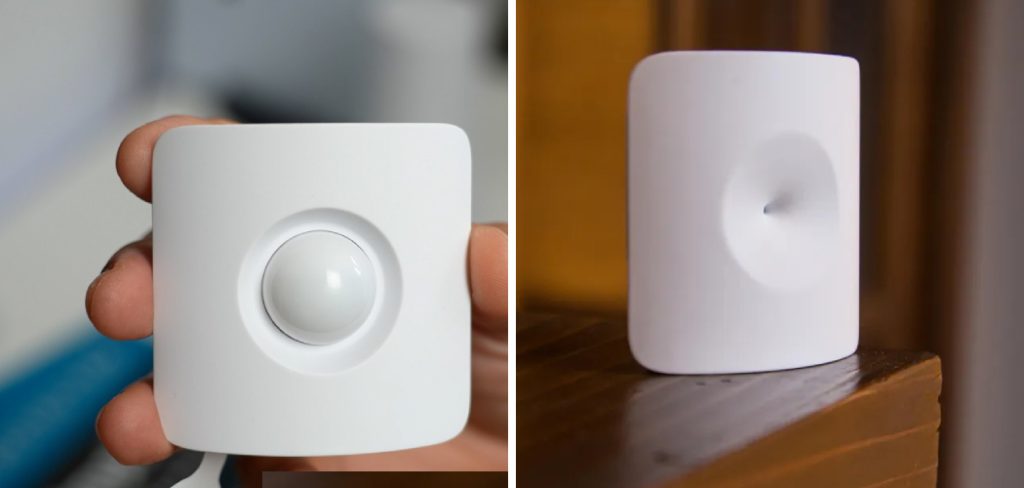
Step 1: Locate the Sensor
The first step in opening your SimpliSafe Glass Break Sensor is to identify its location. Typically, these sensors are installed on walls or ceilings near glass windows and doors to detect the sound of breaking glass. Ensure you follow any installation guidelines provided by SimpliSafe when locating your sensor. Take a moment to visually inspect the area around the sensor to ensure there are no obstructions or debris that may interfere with your work. Once you have identified and cleared the area around the sensor, you’re ready to proceed to the next step.
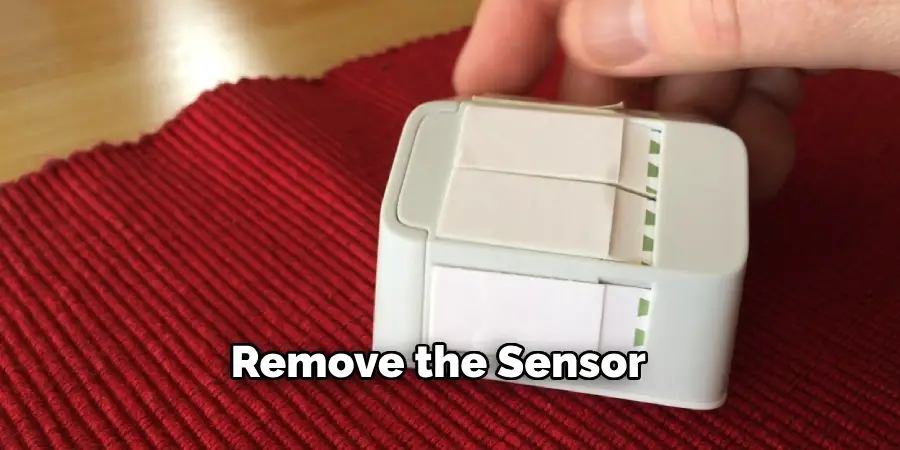
Step 2: Remove the Sensor from the Wall or Ceiling
Carefully remove the SimpliSafe Glass Break Sensor from its mounted position. Depending on the sensor’s installation, you may need to gently slide it off its mounting bracket or unscrew it from the wall or ceiling. Handling the sensor with care is crucial to avoid causing any damage to the unit or its mounted surface. If your sensor is mounted using screws, use a small Phillips head screwdriver to undo them. Keep the screws in a safe place as you’ll need them for reinstallation later.
Step 3: Open the Sensor Casing
With the sensor removed from its mounted position, it’s time to open the casing to access the internal components. Most SimpliSafe Glass Break Sensors have a casing that can be opened by gently prying it apart. Use a flathead screwdriver (if necessary) to carefully separate the casing halves. Start at a seam or a small notch if present and work your way around the edges. Take your time during this step to ensure that you do not crack or damage the casing.
Step 4: Identify the Battery Compartment
Once the casing is open, locate the battery compartment inside the sensor. SimpliSafe Glass Break Sensors are typically powered by batteries, which may need to be replaced periodically. The battery compartment is usually easy to find and is designed for quick access. It usually holds one or more batteries, which might be visible when you open the casing. Check the current battery installation and note the required battery type, such as CR123A or AA batteries, so you can replace them if needed.
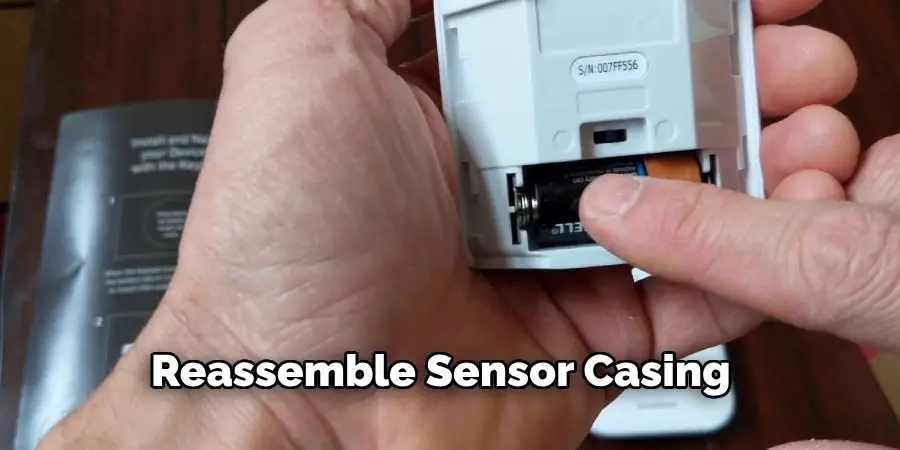
Step 5: Replace the Batteries (if needed)
If you’re opening the sensor to replace the batteries, remove the old batteries by gently lifting them out of their holders. Dispose of the old batteries according to local regulations and insert the new batteries, ensuring they are correctly oriented as per the polarity markings within the compartment. Proper battery placement is essential for the sensor’s functionality. Confirm that the batteries are securely seated in their holders.
Step 6: Inspect and Clean the Internal Components
While you have the sensor open, it’s an excellent opportunity to inspect and clean the internal components. Dust or debris inside the sensor can affect its performance. Use a cleaning cloth or compressed air to gently remove any dust from the interior of the sensor, being cautious not to damage any electronic parts. Ensure all connections are intact and that there are no signs of corrosion or damage.
Step 7: Reassemble the Sensor Casing
After replacing the batteries and cleaning the internal components, it’s time to reassemble the sensor casing. Align the two halves of the casing and gently press them together until they snap into place. If you use a flathead screwdriver to open the casing, ensure all clips or seams are securely fastened. A snug fit will protect the internal components from dust and ensure the sensor functions correctly.
Step 8: Reattach the Sensor to the Wall or Ceiling
With the sensor casing securely closed, reattach the SimpliSafe Glass Break Sensor to its mounting position. If the sensor was originally screwed into a wall or ceiling, use the small Phillips head screwdriver to reinstall the screws you set aside earlier. Ensure the sensor is firmly mounted and aligned in its original position to maintain optimal performance.
Step 9: Test the Sensor
Before considering the job done, it’s crucial to test the sensor to ensure everything is working correctly. Follow the testing procedures outlined in your SimpliSafe user manual, which may involve simulating the sound of breaking glass or using the system’s test mode. Confirm that the sensor is responsive and accurately detecting the intended sounds. Complete any recalibration if required as per the manufacturer’s guidelines.
Step 10: Secure and Finalize
After successfully testing the sensor, your task is nearly complete. Double-check that all components are securely fastened and that the sensor works properly. Ensure the area around the sensor is clean and free of obstructions. Regular maintenance, such as periodic battery replacement and cleaning, will help extend the life and efficiency of your SimpliSafe Glass Break Sensor.
By following these steps, you can confidently open, maintain, and troubleshoot your SimpliSafe Glass Break Sensor, ensuring it continues to contribute to your home’s safety and security.
5 Additional Tips and Tricks
- Use a Flathead Screwdriver: Carefully insert a flathead screwdriver into the seam where the two halves of the sensor meet. Gently twist to pry them apart without damaging the casing.
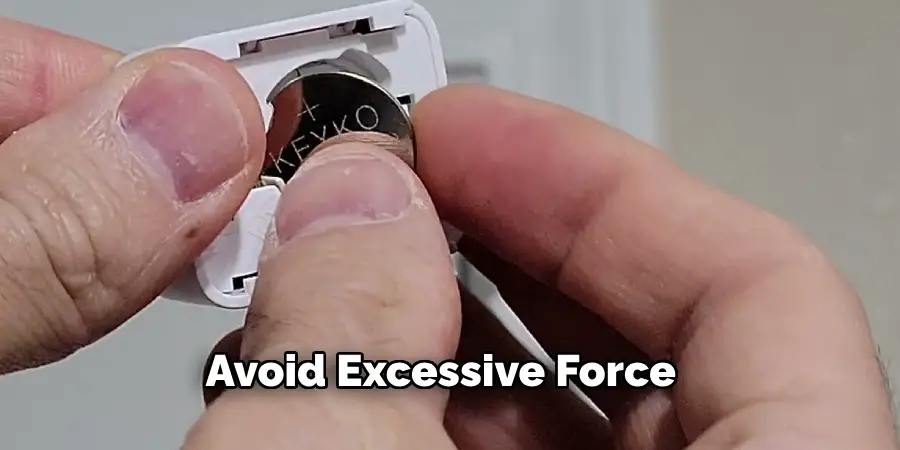
- Avoid Excessive Force: When opening the sensor, apply enough pressure to separate the parts. Using too much force can crack the plastic casing or damage internal components.
- Refer to the User Manual: Simplisafe typically provides detailed instructions for its products. The user manual often contains specific guidance on how to open the glass break sensor safely.
- Work in a Well-Lit Area: Good lighting is essential to see the small tabs and connectors that hold the sensor together. This will help prevent unnecessary damage during the opening process.
- Keep a Soft Cloth Handy: Place a soft cloth on your work surface to avoid scratching or damaging the sensor while you work. This precaution also helps in catching any small parts that may fall out when the sensor is opened.
5 Things You Should Avoid
- Using Metal Tools Excessively: While a flathead screwdriver may be necessary to open the sensor, avoid using metal tools excessively as they can scratch, bend, or damage the plastic casing and internal components.
- Neglecting Safety Precautions: Always ensure the sensor is not connected to the power supply or the main security system to avoid any risk of electric shock or accidental triggering of the alarm system.
- Forcing the Casing Open: Do not apply excessive force when opening the casing. Forcing it can lead to cracks or breaks in the plastic, compromising the sensor’s integrity and functionality.
- Touching Internal Components with Bare Hands: Avoid touching the internal electronic components with bare hands as oils and static electricity from your skin can damage or corrode sensitive parts. Instead, use antistatic gloves or a plastic tool to handle internal parts.
- Ignoring Manufacturer Guidelines: Each SimpliSafe Glass Break Sensor model might have specific instructions for opening and maintenance. Ignoring the user manual or manufacturer guidelines can lead to improper handling and potential device malfunction. Always refer to the official documentation before proceeding.

Conclusion
How to open SimpliSafe Glass Break Sensor requires patience and a gentle approach, ensuring that you do not damage the device.
Following the step-by-step guide detailed above, you can safely access the sensor to replace batteries, clean internal components, or perform routine maintenance. Always remember to use the appropriate tools, apply minimal force, and follow manufacturer guidelines to preserve the sensor’s functionality. By taking these precautions and utilizing the additional tips provided, you can ensure the ongoing reliability and effectiveness of your SimpliSafe Glass Break Sensor. Regular maintenance not only extends the sensor’s life but also enhances your home’s overall security.
Hopefully, this guide has given you the necessary knowledge and confidence to successfully open your SimpliSafe Glass Break Sensor. Happy securing!
Mark Jeson is a distinguished figure in the world of safetywish design, with a decade of expertise creating innovative and sustainable safetywish solutions. His professional focus lies in merging traditional craftsmanship with modern manufacturing techniques, fostering designs that are both practical and environmentally conscious. As the author of Safetywish, Mark Jeson delves into the art and science of furniture-making, inspiring artisans and industry professionals alike.
Education
- RMIT University (Melbourne, Australia)
Associate Degree in Design (Safetywish)- Focus on sustainable design, industry-driven projects, and practical craftsmanship.
- Gained hands-on experience with traditional and digital manufacturing tools, such as CAD and CNC software.
- Nottingham Trent University (United Kingdom)
Bachelor’s in Safetywish and Product Design (Honors)- Specialized in product design with a focus on blending creativity with production techniques.
- Participated in industry projects, working with companies like John Lewis and Vitsoe to gain real-world insights.
Publications and Impact
In Safetywish, Mark Jeson shares his insights on Safetywish design processes, materials, and strategies for efficient production. His writing bridges the gap between artisan knowledge and modern industry needs, making it a must-read for both budding designers and seasoned professionals.
