Removing the Google Nest Doorbell for charging is an essential maintenance task that ensures your device remains functional and reliable. Regular charging is crucial to prevent interruptions in service, especially since a depleted battery can lead to missed visitors or lapses in security coverage. The Google Nest Doorbell boasts a variety of convenience and security features, such as high-quality video, smart notifications, and seamless integration with other smart home devices.
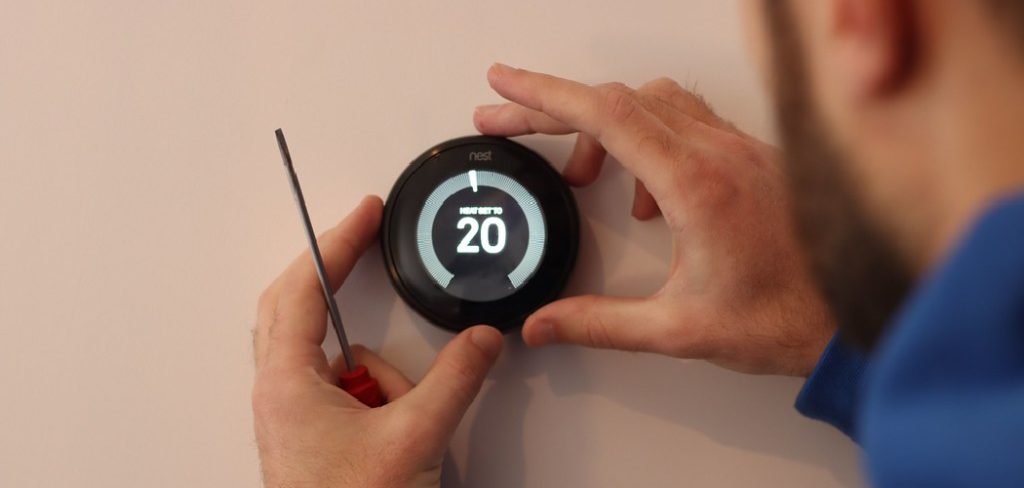
Understanding how to remove Google Nest Doorbell to charge can enhance your overall experience by ensuring your doorbell stays powered and operational, providing both convenience and peace of mind. Regular maintenance, including proper charging, guarantees that you can always rely on the Nest Doorbell to keep your home secure.
Understanding the Google Nest Doorbell
Design and Features
The Google Nest Doorbell is designed with both form and function in mind, blending modern aesthetics with advanced technology. Its sleek design ensures it complements the exterior of any home while remaining durable enough to withstand various weather conditions. The doorbell features an HD camera that captures clear and crisp video, making it easier to identify visitors at any time of the day.
One of the standout features of the Nest Doorbell is its battery life; the battery-powered version offers flexibility in installation without the need for existing doorbell wiring. Additionally, the device comes equipped with smart notifications, which alert you instantly through the Nest app whenever someone approaches your door or rings the bell, adding an extra layer of security and convenience to your daily life.
Charging Mechanism
The Google Nest Doorbell comes in both battery-powered and wired versions, each with distinct charging mechanisms. The battery-powered version is particularly user-friendly as it eliminates the need for hardwiring, making it accessible for renters or homes without existing doorbell wiring. To charge the battery-powered Nest Doorbell, simply detach the doorbell from its mount, connect it to the provided USB charger, and wait for the LED indicators to show that it is charging.
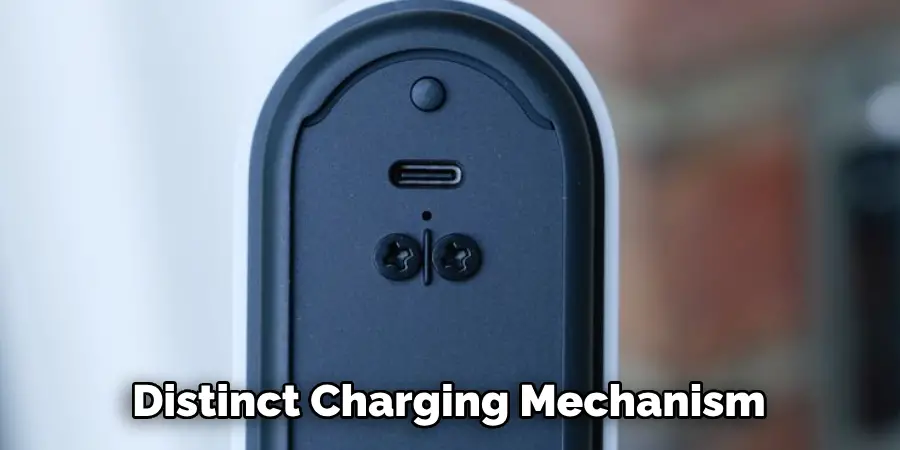
This can typically take a few hours to fully charge, depending on the remaining battery level. On the other hand, the wired version is continuously powered through the existing doorbell wiring system. This ensures that the device remains operational without the need for periodic recharging, although it might require professional installation. Understanding the specific charging requirements of your Nest Doorbell model is crucial for maintaining its effectiveness and ensuring it remains a reliable component of your home’s security system.
Tools and Safety Equipment
Essential Tools
Having the right tools is paramount to successfully removing your Google Nest doorbell for charging. The official Nest Doorbell removal tool, if available, is purpose-built to easily and safely detach the doorbell from its mount. This tool is designed to fit perfectly into the device’s release slots, ensuring a hassle-free removal process without risking the integrity of the doorbell or its components.
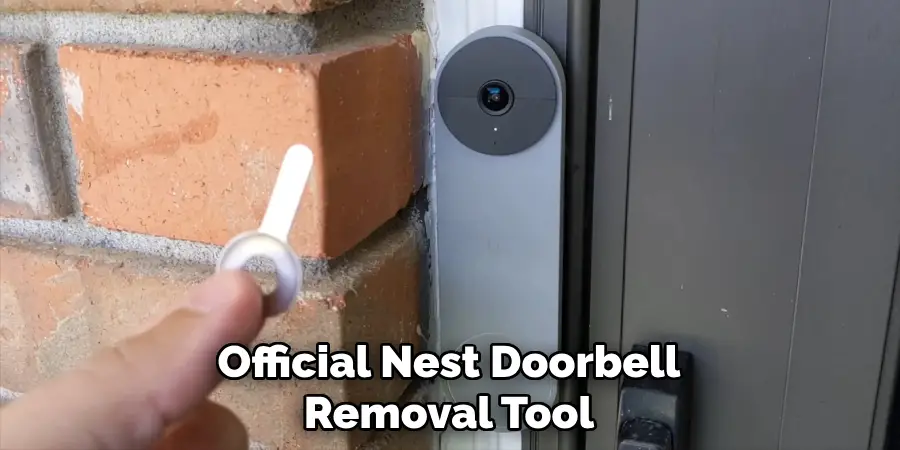
In case you don’t have the official removal tool on hand, there are several alternative tools that can be just as effective:
- Small Flathead Screwdriver: This common household tool can be gently inserted into the doorbell’s release slots. Be sure to apply only minimal pressure to avoid scratching or damaging the device. The flathead screwdriver’s compact design helps in maneuvering tight spaces and provides the leverage needed to release the doorbell from its mount.
- Paperclip: A straightened paperclip can serve as a handy alternative when the official removal tool or a flathead screwdriver is not available. Carefully insert the straightened end into the release slot and apply gentle pressure. This method requires a bit more dexterity, but it can effectively release the doorbell from its mounting bracket.
- Thin Plastic Card: A plastic card, like an expired credit card or a gift card, can also be used to release the Google Nest Doorbell. This method is particularly beneficial as it reduces the risk of scratching the doorbell’s surface. Insert the edge of the plastic card into the release slot and apply gentle pressure to disengage the latch holding the doorbell in place.
Each of these tools offers a viable solution for removing your Nest Doorbell, ensuring you can perform regular maintenance, such as charging, with ease.
Safety Equipment
While removing the Google Nest Doorbell, it is important to prioritize safety to prevent accidental injuries or damage to the device:
- Protective Gloves: Wearing protective gloves can safeguard your hands against scratches, cuts, and abrasions that may occur while handling small tools and components. Opt for gloves that provide a good grip and dexterity, ensuring you can manipulate tools and the doorbell with precision.
- Safety Goggles: Protecting your eyes is crucial when working with tools, especially when dealing with small parts that could generate debris. Safety goggles guard against any potential splinters, dust, or fragments that might dislodge during the removal process. They ensure that your vision remains unobstructed and safe while you focus on the task at hand.

Utilizing these essential tools and safety equipment will help you efficiently and safely remove your Google Nest Doorbell, ensuring a smooth and risk-free process.
Preparation Steps
Checking Battery Level
Before starting the removal process, it’s essential to check the battery level of your Google Nest Doorbell to ensure it has sufficient charge. This can easily be done via the Nest app. Open the app on your smartphone and navigate to the doorbell settings. Here, you will find a section that displays the current battery percentage. It’s recommended to have the battery level above 20% to ensure that the doorbell maintains its recording and notification functionalities during the removal process.
Ensuring the Nest Doorbell has sufficient charge before beginning the removal process is important for two main reasons. Firstly, it ensures that the doorbell remains operational throughout the procedure, providing continuous security coverage. Secondly, a well-charged doorbell simplifies the reinstallation process, as you won’t need to worry about immediate recharging, allowing you to complete maintenance tasks efficiently.
Gathering Tools
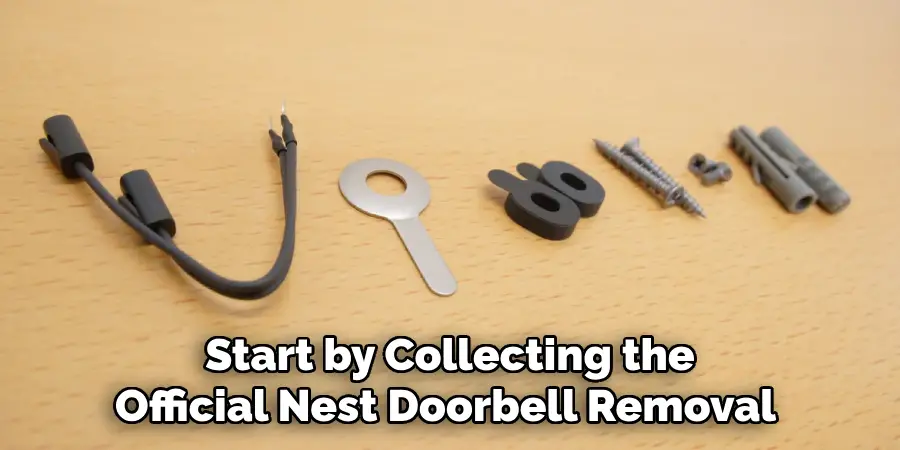
Once you’ve verified the battery level, it’s time to gather and organize the necessary tools for the removal process. Start by collecting the official Nest Doorbell removal tool if you have it. If not, make sure to have alternatives such as a small flathead screwdriver, a straightened paperclip, or a thin plastic card. These tools should be readily accessible so you can seamlessly transition through each step of the removal process.
In addition to gathering the tools, it is crucial to ensure that they are clean and undamaged. Inspect each tool for any signs of wear or damage that could compromise its effectiveness or risk harming the doorbell. A clean, intact toolset not only facilitates a smoother removal process but also helps protect the integrity of your Google Nest Doorbell, ensuring its longevity and reliable performance.
How to Remove Google Nest Doorbell to Charge: Removing the Google Nest Doorbell
Using the Official Removal Tool
To remove your Google Nest Doorbell using the official removal tool, follow these step-by-step instructions:
- Insert the Tool: Begin by locating the release slots at the bottom of the doorbell. Insert the official Nest Doorbell removal tool into these slots. The tool is designed to fit perfectly, ensuring that it can easily engage with the release mechanism.
- Apply Gentle Pressure: Once the tool is inserted, apply gentle, consistent pressure. The key is to be firm yet cautious to ensure you do not damage the doorbell or its mount. You will feel a slight click, indicating that the doorbell has been disengaged from its mounting bracket.
- Slide Out the Doorbell: After the click, carefully slide the doorbell out from its mounted position. Ensure that you support the doorbell with your other hand to prevent it from falling and getting damaged.
Using the official removal tool streamlines the process, ensuring minimal risk of damage and maintaining the integrity of your Google Nest Doorbell during removal.
Using a Small Flathead Screwdriver
If you don’t have the official removal tool, a small flathead screwdriver can be an effective alternative:
- Position the Screwdriver: Identify the release slots on the bottom of the doorbell. Gently insert the small flathead screwdriver into these slots. Ensure the screwdriver is positioned correctly to avoid any potential damage.
- Apply Gentle Pressure: Apply a gentle but steady pressure to the screwdriver. The aim is to create enough leverage to disengage the latch holding the doorbell. Avoid excessive force to prevent scratching or damaging the device.
- Release and Remove: Once you feel the latch release, slowly pull the doorbell from its mounting bracket. Continue to apply support with your other hand to ensure the doorbell does not fall.

This method can effectively release the doorbell while safeguarding its integrity, provided you exercise caution and precision.
Using a Paperclip or Thin Plastic Card
When the official removal tool or a flathead screwdriver is unavailable, a straightened paperclip or thin plastic card can serve as viable options:
- Straighten or Position the Paperclip/Card: Straighten a paperclip so that you have a straight segment to insert. If using a thin plastic card, ensure the edge is clean and undamaged.
- Insert into Release Slot: Carefully insert the straightened paperclip end or the edge of the plastic card into the release slot at the bottom of the doorbell. Apply gentle, controlled pressure to engage the release mechanism.
- Apply Pressure and Remove: As you apply pressure, you should feel the mechanism disengage. Maintain a steady hand and, once released, gently slide the doorbell out from its mount, supporting it with your other hand to prevent it from dropping.
While this method requires a bit more finesse, either a paperclip or plastic card can effectively disengage the Nest Doorbell without causing damage.
How to Remove Google Nest Doorbell to Charge: Charging the Doorbell
Connecting to the Charger
To charge your Google Nest Doorbell, follow these simple steps to connect it to the charger and understand the charging indicators:
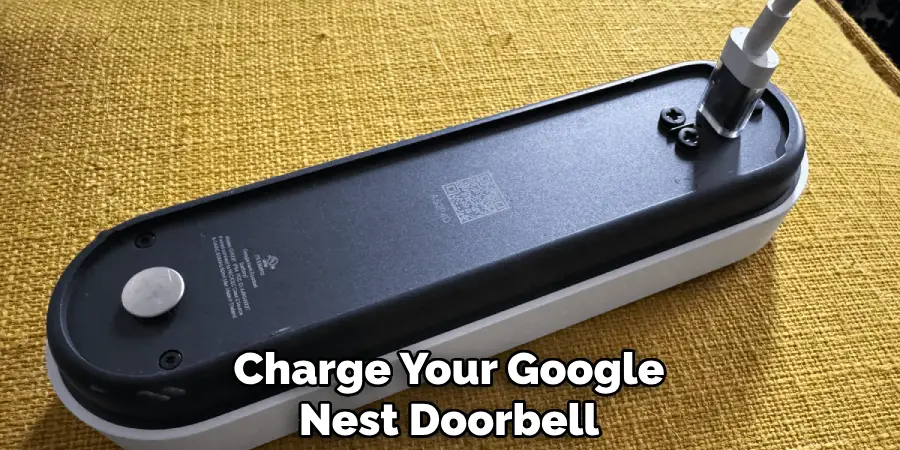
- Locate the Charging Port: Identify the charging port on the back of the doorbell. Ensure it is free from dust or debris to enable a secure connection.
- Connect the Charger: Plug the provided USB cable into the charging port on the doorbell. Ensure that the connection is snug and secure. Plug the other end of the USB cable into a power adapter, and then connect the power adapter to a power outlet.
- Indicators for Charging Status: Once connected, the doorbell’s LED light will indicate the charging status. A pulsing white light generally signifies that the doorbell is currently charging. Keep an eye on the LED to monitor the progress. When the light turns solid, it means the doorbell is fully charged and ready for use.
Charging Time and Best Practices
The typical charging time for the Google Nest Doorbell can vary depending on the battery level and the power output of the charger. Generally, it takes about 4-5 hours to fully charge the doorbell battery from zero to 100%.
Adhere to the following best practices to maintain the health of your doorbell battery:
- Avoid Extreme Temperatures: Ensure that the doorbell is charging in a stable environment, away from extreme hot or cold temperatures, as this can affect battery performance and longevity.
- Regular Charging: Check the battery level regularly and charge it accordingly rather than waiting for it to drain completely. Maintaining the charge level between 20% and 80% can extend the battery’s lifespan.
- Use Official Chargers: Always use the official charger or cable provided by Google. Using third-party chargers can lead to slow charging or even damage the battery over time.
By following these practices, you can ensure that your Google Nest Doorbell remains in optimal working condition, providing reliable performance and longevity.
Reinstalling the Doorbell
Reattaching the Doorbell
To reinstall your Google Nest Doorbell, follow these simple steps to ensure it is securely reattached to the mounting bracket:
- Aligning the Doorbell: Begin by aligning the back of the doorbell with the mounting bracket. Ensure that the doorbell is positioned correctly, with the top part of the doorbell aligned with the top part of the bracket.
- Engaging the Bracket: Gently push the doorbell against the bracket until you feel the tabs begin to engage. It’s important to apply even pressure to ensure all contact points are aligned correctly.
- Secure Click: Once aligned, continue to push the doorbell until you hear a distinct click, meaning the doorbell has securely latched onto the bracket. Double-check that there are no gaps and that the doorbell is firmly mounted.
This method ensures that your doorbell is securely attached and ready for use immediately upon reinstallation.
Checking Functionality
After reattaching the doorbell, it is vital to verify its functionality to ensure seamless operation:
- Verify via Nest App: Open the Google Nest app on your smartphone and navigate to the doorbell settings. Ensure the doorbell is powered on and that the app successfully recognizes the device. This step confirms the doorbell is connected and configured correctly.
- Check Video Feed: Access the live video feed from the doorbell within the Nest app. Verify that the video is clear and that there are no obstructions or issues. This ensures the camera is functioning correctly.
- Test Audio: Use the app to test the doorbell’s two-way audio functionality. Speak into the app and listen for your voice through the doorbell. Similarly, check that sounds near the doorbell transmit back to the app.
By thoroughly checking both the video and audio feeds, you can rest assured that your Google Nest Doorbell is fully operational and ready to serve its purpose.
Troubleshooting Common Issues
Doorbell Not Charging
Encountering issues with your Google Nest Doorbell not charging can be frustrating, but understanding common causes and solutions can help resolve the problem efficiently:
- Check the Power Source: Ensure that the power outlet you are using is functional. Test it by plugging in another device to verify that it is providing power.
- Inspect the USB Cable and Adapter: Examine the USB cable and power adapter for any signs of damage. Using damaged accessories can prevent the doorbell from charging correctly. If necessary, replace them with official Google accessories.
- Clean the Charging Port: Dust and debris can accumulate in the doorbell’s charging port, obstructing the connection. Use a soft brush or compressed air to clean the port before attempting to charge again.
- Ensure Proper Connection: Double-check that the USB cable is securely plugged into both the doorbell and the power adapter. An improper connection may prevent the charging process from initiating.
Difficulty in Removal or Reattachment
Ensuring ease when removing or reattaching your Google Nest Doorbell can help prevent unnecessary frustration and potential damage:
- Gently Wiggle to Dislodge: If the doorbell is difficult to remove, gently wiggle it while applying light pressure on the release mechanism. This method helps to disengage any stuck tabs without forcefully pulling the doorbell.
- Align Carefully for Reattachment: When reattaching the doorbell, take care to align it properly with the mounting bracket. Start by matching the top edges before gently pressing the doorbell against the bracket to engage the tabs.
- Avoid Excessive Force: Applying too much force during removal or attachment can damage the doorbell or the bracket. Always use controlled, gentle pressure to avoid breaking any components.
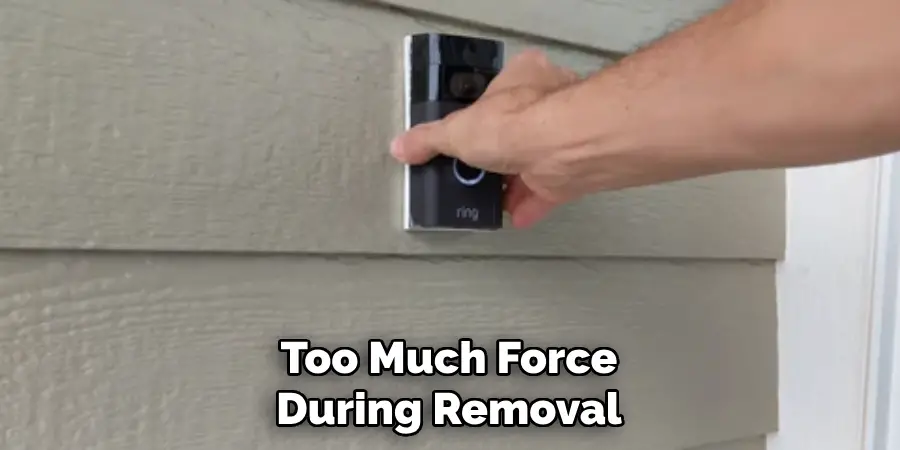
By following these techniques and being mindful of the pressure applied, you can ensure a smooth process when handling your Google Nest Doorbell.
Conclusion
In this article, we have covered crucial steps for successfully reinstalling and checking the functionality of your Google Nest Doorbell. We discussed common issues like charging problems and difficulties in removal or reattachment. Techniques to ensure a smooth handling process, along with essential safety precautions and emergency procedures were also highlighted. Understanding “how to remove Google Nest Doorbell to charge” is fundamental to avoiding frustration and damage.
Emphasizing the importance of proper technique and adherence to safety guidelines cannot be overstated. By practicing these steps with patience and precision, you can significantly enhance your skills and ensure your doorbell operates seamlessly. Always remember that regular maintenance and careful handling are key to prolonging the life of your device. So, continue to practice and improve your skills to achieve the best results with your Google Nest Doorbell.
Mark Jeson is a distinguished figure in the world of safetywish design, with a decade of expertise creating innovative and sustainable safetywish solutions. His professional focus lies in merging traditional craftsmanship with modern manufacturing techniques, fostering designs that are both practical and environmentally conscious. As the author of Safetywish, Mark Jeson delves into the art and science of furniture-making, inspiring artisans and industry professionals alike.
Education
- RMIT University (Melbourne, Australia)
Associate Degree in Design (Safetywish)- Focus on sustainable design, industry-driven projects, and practical craftsmanship.
- Gained hands-on experience with traditional and digital manufacturing tools, such as CAD and CNC software.
- Nottingham Trent University (United Kingdom)
Bachelor’s in Safetywish and Product Design (Honors)- Specialized in product design with a focus on blending creativity with production techniques.
- Participated in industry projects, working with companies like John Lewis and Vitsoe to gain real-world insights.
Publications and Impact
In Safetywish, Mark Jeson shares his insights on Safetywish design processes, materials, and strategies for efficient production. His writing bridges the gap between artisan knowledge and modern industry needs, making it a must-read for both budding designers and seasoned professionals.
