
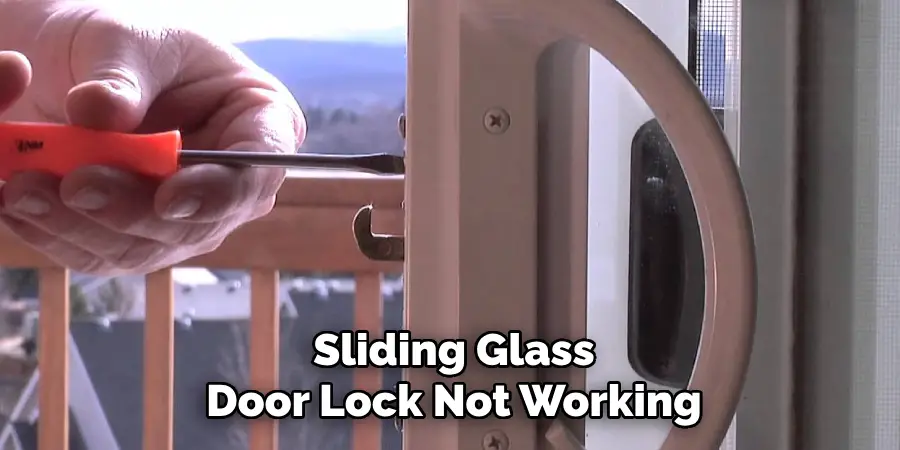
Are you tired of your sliding glass door lock not working? Here’s a guide on how to replace it and make your home more secure.
How to replace the lock on a sliding glass door is a straightforward task that can enhance the security of your home. Over time, locks can wear out or need upgrading for better protection. This guide will walk you through the steps to successfully replace the lock, ensuring your property remains safe and secure. With a few essential tools and careful instructions, you can easily undertake this DIY project without professional assistance.
Whether dealing with a broken lock or simply looking to boost your home’s security, this guide will make the process stress-free and efficient.
What Will You Need?
Before getting started, gather all the necessary tools and equipment. Here’s a list of items you’ll need:
- New Sliding Glass Door Lock
- Screwdriver (Phillips or Flathead depending on screws)
- Drill
- Drill Bits (if required)
- Measuring Tape
- Pencil
Once you have everything on the list, you’re ready to begin.
10 Easy Steps on How to Replace the Lock on a Sliding Glass Door
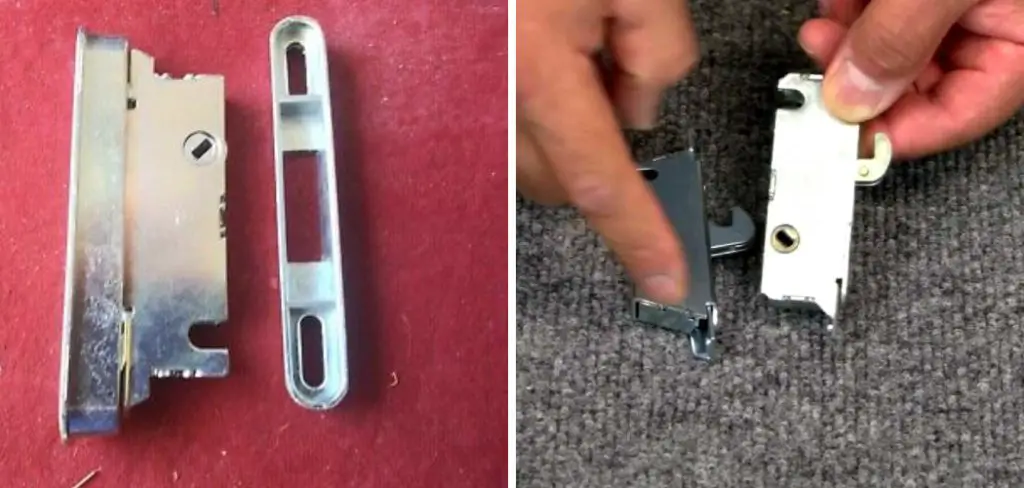
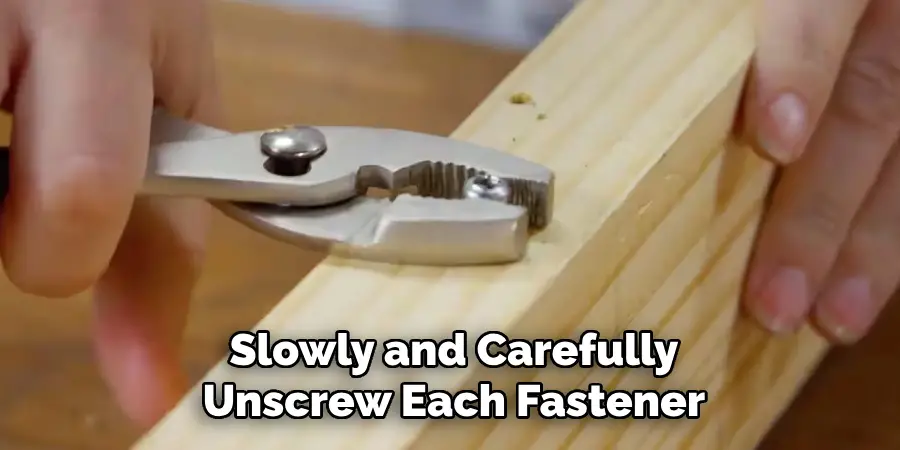
Step 1: Remove the Old Lock
To begin replacing your sliding glass door lock, you first need to remove the old lock. Carefully examine the current lock to understand its attachment points. Typically, these locks are secured with screws that are visible along the lock’s casing. Use the appropriate screwdriver—either a Phillips or flathead—based on the type of screw used. Slowly and carefully unscrew each fastener, making sure to keep the removed screws in a safe place for potential future use or disposal.
If the lock is particularly old or damaged, you might need to use more force to detach it from the door, ensuring that you do not damage the surrounding glass or the door frame.
Step 2: Measure the Lock Area
With the old lock removed, measuring the area where the new lock will be installed is essential. This ensures that the new lock will fit snugly and function correctly. Use a measuring tape to determine the height and width of the lock placement area on your sliding glass door. It can be helpful to jot down these measurements with a pencil to ensure accuracy. Precise measurements will guide you in properly aligning the new lock and help avoid any alignment issues once installation begins.

Step 3: Choose the Right Lock
Now that you have the measurements ensure your new lock is compatible with the prepared space on your sliding glass door. Various types of sliding door locks are available, including hook-style, loop-lock, and deadbolt options. Selecting one that fits both the dimensions you’ve measured and your security needs is crucial. Make sure the lock you choose is strong, durable, and from a reputable manufacturer to guarantee the safety and security of your home. Additionally, check the packaging or instructions for any specific tools or additional parts required to complete the installation.
Step 4: Align and Mark the New Lock Position
Once you have chosen the appropriate lock for your sliding glass door, it’s time to align it with the measured area. Position the new lock against the door where it will be installed. Ensure it sits flush with the door surface and that the locking mechanisms will function smoothly. With the lock in place, use a pencil to mark any necessary drill holes on the door’s surface. This will help guide your installation and ensure everything is correctly aligned. Double-check the alignment and measurements before proceeding to avoid errors during installation.
Step 5: Drill Pilot Holes
With the positions marked, the next step is to drill pilot holes for the screws that will secure the new lock in place. Using the appropriate size drill bit compatible with your screws, carefully drill into the marked spots on the sliding glass door frame. Drilling pilot holes helps to prevent the door material from cracking and ensures the screws will go in smoothly. Be sure to hold the drill steady to maintain precision, and drill just deep enough to accommodate the screws without penetrating too far into the door frame.
Step 6: Install the New Lock
With the pilot holes in place, you’re ready to install the new lock. Align the lock with the holes you’ve drilled, ensuring it’s positioned accurately according to your earlier measurements and markings. Start by inserting one screw to keep the lock adequately aligned, then proceed to insert and tighten the remaining screws. Use the screwdriver to fasten them securely, being cautious not to overtighten as this can strip the screw threads or damage the lock or door frame. Once all screws are tightened and the lock is firmly in place, examine the alignment to make sure it sits flush and operates as intended.
Step 7: Test the Lock
After installing the new lock, it’s essential to test its functionality. Slide the door open and close a few times to ensure that the lock engages smoothly and that the latch or bolt enters the receiver on the door frame without obstruction. Lock and unlock the mechanism several times to confirm that it operates without sticking or resistance. This testing phase will help verify that the installation was successful and that no adjustments are needed. If you encounter any issues, such as difficulty locking or unlocking, revisit the alignment and ensure that the screws are tightened appropriately. Ensuring your new lock works seamlessly will give you peace of mind regarding your home’s security.
Step 8: Adjust the Lock as Needed
After testing the lock, some minor adjustments are required to ensure optimal operation. If the lock does not engage smoothly or seems to be sticking, check the alignment of the lock and the striker plate on the door frame. Loosen the screws slightly and adjust their positioning as needed to achieve a seamless fit. The lock and striker must be perfectly aligned to function correctly. Additionally, ensure that all screws are tightened sufficiently after making adjustments to secure the lock firmly in place. This step will ensure that your sliding glass door lock is practical and reliable in securing your home.
Step 9: Maintain the Lock Regularly
To ensure the longevity and effective functioning of your sliding glass door lock, regular maintenance is critical. Periodically check the lock for signs of wear or looseness and tighten any screws if necessary. Clean the lock mechanism and surrounding area to prevent the buildup of dirt and debris, which can hinder its operation. Lubricate the locking mechanism every few months with a silicone-based lubricant to keep it moving smoothly. Regular maintenance not only prolongs your lock’s life but also ensures your home’s continued security.
Step 10: Enjoy Your Secured Home
Congratulations on the successful installation of your new sliding glass door lock! With these steps, you’ve added an essential layer of security to your home. Beyond just the lock, consider evaluating other aspects of your home’s security system. Replacing or reinforcing weak door frames and securing windows more robustly can further enhance your safety. Additionally, consider integrating a home security system with cameras or alarms for comprehensive protection. As you take these measures, you’ll protect your properties and loved ones and enjoy greater peace of mind, knowing that your living space is secure.
By following these steps, you can confidently and successfully install a sliding glass door lock, providing your home security and peace of mind.

5 Things You Should Avoid
- Using Incorrect Tools: Always ensure you use the right tools for the job. Using unsuitable tools can damage the lock or door and make the replacement process more difficult.
- Ignoring Safety Precautions: Safety should be your top priority. Avoid neglecting essential safety measures such as wearing protective gloves and glasses to prevent injuries.
- Skipping Instructions: Read the installation instructions specific to the new lock. Each lock can have unique requirements, and steps must be included in proper installation.
- Forcing Components: Never force any components to fit. If something doesn’t align or move quickly, check for alignment or potential obstructions instead of applying excessive force, which could cause permanent damage.
- Rushing the Process: Take your time during installation. Rushing can lead to errors and might require additional time to fix any mistakes. Correctly measure and double-check your work to ensure everything is secure.
Once you have successfully installed a sliding glass door lock, check and maintain it to ensure its continued effectiveness regularly.
Conclusion
How to replace the lock on a sliding glass door is a straightforward but critical task that enhances the security of your home.
Following the detailed steps above will guide you through the process effectively, from removing the old lock to adjusting and maintaining the new one. You can ensure a successful installation by carefully preparing, accurately measuring, and addressing each step with precision. Additionally, being mindful of potential pitfalls, such as using incorrect tools or ignoring alignment issues, will help prevent common mistakes. Regular maintenance post-installation will not only extend the lifespan of the lock but will also assure you that the security of your sliding glass door is uncompromised.
With careful attention to detail and commitment to ongoing upkeep, you can enjoy the peace of mind of knowing your home is well-protected.