Are you a Wyze camera owner who needs to update the wifi settings on your device? You recently changed your home network or are moving to a new location.
Setting your Wyze Camera to a new Wi-Fi network is a straightforward process that ensures your device remains connected and accessible for surveillance and monitoring. Whether you’ve changed your internet service provider, updated your router, or simply want to connect to a different network, reconfiguring the Wi-Fi settings on your Wyze Camera is essential to maintain its functionality. In this guide, we will walk you through the necessary steps on how to set wyze camera to new wifi, ensuring that your security setup remains intact and operational.
With a few simple adjustments, you’ll have your camera back online, ready to capture and stream footage wherever you need it.
What Will You Need?
Before we jump into the steps, make sure you have the following items on hand:
- Your Wyze Camera: You’ll need your camera to access its settings and make changes.
- A Smartphone, Tablet, or Laptop That Can Connect to Wi-fi: You’ll use this device to update the Wi-Fi network for your Wyze Camera.
- Stable Internet Connection: If you’re changing the Wi-Fi settings because of a faulty connection, ensure you have an alternative internet source to keep your device connected during the setup process.
Once you have these items, you’re ready to proceed with the steps below.
10 Easy Steps on How to Set Wyze Camera to New Wifi
Step 1. Open the Wyze App:
To begin connecting your Wyze Camera to a new Wi-Fi network, you will first need to open the Wyze app on your smartphone or tablet. Ensure that your device is connected to a Wi-Fi network and has an active internet connection. The Wyze app is the central hub for managing all your Wyze devices, including cameras, and is available for download on both Android and iOS platforms.
If you haven’t installed it, head to the Google Play Store or Apple App Store, download the app, and log in to your account. Once you’ve opened the app, ensure you’re logged in with the correct credentials associated with your Wyze camera. This step is crucial because it sets the stage for managing your camera’s settings and ensures seamless integration with your updated network configuration.
Step 2. Access the Device List:
After opening the Wyze app, you will see a list of all devices linked to your account. Locate your Wyze Camera on this list. If you have multiple cameras or other Wyze devices, select the correct one for which you intend to update the Wi-Fi settings. This list is the starting point for any modifications or updates needed on your devices, allowing you to efficiently manage your Wyze Camera’s network connection alongside any other configurations required for optimal performance. Once you have identified the camera, tap on its name or icon to proceed to its settings menu, where you can make the necessary changes.
Step 3. Enter the Camera Settings:
After selecting your Wyze Camera from the device list, you will be directed to the camera’s main interface. From here, locate and tap the gear icon or the settings button, typically in the screen’s top right corner. This action will take you to the camera’s settings menu, where you can adjust its various features and preferences. Accessing the settings is a critical step, as this is where you will manage the network connection and update the Wi-Fi network. Be sure to remain on this screen to effectively continue with the necessary configuration changes for your Wyze Camera.
Step 4. Select Wi-Fi Settings:
You’ll find an option labeled “Wi-Fi Settings” or similar within the camera settings menu. Tap on this option to access your Wyze Camera’s current network configuration details. This section allows you to view and update the Wi-Fi network to which your camera is connected. It’s crucial to verify the current details and proceed cautiously to ensure the update is performed correctly. Once you’re ready to make the change, proceed to the next step to switch the network settings to your new Wi-Fi network, ensuring a continuous and reliable connection for your camera’s operation.
Step 5. Connect to the New Wi-Fi Network:
Once you’ve accessed the Wi-Fi settings, you will see an option to select a new network or change the existing one. Tap on “Change Network” or a similar option that is provided. A list of available Wi-Fi networks will appear on the screen. Select your new network from this list. You will be prompted to enter the Wi-Fi password for this network. Ensure that you input the correct password to avoid connection issues. Once you have entered the password, confirm the selection. Your Wyze Camera will attempt to connect to the new Wi-Fi network. This process may take a few moments, so be patient and await confirmation that the connection is successful before proceeding to the next step.
Step 6. Test the Connection:
After connecting the Wyze Camera to the new Wi-Fi network, it’s essential to verify the connection to ensure everything is functioning correctly. Navigate back to the camera’s main interface within the Wyze app. You should be able to see a live video feed from the camera. If the feed is visible and the camera responds to commands through the app, your new network connection is operational. If you encounter any issues, double-check the Wi-Fi settings and password entered in the previous steps. Ensuring a stable connection at this stage is crucial for the seamless operation of your camera under the new network configuration.
Step 7. Update Firmware:
Once you have confirmed that the connection to the new Wi-Fi network is stable and the camera is functioning correctly, it’s a good practice to update the firmware of your Wyze Camera. To do this, remain in the Wyze app and return to the camera’s settings menu. Look for an option labeled “Firmware Update” or something similar. Tap on it to check for any available updates.
Keeping the firmware up to date ensures that your camera has the latest features, security patches, and improvements. If an update is available, follow the prompts to download and install it. This process may take a few minutes, so ensure your device remains connected to a stable Wi-Fi network. After the update is complete, your Wyze Camera will restart, and you can resume using it with confidence in its enhanced performance and security.
Step 8. Reorganize Camera Placement:
With the firmware updated and the camera successfully connected to the new Wi-Fi network, consider assessing its current placement to ensure optimal coverage and connectivity. The placement of your Wyze Camera can significantly impact both the video quality and signal strength. Ensure that it is not obstructed by walls or large objects that might hinder the Wi-Fi signal.
Additionally, position the camera at a height and angle that provides the best view of the desired area. This step is particularly useful if you notice any inconsistencies in the video feed or connectivity strength after switching networks. Carefully adjust the camera’s position and test the live video feed again to confirm enhanced performance before finalizing its setup.
Step 9. Finalize and Save Changes:
After ensuring your Wyze Camera is optimally positioned and functioning well with the new network and updated firmware, reviewing all settings to confirm that all adjustments have been correctly applied is important. Revisit the settings menu to double-check any configurations you’ve made, such as motion detection or notifications. Once satisfied, save any changes, if required, and exit the settings menu. Regular maintenance checks like these will ensure your camera operates smoothly and continues to provide reliable security and monitoring.
Step 10. Troubleshooting Common Issues:
If you encounter any challenges with your Wyze Camera after reconfiguring the settings or during regular use, it’s helpful to have a troubleshooting guide handy. Begin by ensuring the camera is within range of the Wi-Fi router and that no significant obstructions exist. Check that the router is functioning correctly and that other devices can connect to the network without issues. If the video feed is lagging or not displaying, try restarting both the camera and the Wyze app.
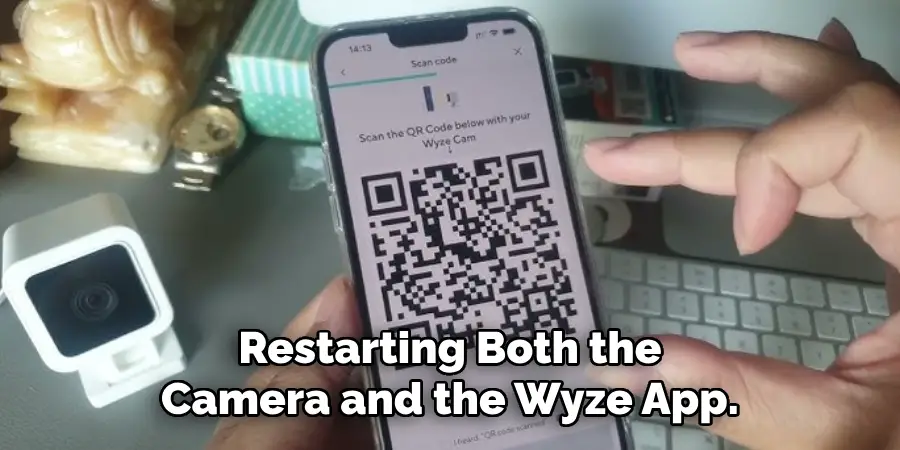
Sometimes, a simple power cycle can resolve many minor issues. Additionally, verify that all app permissions on your smartphone are enabled for maximum functionality. If problems persist, consult the support resources provided by Wyze for detailed solutions, or consider reaching out to their customer support team for further assistance.
By following these steps and recommendations, you can easily switch the Wi-Fi network for your Wyze Camera without any complications.
Conclusion
How to set Wyze camera to new wifi network may seem daunting at first, but by following the outlined steps thoroughly, you can complete the process efficiently.
Starting with accessing and updating your network settings, ensuring a stable connection, updating the firmware, and correctly positioning the camera, each step plays a critical role in the camera’s optimal performance. Regularly checking and updating software and hardware configurations ensures your device remains reliable and secure. Keeping troubleshooting techniques handy ensures you’re prepared for any issues.
By adhering to these steps, you maintain a seamless and secure monitoring system for your home or office environment.
