
Do you want to use traditional locks that can easily be picked or are prone to mechanical failure? If you’re looking for a more secure and convenient option, then a Yale lock might be the solution.
How to set Yale lock code is an essential step in ensuring the security and convenience of accessing your property. Whether you’re installing a new lock or updating an existing code, understanding the process is crucial for optimum protection. Yale locks, known for their reliability and user-friendly features, provide homeowners with peace of mind and the flexibility to manage access without traditional keys.
This guide will walk you through the straightforward steps to set or change your Yale lock code, enhancing your home security with minimal effort.
What Will You Need?
Before diving into the process, ensure you have all the necessary items. You’ll need the following:
- Yale lock (keyless or traditional)
- Master code (default or previously set)
- New user code (if setting a new one)
- Screwdriver
Once you have these items, follow the instructions below to set your Yale lock code.
10 Easy Steps on How to Set Yale Lock Code
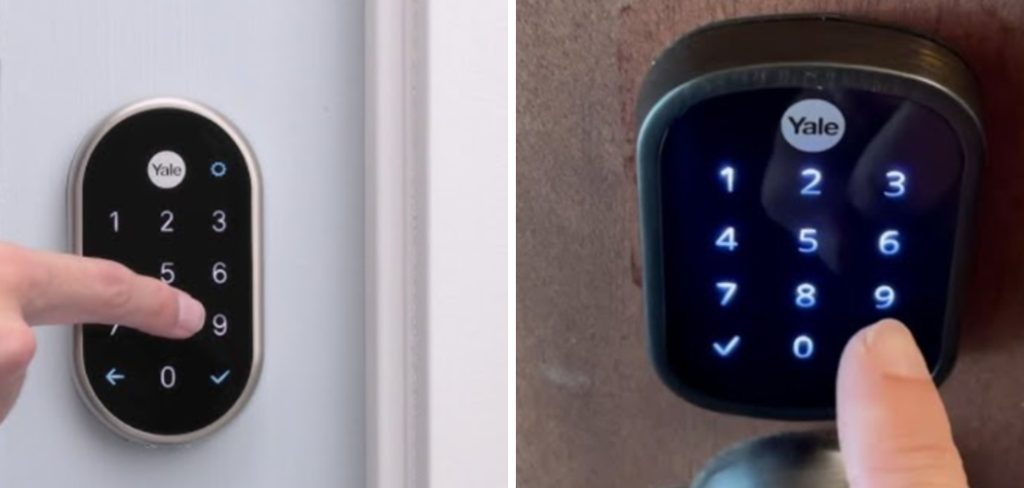
Step 1. Enter Master Code:

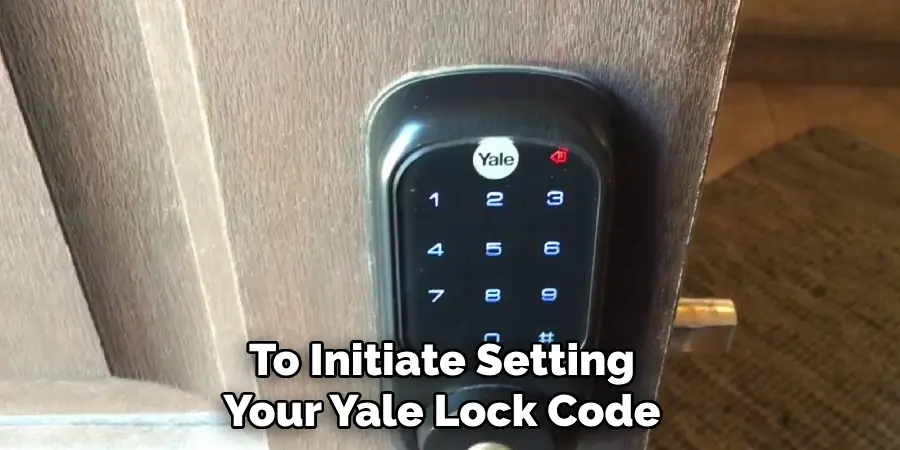
To initiate setting your Yale lock code, begin by entering the master code. This code acts as your gateway to configuring the lock’s settings. Ensure you have the correct master code, which could be the default code that came with your lock or a custom one you have previously established. If the lock is new, refer to the manual to find this default master code.
Once you have it, approach the lock and enter the master code on the keypad. The lock should indicate a successful entry, typically through an auditory beep or a visual signal like a flashing light. This confirmation means the lock is now in programming mode, allowing you to proceed further with setting a new user code or altering existing settings. It’s crucial to perform this step carefully to prevent unnecessary lockouts or errors during reprogramming.
Step 2. Access Programming Menu:
After successfully entering the master code, the next step is to access the programming menu of your Yale lock. This menu is essential for changing settings and setting a new user code. You may need to press a specific button or sequence on the keypad immediately after entering the master code to enter the programming menu.
Refer to your lock’s user manual for the exact instructions, which might vary slightly depending on the lock model. Upon accessing the programming menu, the lock will again confirm with a beep or flashing light, indicating that it is ready for further instructions. You are now prepared to set a new user code or modify existing codes.
Step 3. Select User Code Setting:
Within the programming menu, locate the option for user code settings. This step allows you to add, modify, or delete user codes associated with your Yale lock. The menu might list various settings, so select the correct option corresponding to user code management. Once selected, the lock will prompt you to either add a new code or alter an existing one. Follow the on-screen instructions or input prompts provided to proceed. Ensuring accuracy in this step is crucial to maintaining secure access.
Step 4. Enter New User Code:
After selecting the user code setting, the next step is to enter the new user code you wish to set. Carefully input the desired code using the lock’s keypad. Ensure that the code is both secure and memorable for authorized users. Some locks may require you to confirm the new code by re-entering it immediately after the initial entry. This step helps prevent errors and ensures that the correct code is stored.
Once successfully entered and confirmed, the lock will provide an audible beep or a visual signal, confirming that the new user code has been set. This new code can now be used to lock and unlock the door, providing convenient and secure access to your property.
Step 5. Confirm New User Code:
The next step is to confirm the entry to ensure that your new user code has been set correctly. Depending on your Yale lock model, you may need to re-enter the new user code as confirmation. This double-verification process eliminates any errors you might have made during the initial input. After re-entering the code, watch for an indication from the lock, such as a beep or a light flash, which will confirm the successful configuration of the user code. This confirmation lets you proceed confidently, knowing that the lock is now securely programmed with the new code.
Step 6. Exit Programming Mode:
Once you have confirmed the new user code, it is important to exit the programming mode to ensure the lock returns to its regular operational state. To do this, follow the specific instructions for your lock model, which typically involves pressing a designated button or key sequence. Exiting programming mode will usually be accompanied by a signal from the lock, such as a beep or a light, indicating that you are no longer in programming mode. This step protects your changes and ensures unauthorized users cannot alter the lock’s settings.
Step 7. Test the New Code:
To guarantee that the new user code functions correctly, perform a test by locking and unlocking the door using the newly set code. Approach the lock and carefully enter the new user code on the keypad, observing whether the lock engages or disengages as expected. If the lock operates correctly, it will confirm the code entry with a beep or light, indicating successful use.
Conduct the test multiple times to ensure consistency and reliability. If any issues arise, reconsider the code entry process or consult the user manual to troubleshoot potential problems. Validating the new code through this test step confirms that the programming was successful and that secure access is consistently maintained.
Step 8. Maintain Your Yale Lock Code Settings:
To ensure ongoing security and optimal performance of your Yale lock, regularly maintain your user code settings. Periodically reviewing and updating user codes can prevent unauthorized access and ensure that only trusted individuals have entry. If multiple users have access to the property, consider changing the user codes at regular intervals or when authorized personnel change.
Always keep track of the current active codes and who has been assigned each. Consult the lock’s user manual for additional maintenance tips, such as cleaning techniques or battery replacement schedules, to keep your lock in top condition.
Step 9. Troubleshoot Common Issues:
You may occasionally need help with your Yale lock, even with careful setup. If the lock fails to respond after programming, check the battery level first, as low power can disrupt operations. If the issue persists, ensure that the user code was entered correctly and matches the required code length set by your lock model. Misalignment of the lock components can also cause mechanical problems, so verify the lock and door alignment if the lock doesn’t engage or disengage smoothly.
For electronic locks, interference from nearby electronic devices may occasionally cause erratic behavior, so consider relocating such devices if needed. Always refer to the lock’s troubleshooting guide in the user manual or contact customer support for assistance with persistent or more complex issues.
Step 10. Keep a Record of Code Changes:
It is advisable to keep a detailed record each time you update or change your Yale lock user codes. Document the date of the change and the new code assigned, ensuring you follow your security protocols for storing sensitive information.
This practice assists in managing access and provides a historical reference that can be useful for reviewing access patterns and enhancing security measures. Maintaining an organized record helps streamline the process when future changes are needed and fosters a systematic approach to property security management.
Following these ten steps, you can confidently and securely program your Yale lock with a new user code.
5 Precautions to Consider When Programming Your Yale Lock
- Choose a Unique and Secure User Code: Avoid using shared or easily guessable codes when setting up your Yale lock. Instead, select a combination that is difficult for others to figure out.
- Keep the User Code Confidential: Share the new code only with trusted individuals who are authorized to access your property.
- Regularly Change the Code: To prevent unauthorized access, consider changing the user code periodically or whenever personnel who have access to your property change.
- Do Not Disclose the Programming Process: To maintain security, do not share details of the programming process with anyone who is not authorized to access your property.
- Have a Backup Plan: In case of an emergency or if you forget the user code, have a backup plan in place. This could include having a spare key or setting up alternative access methods, such as a keypad entry system or smart lock feature.
Conclusion
How to set Yale lock code is a straightforward process that enhances security while providing convenience.
By following a structured approach, you can efficiently program your lock and maintain optimal security practices. Begin by selecting a unique and robust user code, and ensure that you’re in programming mode by following your lock’s specific instructions. Test the code thoroughly to confirm its correctness, then document any changes for future reference. Regularly update your codes to reflect personnel changes and prevent unauthorized access.
By adhering to these guidelines and maintaining security protocols, you ensure your Yale lock performs effectively, safeguarding your property with reliable access control.