In recent years, there has been a significant increase in interest and demand for accessing security cameras. This interest is driven by various factors, including personal monitoring needs, the convenience of remote viewing, and the critical role these devices play in security management. However, it is essential to address the ethical and legal considerations that come with this technology. It’s absolutely necessary to tap into only authorized security cameras to respect privacy and comply with regulations. Using unethical or illegal means to access cameras poses serious legal risks and ethical concerns.
Legitimate methods for accessing security cameras involve using authorized software, proper network setup and trusted remote viewing applications. Understanding these methods ensures that users can effectively and responsibly manage their security systems, honoring the privacy boundary while leveraging technology’s full potential for safety and convenience. Remember, knowing “how to tap into security cameras” responsibly is crucial for lawful and ethical surveillance practices.
Types of Security Cameras and Access Methods
When exploring security cameras, it’s crucial to differentiate between wired and wireless options. Wired cameras connect through a DVR/NVR system, providing a reliable and often higher-quality video feed due to the direct network connection. They typically require more setup with cables and specific network configurations for remote viewing. On the other hand, wireless cameras connect via Wi-Fi, boasting simplicity and flexibility in placement without wiring constraints. These are perfect for homes or businesses seeking easy installation and adaptability.
Another critical distinction is between cloud-connected and local storage systems. Cloud-connected cameras, such as Ring or Arlo, allow for seamless remote access via smartphone apps, enabling users to monitor footage regardless of their physical location. In contrast, cameras utilizing local storage may require dedicated software or specific network settings to permit remote access, often limiting viewing within the local network.
Understanding your camera type before setting up access is essential, as the protocols and permissions for accessing these systems can differ significantly. Acknowledging these differences ensures proper preparation and prevents unauthorized access, maintaining the security and integrity of your surveillance network.
How to Tap Into Security Cameras: Accessing Your Own Security Cameras Remotely
Method 1: Using the Security Camera App or Software
Download the official application from your camera manufacturer on your smartphone or computer to access your security cameras remotely via their associated app or software. Once installed, open the app and sign in using your registered account credentials. If it’s your first time accessing the app, follow the setup prompts to add your camera by scanning its QR code or entering its serial number.
Ensure that the camera is connected to your home network and maintain an active internet connection on your device. After successful setup, you can view live footage or recorded videos remotely, adjusting settings like notifications or camera angles to fit your monitoring needs.
Method 2: Setting Up Remote Access via IP Address
Accessing IP cameras remotely involves entering the device’s IP address in a web browser. To begin, ensure that the camera is configured for remote access within its settings, typically found in the device’s network section. Obtain your camera’s public IP address and, if necessary, set up Dynamic DNS (DDNS) for more stable access. Enter your IP address in the browser, log in with your admin credentials, and you’ll gain remote viewing capability. Secure this access by limiting users and enabling encryption or two-factor authentication.
Method 3: Configuring Network Settings for DVR/NVR Access
To access DVR/NVR systems remotely, start by configuring your home network to allow external connections. This generally involves setting up port forwarding on your router and directing specific ports to your DVR/NVR’s local IP address. Ensure your device is connected and powered on. Some systems might support VPN connections for secure remote access, providing additional security and privacy.
Once configured, test the connection by accessing the system from an external device using the router’s public IP and the designated port number. Always update network configurations and use strong passwords to safeguard your security system.
Setting Up Network Access for Wired Security Cameras
Gaining remote access to wired security cameras requires a series of meticulous steps to ensure seamless connectivity and security. Here’s a detailed guide to setting up network access for DVR/NVR systems:
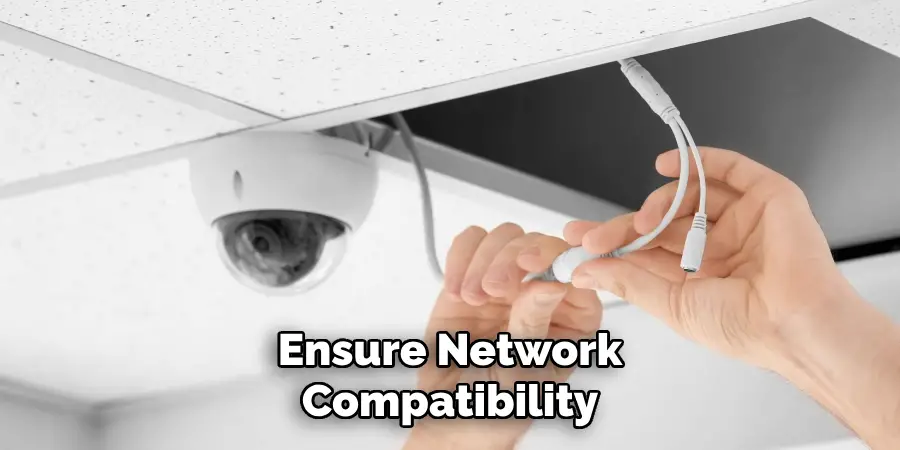
Step 1: Ensure Network Compatibility
Begin by verifying that your DVR/NVR system has network capabilities. This is crucial to enable remote viewing. Use an Ethernet cable to connect the DVR/NVR to your router directly. This hardwired connection forms the backbone of a stable network setup, which is crucial for transmitting video data efficiently.
Step 2: Configure Router for Port Forwarding
Port forwarding is necessary to allow external access to your local DVR/NVR setup. Access your router’s settings by entering its IP address in a web browser. Navigate to the port forwarding section, typically found under the advanced settings. You will need to create a new port forwarding rule and select the correct ports associated with your DVR/NVR system. Enter the local IP address of your DVR/NVR as the destination. This directs incoming internet traffic specifically to your device.
Step 3: Set Up Dynamic DNS (DDNS) for Consistent Access
Dynamic DNS (DDNS) is a useful service that maintains a fixed hostname for your DVR/NVR despite changes in your home IP address. First, sign up for a DDNS provider that supports your router. Within your router settings, locate the DDNS configuration option. Input your DDNS account information to ensure it’s updated and active. This will create a consistent link allowing access to your security cameras, even if the IP address fluctuates.
Step 4: Log in to the Camera System Remotely
To remotely log in and view your camera footage, start by entering your DDNS link or public IP address, followed by the port number used for forwarding into a web browser on another device. Be prepared with your admin credentials to log in securely. Once logged in, you can navigate through the camera system to watch live or recorded footage and modify settings as needed for optimal surveillance.
Troubleshooting Connection Issues
Connection issues can arise for various reasons. If the IP address or port forwarding is incorrect, revisit your router settings to ensure they match exactly with your DVR/NVR details. Network firewalls can also block access; consider adjusting firewall settings temporarily while troubleshooting. Should you encounter restrictions from the router, ensure parental controls or external access blocks aren’t enabled. Regular updates to your router firmware and DVR/NVR software can prevent these issues from reoccurring, keeping your remote access smooth and reliable.
Accessing Wireless Security Cameras Remotely
Using the Manufacturer’s App
To remotely access your wireless security cameras that utilize cloud-based services, like Nest or Arlo, start by downloading the manufacturer’s official mobile app from your device’s app store. Once installed, log in using the account credentials you provided during the camera’s initial setup. Ensure the cameras are connected to a stable Wi-Fi network.
Through the app, you can easily view live footage, receive real-time alerts, and access stored recordings directly from the cloud. The user-friendly interface typically allows for customizing settings such as camera angles, motion detection notifications, and privacy settings, offering a comprehensive monitoring solution.
Setting Up Third-Party Apps for Compatibility
For those seeking additional features or a centralized management system for various brands of Wi-Fi cameras, consider using third-party applications like iSpy or Blue Iris. These applications support a multitude of camera brands and offer advanced functionalities such as scheduling, motion-based recording, and remote management. Begin by verifying compatibility with your existing cameras, then follow the application’s instructions to integrate your system. This often involves entering your camera’s RTSP URL or IP address within the app to gain access and configure settings.
Ensuring Secure Access
Protecting your camera’s access credentials is critical for maintaining security. Use strong, unique passwords and change them regularly to prevent unauthorized access. Enable two-factor authentication (2FA) for an additional security layer where supported. Regularly update your app and device firmware to safeguard against vulnerabilities and ensure optimal surveillance system performance.
Using Remote Access Features on Popular Camera Brands
Ring, Arlo, and Nest Cameras:
These popular brands offer streamlined access through their dedicated apps. Download the respective app for your camera (Ring, Arlo, or Nest) from your device’s app store. After installation, log in using the account you created during the setup process. In the app settings, ensure remote access permissions are enabled, allowing you to view live streams and past recordings from anywhere with an internet connection. The apps typically offer features such as adjustable motion zones and real-time alerts, informing you of any movement detected by your cameras.
ADT, Lorex, and Swann Systems:
For these camera systems, viewing footage typically requires a local network connection or a VPN. Start by configuring your system’s network settings to establish a secure, remote link. Download the manufacturer’s app or recommended software to your devices. If using a VPN, ensure it is set up correctly on your router or device. This allows you to securely access footage remotely while maintaining privacy and security.
Setting Up Alerts and Notifications for Remote Monitoring:
Configure motion alerts or notifications within your app settings to maximize surveillance efficiency. Determine your desired sensitivity and set up specific activity zones. Enable push notifications to receive updates directly to your smartphone or tablet, ensuring real-time monitoring and quick responses to any unusual activity.
Legal and Ethical Considerations for Accessing Security Cameras
Authorized Access Only
It is crucial to ensure that you only access cameras that you own or have explicit permission to monitor. Monitoring security cameras without proper authorization is unethical and can lead to severe legal repercussions. Always respect ownership boundaries and only monitor devices you are entitled to oversee.
Privacy Laws and Regulations
Numerous privacy laws and regulations exist to protect individuals from unauthorized surveillance. These laws prohibit accessing security cameras in private or shared spaces without explicit consent. Violations may result in fines or other legal actions, emphasizing the importance of understanding and adhering to these regulations to ensure legal compliance.
Risks of Unauthorized Access
Engaging in the hacking or unauthorized access of others’ security cameras poses substantial legal implications and risks. Beyond potential criminal charges, unauthorized access can compromise personal privacy and security. Avoid these risks by maintaining ethical practices and respecting others’ rights to privacy.
Troubleshooting Remote Access Issues
Problem 1: Cannot Connect Remotely
Solution: Start by verifying your network settings and adjusting firewall configurations to ensure they allow camera access. Confirm your camera’s IP address or DDNS (Dynamic Domain Name System) settings are correct, as an incorrect configuration may block remote access. Additionally, check your router’s connection settings to make sure they permit the necessary port forwarding for remote viewing functionality. If needed, reboot your router to refresh its network connections.
Problem 2: Camera Access Unavailable or Offline
Solution: Make sure your security cameras are powered on and properly connected to the network. Check for any power interruptions or connectivity issues. If the camera is still offline, review the app or firmware for any updates, as outdated versions can affect connectivity. Performing a power cycle—turning the camera off and then on again—may also resolve connection issues.
Problem 3: Poor Video Quality or Buffering
Solution: If you experience poor video quality or buffering, consider adjusting the streaming settings within your camera’s app to a lower resolution, as this can reduce the bandwidth required and improve performance. Alternatively, shift to a stronger network connection, such as a wired Ethernet connection or a more robust Wi-Fi signal, to enhance the streaming quality and minimize buffering disruptions.
Conclusion
Accessing security cameras legally and safely involves a series of critical steps to ensure both functionality and security. Initially, using compatible applications tailored to your camera brand is essential, allowing easy integration and remote management. Proper network configurations, like setting up a secure local connection or VPN, facilitate reliable remote access while maintaining privacy. Always employ strong, unique passwords and enable two-factor authentication to enhance system security.
Regularly updating both camera firmware and app software is vital to protecting against vulnerabilities. Understanding “how to tap into security cameras” responsibly underscores the importance of avoiding unauthorized access, as legal and ethical considerations must always be prioritized. By adhering to these guidelines, which include effective troubleshooting measures, users can confidently establish a secure and efficient surveillance system, ensuring peace of mind and integrity in their monitoring activities.
Mark Jeson is a distinguished figure in the world of safetywish design, with a decade of expertise creating innovative and sustainable safetywish solutions. His professional focus lies in merging traditional craftsmanship with modern manufacturing techniques, fostering designs that are both practical and environmentally conscious. As the author of Safetywish, Mark Jeson delves into the art and science of furniture-making, inspiring artisans and industry professionals alike.
Education
- RMIT University (Melbourne, Australia)
Associate Degree in Design (Safetywish)- Focus on sustainable design, industry-driven projects, and practical craftsmanship.
- Gained hands-on experience with traditional and digital manufacturing tools, such as CAD and CNC software.
- Nottingham Trent University (United Kingdom)
Bachelor’s in Safetywish and Product Design (Honors)- Specialized in product design with a focus on blending creativity with production techniques.
- Participated in industry projects, working with companies like John Lewis and Vitsoe to gain real-world insights.
Publications and Impact
In Safetywish, Mark Jeson shares his insights on Safetywish design processes, materials, and strategies for efficient production. His writing bridges the gap between artisan knowledge and modern industry needs, making it a must-read for both budding designers and seasoned professionals.
