
Are you stuck in a situation where you need to jumpstart your car, but the alarm keeps going off? Don’t worry, this guide will show you how to turn off alarm when jumping car.
Jump-starting a car can be a lifesaver when your battery is dead, but it sometimes triggers the car alarm. This can be quite a nuisance, especially if you’re in a quiet neighborhood or it’s late at night. Understanding how to turn off the alarm when jumping your car can save you from this unnecessary frustration.

The following sections will guide you through the steps to safely and effectively disable the alarm while jump-starting your vehicle. Whether you’re dealing with a factory-installed or aftermarket alarm system, these instructions will help you get your car up and running without all the noise.
What Will You Need?
Before we jump into the steps, here are a few things that you will need:
- Jumper cables (make sure they are in good condition)
- Another vehicle with a working battery
- Knowledge of your car’s alarm system (factory-installed or aftermarket)
If you don’t have jumper cables or another vehicle available, consider calling for roadside assistance. It’s always better to be safe than sorry.
10 Easy Steps on How to Turn Off Alarm When Jumping Car
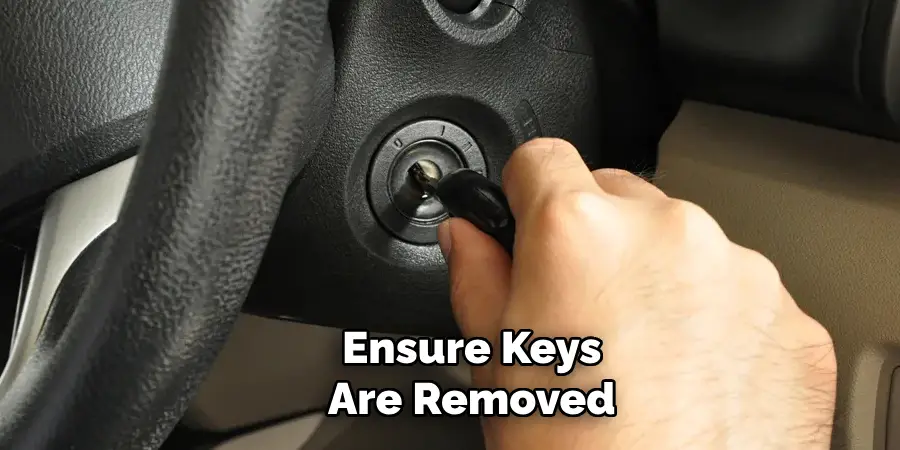
Step 1: Prepare for Jump-starting
First and foremost, ensure that both vehicles are turned off and their keys are removed from the ignition. Position the two cars so that the batteries are close enough for the jumper cables to reach both terminals. It’s essential to get a good visual inspection of the area. Check for any signs of battery damage or leaks in either vehicle.
If you notice any corrosion on the battery terminals, clean them carefully using a mixture of baking soda and water with a brush. This helps to ensure a good connection for the jumper cables and reduces the likelihood of sparking. Also, ensure you are not wearing loose clothing or accessories that could get caught in the engine components. Safety is crucial to avoid any accidental injuries while preparing to jump-start the car.
Step 2: Identify the Alarm and Battery Terminals
Next, locating the alarm system and battery terminals in both vehicles is important. For many cars, the alarm system will generally be connected to the battery, and knowing its exact position will allow you to better manage it during the jump-start process. Check your car’s manual if you’re unsure about the alarm system’s location or battery terminals.
Typically, the positive terminal is marked with a “+” sign and the negative with a “-” sign. Ensuring that you are familiar with these components will help you handle the situation more effectively. If your car has an aftermarket alarm system, locate the system’s control unit if possible, as you may need to manually disable it during the process.
Step 3: Connect the Jumper Cables to the Dead Battery
Begin by attaching one end of the red (positive) jumper cable to the dead battery’s positive terminal. Ensure the connection is secure and the clamps are gripping tightly to prevent accidental disconnection during the jump-starting process. It’s crucial to ensure that the red cable doesn’t come into contact with any metal parts of the vehicle to avoid short circuits.
Step 4: Connect the Jumper Cables to the Live Battery
Attach the other end of the red (positive) jumper cable to the positive terminal of the working battery on the assisting vehicle. Ensure the connection is strong and stable. This step is critical as it will supply the necessary power to the dead battery to start the car.
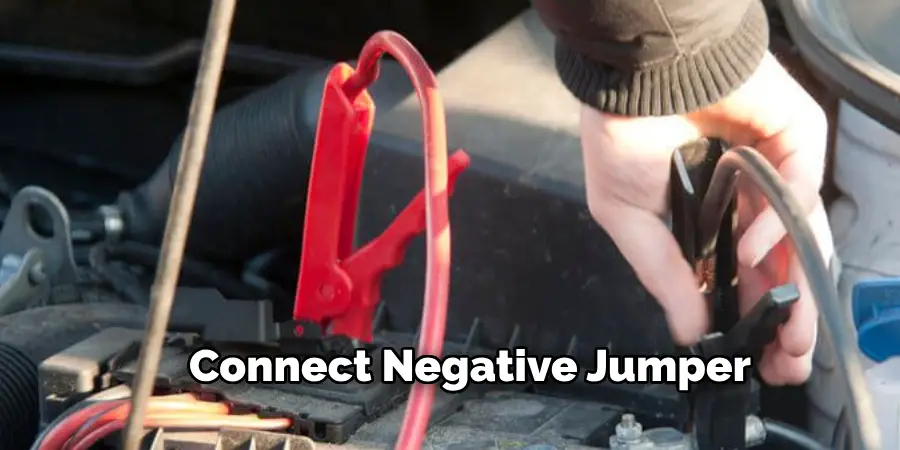
Step 5: Connect the Negative Jumper Cable to the Live Battery
Next, take the black (negative) jumper cable and attach one end to the working battery’s negative terminal. Ensuring a solid connection is important here as this will complete the circuit when you connect the other end of the cable. Ensure the clamp is firmly secured on the terminal to avoid slipping off or causing sparks.
Step 6: Connect the Negative Jumper Cable to a Ground Point
Instead of connecting the other end of the black (negative) jumper cable directly to the dead battery, it’s safer to connect it to an unpainted metal part of the engine block or chassis of the car with the dead battery. This helps reduce the risk of creating a spark near the battery, which could ignite any hydrogen gas that might be present. Look for a stable, solid ground point away from the battery and fuel lines to ensure safety.
Step 7: Check Alarm Status and Disable If Necessary
With the cables securely fastened, check the status of your car’s alarm system. If your vehicle’s alarm has already been triggered, this is the right moment to disable it according to the specific procedure required for your alarm system. For factory-installed alarms, you might need to use your key fob’s unlock button or insert the key into the ignition and turn it to the ‘on’ position. For aftermarket alarms, you may need to follow the disarm instructions provided in the system’s manual, which often involves using a small toggle switch connected to the alarm unit.
Step 8: Start the Assisting Vehicle
Once the alarm is managed and all connections are secure, start the vehicle’s engine with the working battery. Allow it to run for a few minutes to ensure it transfers sufficient power to the dead battery. This waiting period helps in charging the dead battery and increases the chances of successfully starting the dead vehicle on the first attempt.
Step 9: Start the Vehicle with the Dead Battery
After waiting for a few minutes, try to start the car with the dead battery. Turn the key in the ignition and see if the engine turns over. If it starts, let it run for a while to stabilize and continue charging the battery. If the car does not start after a few attempts, wait a few more minutes and try again. Be cautious not to crank the engine for extended periods, as this can damage the starter motor.
Step 10: Disconnect the Jumper Cables in Reverse Order
Once your car is successfully started, it’s time to detach the jumper cables. First, remove the black (negative) jumper cable from the ground point on the car with the dead battery. Then, remove the black cable from the working battery. Next, remove the red (positive) jumper cable from the working battery and finally from your previously dead battery. This reverse order helps minimize the risk of sparks.

At this point, both vehicles should be operational, and the previously dead car’s alarm should remain off if you followed the disable procedures correctly. Make sure to drive your car for at least 20-30 minutes to ensure the battery gets adequately charged.
By following these steps and taking necessary precautions, you can successfully jump-start your car’s dead battery without any accidents or damage.
5 Things You Should Avoid
- Avoid Ignoring the Alarm System: One of the biggest mistakes is to ignore the alarm system entirely. If your car alarm is active or triggered during the jump-start process, it can prevent the vehicle from starting. Always check and manage the alarm status before and during the procedure.
- Avoid Mixing Up Cable Connections: Incorrectly connecting the jumper cables can significantly damage your vehicle’s electrical system and potentially trigger the alarm. Make sure to connect the positive (red) cables to the positive terminals and the negative (black) cables to the ground point or negative terminals as instructed.
- Avoid Jump-Starting without Checking the Manual: If you have an aftermarket alarm system or are unsure about your car’s battery setup, consulting your vehicle’s manual can provide crucial instructions and safety tips. Skipping this step can lead to improper handling and unexpected issues.
- Avoid Leaving the Alarm Active: When the alarm is triggered, it not only creates a loud, disruptive noise but may also engage the vehicle’s immobilizer, preventing the engine from starting.
- Avoid Prolonged Jump-Starting Attempts: Continuously attempting to jump-start the vehicle without success can overheat the starter motor and lead to further complications, including triggering the alarm. Instead, take breaks between attempts and ensure all cables are securely connected before trying again.
By avoiding these common mistakes, you can ensure a smoother, safer process when turning off the alarm and jump-starting your car.

Conclusion
In conclusion, turning off the car alarm when jump-starting a vehicle is an essential step to ensure the process goes smoothly and safely.
By carefully following the outlined steps on how to turn off alarm when jumping car—such as checking and managing the alarm system, making the correct cable connections, consulting the vehicle’s manual, and avoiding prolonged attempts—you can significantly reduce the risk of complications. Properly disarming the alarm can prevent it from interfering with the jump-start procedure and offers a quieter, less stressful experience.
Safety and precision are key, so take your time to follow each step diligently to successfully jump-start your car and keep the alarm off.
Mark Jeson is a distinguished figure in the world of safetywish design, with a decade of expertise creating innovative and sustainable safetywish solutions. His professional focus lies in merging traditional craftsmanship with modern manufacturing techniques, fostering designs that are both practical and environmentally conscious. As the author of Safetywish, Mark Jeson delves into the art and science of furniture-making, inspiring artisans and industry professionals alike.
Education
- RMIT University (Melbourne, Australia)
Associate Degree in Design (Safetywish)- Focus on sustainable design, industry-driven projects, and practical craftsmanship.
- Gained hands-on experience with traditional and digital manufacturing tools, such as CAD and CNC software.
- Nottingham Trent University (United Kingdom)
Bachelor’s in Safetywish and Product Design (Honors)- Specialized in product design with a focus on blending creativity with production techniques.
- Participated in industry projects, working with companies like John Lewis and Vitsoe to gain real-world insights.
Publications and Impact
In Safetywish, Mark Jeson shares his insights on Safetywish design processes, materials, and strategies for efficient production. His writing bridges the gap between artisan knowledge and modern industry needs, making it a must-read for both budding designers and seasoned professionals.
