
Unregistering your Blink camera from your account is a straightforward process that ensures your device is no longer linked to your personal settings and data. Whether you’re planning to sell your camera, give it to someone else, or simply remove it from your system, understanding how to properly unregister it is essential.
This guide on how to unregister blink camera from account will walk you through the necessary steps to ensure your Blink Camera is successfully removed from your account, maintaining your privacy and preparing the device for its next use.
What is Blink Camera?
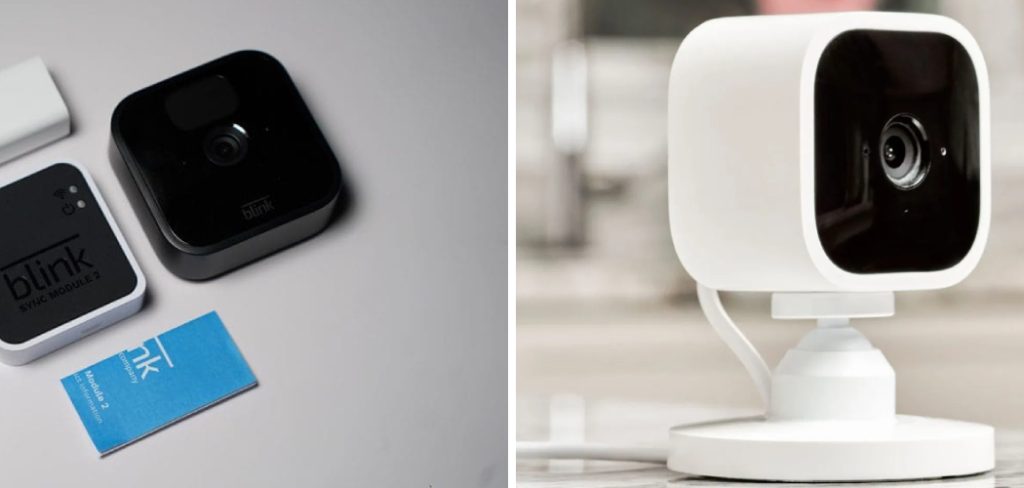
Blink camera is a wireless security camera system that allows you to monitor your home or office remotely.
It provides high-quality video footage, motion detection, and real-time alerts through the Blink app on your smartphone or tablet. It’s a popular choice for those who want an affordable and easy-to-use home surveillance solution.
You can register multiple Blink cameras to one account, making it convenient to manage all your devices in one place. However, there may come a time when you need to unregister a camera for various reasons.
Why Unregister Your Blink Camera?
There are several reasons why you may need to unregister your Blink camera from your account:
- You no longer require the device and want to sell it or give it away. Unregistering it ensures your personal settings and data are removed, protecting your privacy.
- You want to temporarily remove the camera from your system. In this case, you can easily re-register it by following the setup process again.
- You need to troubleshoot an issue with your camera or account and want to start fresh. Unregistering the camera will clear all previous settings and configurations.
- You’re upgrading to a new Blink camera and want to transfer your settings from the old device to the new one. Unregistering allows you to do this seamlessly.
- You want to change the ownership of the camera. Unregistering it from your account prepares it for a new owner to register and use.
Necessary Materials
Before you begin the process of unregistering your Blink camera from your account, make sure you have the following materials on hand:
Blink Camera:
The device you intend to unregister.
Smartphone or Tablet:

Loaded with the Blink app, which is available on both iOS and Android platforms.
Internet Connection:
A stable internet connection to ensure seamless communication between your Blink camera and the app.
Blink Account Credentials:
Your username and password to log into the Blink app.
Power Supply:
Ensure your Blink camera is powered on and connected to your network.
Email Access:
In case you need to verify any information or receive confirmation emails.
Having these materials ready will help streamline the process of unregistering your Blink camera and ensure a smooth transition.
9 Step-by-step Guides on How to Unregister Blink Camera From Account
Step 1: Open the Blink App
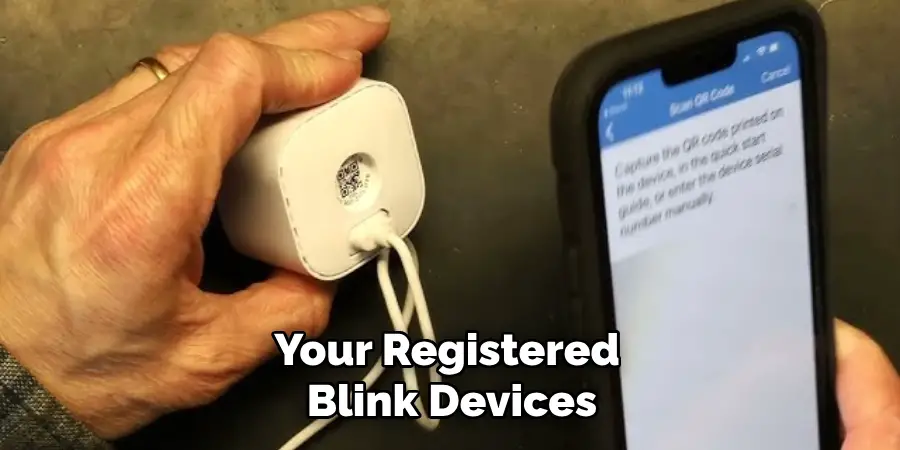
The first step in unregistering your Blink camera is to open the Blink app on your smartphone or tablet. Make sure you are connected to the internet. Locate the app icon, which typically resembles a blue house with a camera inside, on your device’s home screen or app drawer.
Tap the icon to launch the app. If you are not already logged in, you will be prompted to enter your Blink account credentials. After logging in, you should see the main dashboard displaying your registered Blink devices.
Step 2: Select the Camera to Unregister
Once you’ve opened the Blink app and are on the main dashboard, identify and select the camera you wish to unregister. This can typically be done by scrolling through the list of registered devices displayed on the screen.
Tap on the specific camera’s name or thumbnail image to access its individual settings.
This will take you to a new screen where you can see detailed information about the camera, including its status, recent activity, and various configuration options. Ensure you have selected the correct device before proceeding to the next step.
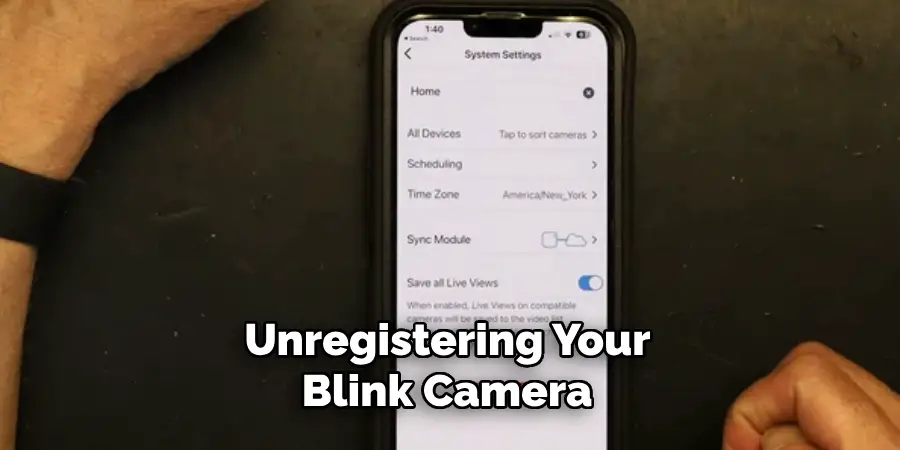
Step 3: Tap on the Settings Icon
At the top right corner of the screen displaying your selected camera’s details, you will see a gear icon, which represents the settings.
Tap on this settings icon to access the specific configuration options for your camera. This will open a menu where you can adjust various settings related to your camera, such as motion detection, video quality, and more.
The settings menu is also where you will find the option to unregister your camera from your Blink account. Make sure you are using the correct camera settings before proceeding to the next step to avoid making changes to the wrong device.
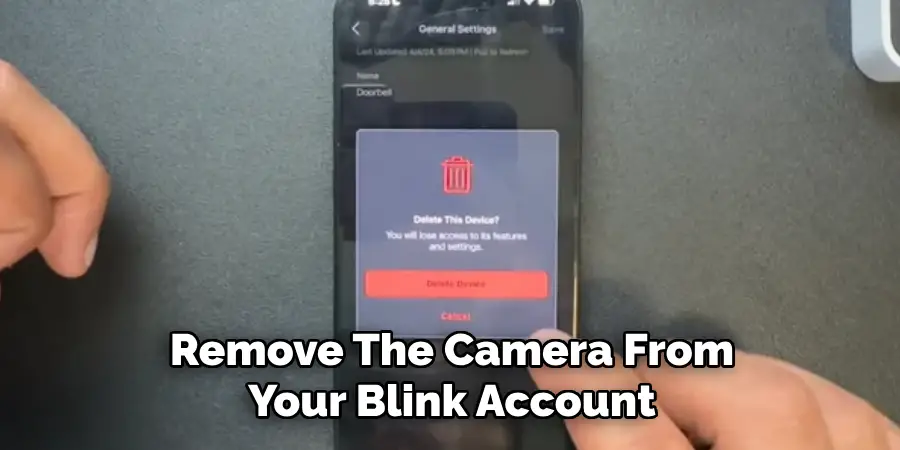
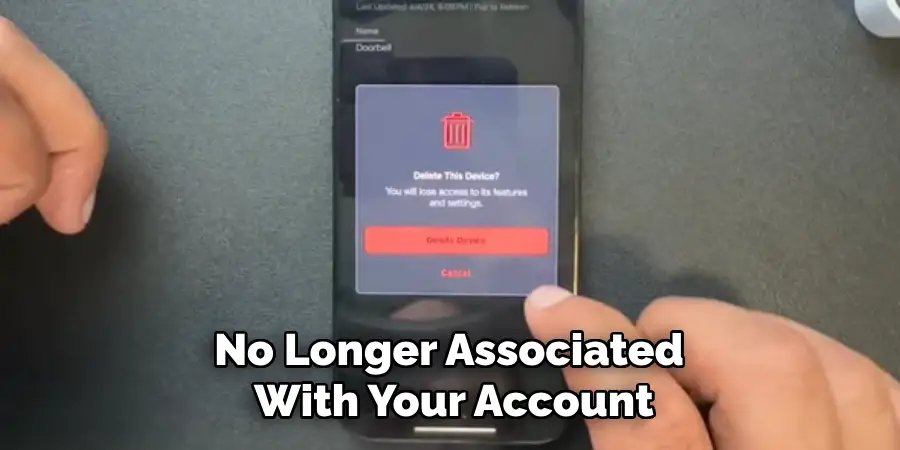
Step 4: Choose the Unregister Option
In the settings menu, scroll down until you find the “Unregister” option. This may be labeled differently depending on your app version, such as “Remove Device” or “Delete Camera.” Once you locate the option, tap on it.
A confirmation prompt will appear, asking you to verify your decision to unregister the device. This step is crucial as it ensures that the action is intentional and prevents accidental unregistration of your Blink camera.
Carefully read the prompt and confirm the action when you are ready to proceed. Your Blink camera will then begin the unregistration process, which may take a few moments to complete. Once finished, you will receive a confirmation message.
Step 5: Confirm Unregistration
After selecting the unregister option, a confirmation prompt will appear on your screen. This prompt is designed to ensure that you intentionally want to remove the camera from your Blink account.
Carefully read the message to understand the implications of unregistering the device, which includes losing all current settings and data associated with the camera.
If you are certain about proceeding, tap the “Yes” or “Confirm” button to complete the unregistration process. The Blink app will then process your request, which may take a few moments. Once the process is complete, you will receive a notification confirming that the camera has been successfully unregistered from your account.
Step 6: Disconnect the Power Supply
With the camera now unregistered from your Blink account, the next step is to safely disconnect the power supply. Begin by locating the power source connected to your Blink camera. If your camera is battery-operated, you will need to remove the batteries. For cameras connected via USB or another power adapter, unplug the cable from the camera.
This step ensures that the device is completely powered off and ready for any subsequent handling, whether for storage, transfer to a new owner, or troubleshooting purposes.

Make sure to avoid pulling the power cable forcefully to prevent damage to the connectors. Once the power supply is disconnected, your Blink camera is fully unregistered and powered down, completing the unregistration process.
Step 7: Remove the Camera Mount
If your Blink camera is mounted to a wall or other surface, you may want to remove it from its mount after completing the unregistration process. This step is optional but can help prepare the device for any future use or transfer to another location. Begin by gently removing the camera from its mount, taking care not to damage the device or its connectors.
If you are unsure how to remove your specific camera model from its mount, refer to the manufacturer’s instructions or seek assistance from a qualified technician. Once removed, store the camera and its mount in a safe place until you are ready to use it again.
Step 8: Reset Camera (Optional)
Resetting your Blink camera is an optional step that can be particularly useful if you plan to sell or give the device to someone else.
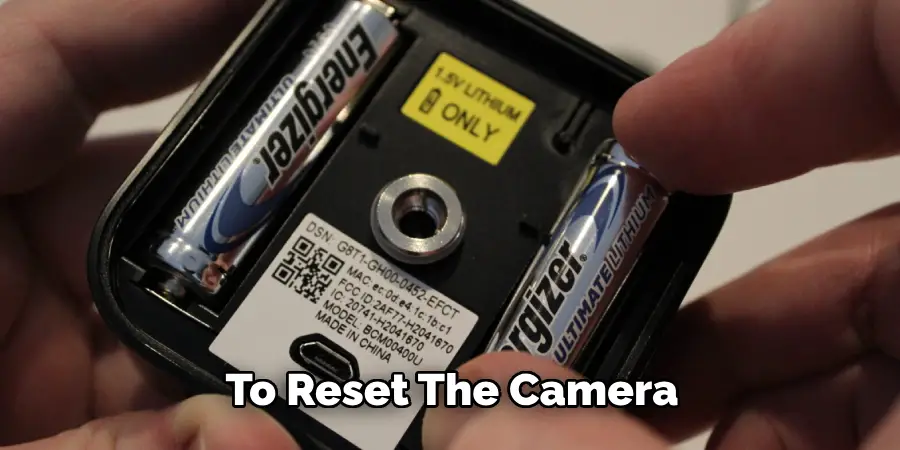
To reset the camera, locate the reset button on the device. This button is typically found on the back or bottom of the camera and may be labeled “Reset” or indicated by a small hole that requires a pin or paperclip to press. Press and hold the reset button for approximately 10-15 seconds until you see the camera’s LED light start flashing.
This indicates that the camera has been reset to its factory settings. Keep in mind that resetting the camera will erase all its configurations and stored data. Once the reset is complete, the camera will be ready to set up as a new device.
Step 9: Repeat the Process for Additional Cameras
If you have multiple Blink cameras registered to your account and wish to unregister them, simply repeat the steps outlined above for each device. Make sure to select the correct camera and confirm your decision before proceeding with each unregistration.
This process can be particularly useful if you are experiencing issues with a specific camera or no longer need it connected to your account. Once all desired cameras have been unregistered, you can log out of your Blink account or continue managing any remaining devices on the main dashboard.
Following these steps on how to unregister blink camera from account will allow you to easily unregister your Blink camera from your account. It’s important to note that once a camera is unregistered, it cannot be re-registered to the same account. If you wish to use the camera again, you will need to set it up as a new device.
Unregistering your Blink camera can help declutter and manage your devices effectively, providing a seamless experience for all your home security needs.
Considerations and Potential Issues
When unregistering your Blink camera, it is essential to be aware of several considerations and potential issues. Firstly, the unregistration process is permanent, meaning you cannot re-register the same camera to the same account once it’s removed.
This could be inconvenient if you accidentally unregister a device you still need. Additionally, ensure that all essential footage and settings are backed up or noted before proceeding, as these will be lost upon unregistration.
Another consideration is the impact on your overall security system; removing a camera could leave areas of your property unmonitored.
Additionally, some users may encounter technical difficulties during the unregistration process. Issues like app crashes, connectivity problems, or delays in processing the request can disrupt the procedure.
It is also crucial to handle the physical removal and disconnection of your camera’s power supply carefully to avoid any potential damage.
In summary, while unregistering your Blink camera can be an effective way to manage and declutter your devices, being mindful of these considerations and potential issues can help ensure a smooth and hassle-free experience.
Post-Unregistration Steps
Verify Unregistration
After you have successfully unregistered your Blink camera, it is advisable to verify that the device is no longer linked to your account.
Open the Blink app and navigate to the device management section. Confirm that the unregistered camera does not appear in the list of active devices. This verification step ensures that the unregistration process has been completed successfully and that the camera is no longer associated with your account.
Backup and Save Data
If not done prior to the unregistration process, make sure to backup and save any important footage or configurations that were associated with the camera. This can be done by accessing the video footage in the Blink app and downloading any essential clips to your preferred storage medium.
Additionally, note down any specific settings or preferences that you may need for future reference.
Clean and Inspect the Camera
Before storing or transferring the camera, take the time to clean and inspect the device. Use a soft cloth to gently wipe the camera’s exterior, removing any dust or debris. Check the camera and its components, such as mounts and cables, for any signs of wear or damage. Ensuring that the camera is in good condition will help maintain its functionality for future use.
Store the Camera Safely
If you do not plan to immediately set up the camera for another user, store it in a safe and secure location. Keep it in a dry, cool place where it will not be exposed to harsh environmental conditions. Store all accessories, including mounts, cables, and power adapters, along with the camera to keep everything organized and ready for future use.
Update Account Preferences
With the camera unregistered, consider updating your Blink account preferences. This could include adjusting notifications, managing remaining devices, or reviewing your subscription plan. Optimizing your account settings post-unregistration will help streamline your home security management process.
Prepare for Sale or Transfer
If you are planning to sell or give the camera to someone else, ensure that the device is in proper working condition.
Provide the new owner with all necessary components and instructions. Inform them about the need to set up the camera as a new device on their Blink account. Transparency and thorough preparation will facilitate a smooth transition for the new user.
Frequently Asked Questions
Q: Can I Unregister My Blink Camera From a Different Device?
A: Yes, you can log into your Blink account from any device and follow the steps outlined in this guide to unregister your camera.
However, make sure that you are accessing the correct camera settings and confirm your decision before proceeding with the unregistration. You may also need to enter your account password for security purposes.
Q: What Happens to My Camera’s Data After Unregistration?
A: Once a camera is unregistered, all data associated with it, including settings and recorded footage, will be deleted from your account. This cannot be undone, so make sure to back up any important data before proceeding with the unregistration process.
Q: Can I Unregister a Camera Without Internet Access?
A: No, you must have an active internet connection to access the Blink app and unregister your camera. If your camera is offline or disconnected from the internet, you will not be able to complete the unregistration process.
However, if you no longer have access to the internet in your home or wish to use the camera in a different location, you can reset it and set it up as a new device on a different network.
Q: Will Unregistering My Camera Affect My Subscription Plan?
A: No, unregistering your camera will not affect your subscription plan with Blink. However, if you no longer wish to use any of your cameras and want to cancel your subscription, make sure to do so before unregistering them from your account. You can manage your subscription and payment details under the “Account” tab in the main menu of the Blink app.
Conclusion
Unregistering your Blink camera is a straightforward process that can help manage and optimize your home security setup. By following the outlined steps, from accessing the settings menu to confirming the unregistration, you can ensure that your devices are efficiently managed and prepared for future use.
Whether you are troubleshooting, transferring ownership, or simply decluttering your account, these steps will guide you through each stage with clarity and precision. Remember, once unregistered, the camera needs to be set up as a new device if you wish to use it again.
Proper management of your Blink cameras is essential for maintaining an organized and secure home environment. Thanks for reading this article on how to unregister blink camera from account.