
Trail cameras, originally designed for wildlife monitoring, have become indispensable tools for nature enthusiasts and researchers alike. Equipped with features such as motion detection and infrared night vision, these cameras capture the elusive behavior of animals without intrusion. Beyond their traditional purpose, trail cameras have been ingeniously repurposed for security surveillance around homes, properties, and businesses.

By employing these devices, individuals can enhance their security efforts, capturing high-resolution images and videos of any unauthorized access or suspicious activity. This article delves into how to use a trail camera for security, providing insights on effective setup, strategic placement, and efficient monitoring. Whether for deterring potential intruders or simply maintaining peace of mind, trail cameras offer a versatile and reliable solution for safeguarding your assets.
Understanding Trail Cameras
What is a Trail Camera?
A trail camera is a versatile device primarily designed to capture images and videos of wildlife without human presence. These cameras are equipped with advanced features such as motion detection, which triggers the camera to record when movement is detected, and infrared night vision, allowing them to capture clear images even in low-light conditions. Additionally, many trail cameras offer time-lapse capabilities, enabling them to record at set intervals, providing a comprehensive overview of the monitored area.
Key Features to Look For
When selecting a trail camera for security purposes, focus on features that enhance its effectiveness in capturing reliable footage. High video resolution ensures clear and detailed recordings, which are crucial for identifying potential intruders. A fast trigger speed is vital to capture images quickly after detecting motion. Long battery life is essential for continuous operation, minimizing the frequency of battery replacements, while ample storage capacity ensures sufficient footage can be recorded before transferring files.
Types of Trail Cameras
There are several types of trail cameras suited to various security applications. Standard trail cameras store footage on a local memory card and require manual retrieval. Cellular trail cameras, conversely, can send images and videos directly to your phone or email in real time, providing immediate alerts to any activity. Wi-Fi-enabled trail cameras allow remote access and monitoring via mobile or web applications, enhancing convenience and responsiveness. Each type brings unique advantages depending on the specific security needs and circumstances.

Selecting the Right Location for Your Trail Camera
Choosing the optimal location for your trail camera is crucial to ensuring its effectiveness in capturing significant activity. Begin by assessing vulnerable areas around your property where intrusions are most likely to occur. Common high-risk zones include entry points such as doors and windows, driveways, and secluded parts like backyards. Evaluating these locations will help prioritize where to place your cameras for maximum coverage.
Another key consideration when selecting a location is avoiding obstructions. Position the camera in areas where trees, fences, or shrubs do not obscure the lens, as these can hinder clear sightlines and impede movement detection. Ensure the camera has a direct line of sight to the intended monitoring zone to maintain an unobstructed view.
The height and angle of the camera play integral roles in capturing comprehensive images. Mounting the camera at a height of 6 to 8 feet is generally recommended, allowing it to capture faces and upper body movements while deterring tampering. Aim the camera slightly downward to cover more ground and enhance detail. Experimenting with different angles may also be beneficial to ensure the camera’s field of view is optimized to effectively monitor your property’s vulnerable areas.
How to Use a Trail Camera for Security: Setting Up the Trail Camera
Step 1: Preparing the Camera
Begin by gathering the necessary components for your trail camera setup: batteries, a memory card, and the camera unit itself. Open the battery compartment and insert high-quality batteries, ensuring they align with the polarity markings correctly. This step is crucial for maintaining the camera’s functionality and prolonging battery life. Next, insert a compatible memory card into the appropriate slot, formatting it according to the manufacturer’s instructions to optimize storage. Once inserted, confirm that the camera powers on successfully, and perform a quick functionality check by navigating through its menu to verify that all buttons and functions are responsive.

Step 2: Configuring Settings
With the camera prepared, configure the essential settings tailored to your specific security needs. Begin with the resolution setting, selecting the highest option available to capture clear and detailed footage. Consider the ideal video length for your surveillance context, balancing the need for comprehensive recordings with memory card capacity. Adjust the motion sensitivity to ensure the camera effectively captures movement without triggering excessively from small, irrelevant activity. Setting an appropriate sensitivity helps optimize battery usage and storage space. Lastly, ensure the time and date stamps are enabled and correctly set, providing crucial context for recorded footage.
Step 3: Mounting the Camera
The next step involves securely mounting your camera, which is vital for capturing stable, accurate footage. Utilize the straps or brackets provided with your camera to attach it to a sturdy surface like a tree trunk, post, or building exterior. Make sure the mounting is firm to prevent the camera from inadvertently shifting due to weather conditions or unexpected impacts. Position the camera at the recommended height of 6 to 8 feet, angling it slightly downward to maximize its field of view and capture relevant activity comprehensively.

Step 4: Testing the Camera
Before finalizing the installation, testing the camera’s field of view and motion detection capabilities is essential. Begin by observing through the camera’s lens to ensure it covers the desired area without obstructions. Conduct a series of movements within the detection zone to evaluate the responsiveness and accuracy of motion triggers. Adjust the positioning if necessary, fine-tuning the angle or height until the camera reliably captures all intended activity. These preliminary tests are crucial for avoiding blind spots and ensuring effective surveillance.
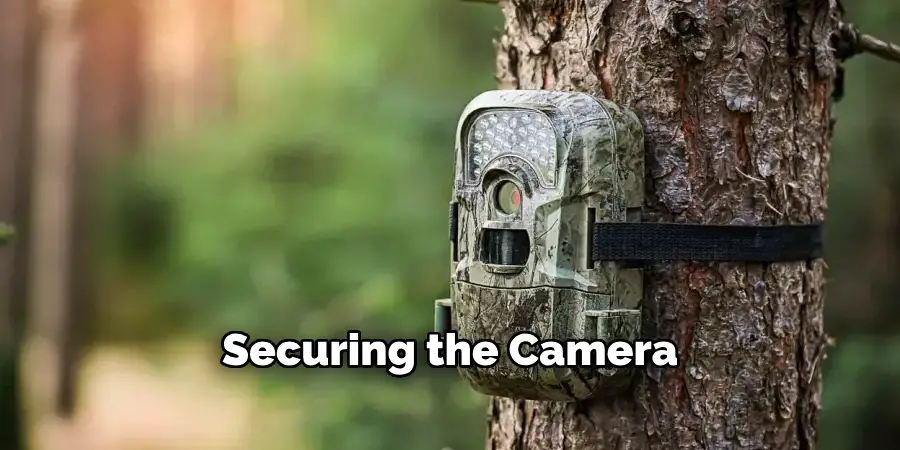
Step 5: Securing the Camera
Finally, secure your camera to safeguard it against theft or tampering. Consider using a locking box designed specifically for trail cameras, providing a robust barrier against unauthorized access. Alternatively, attach a durable steel cable lock to deter removal attempts. Place the camera in a relatively discreet location, minimizing visibility to reduce the risk of vandalism. These security measures ensure your trail camera remains operational and provide consistent surveillance to protect your property.
Monitoring and Reviewing Footage
Accessing Recorded Footage
Accessing recorded footage from your trail camera is straightforward and essential for analyzing the data it captures. For non-cellular models, remove the memory card from your camera and insert it into a card reader connected to your computer. This method lets you transfer images or videos directly to your device for detailed review and storage. Using a cellular or Wi-Fi-enabled camera may involve downloading files via the corresponding mobile app or web portal, eliminating the need for physical retrieval and streamlining access to the footage.
Using Mobile or Web Apps
Many cellular and Wi-Fi models offer dedicated mobile or web applications that enhance the management of camera settings and facilitate easy footage review. These apps allow you to configure motion sensitivity, resolution settings, and notification preferences remotely. They also provide organized views of recorded events, making it easier to sift through footage without being physically present at the camera’s location. Seamlessly syncing the footage with your devices keeps you updated and allows for proactive monitoring and response.
Identifying Key Events
When reviewing footage, focus on efficiently identifying key events that might indicate potential security concerns, like unauthorized access or suspicious activity. Set aside routine events and prioritize reviewing recordings from high-risk areas. Use timestamps to isolate and analyze footage during unusual activity times, such as late nights or early mornings, when intrusions are more likely. Highlight instances where motion detection was triggered, and thoroughly review these clips to ascertain any unusual occurrences, ensuring robust and effective security surveillance.
Enhancing Security with Multiple Cameras
Creating a Security Network
Deploying multiple trail cameras strategically is vital to fortify a wider area and elevate security effectiveness. Establish a security network by positioning cameras at key locations, ensuring overlapping fields of view that eliminate blind spots and provide continuous coverage. This setup can help capture activity from various angles, recording more comprehensive footage that enhances the ability to detect and respond to security breaches effectively.
Strategic Placement
When placing additional cameras, prioritize areas of high vulnerability, such as entrances, exits, and secluded property sections. Ensure each camera is positioned to maximize coverage and minimize the potential for tampering or obstruction. Consider environmental factors such as lighting and foliage, adjusting camera angles to counteract these elements for consistent monitoring.
Coordinating with Other Security Measures
Integrating trail cameras with supplementary security systems amplifies protection by creating a multi-layered defense. For example, coordinating camera activity with alarms or motion sensors enhances the ability to trigger immediate responses to suspicious activity. Implementing a unified system where cameras and alerts communicate can offer real-time notifications, allowing for prompt action to potential threats. Such integration streamlines security operations and strengthens overall resilience against intrusion.
Troubleshooting Common Issues
Issue 1: Camera Not Triggering
Ensure the motion detection settings are correctly configured when your camera fails to capture images or videos. Increase the sensitivity in areas with less movement to trigger recordings more reliably. Check the field of view to ensure it covers the desired area and remove any obstructions that may block the sensor. Additionally, verify that the camera’s firmware is current, as unresolved software issues can impact performance.
Issue 2: Poor Image Quality
If your camera is producing subpar images, first evaluate its positioning. Ensure it is secure and aimed correctly to capture the intended scene without distortions. Examine the lighting conditions; cameras may struggle in low light, so consider adding supplemental lighting or utilizing cameras with night vision capabilities. Regularly clean the lens to prevent dirt and debris from affecting image clarity.
Issue 3: Battery Life Concerns
Adjust the camera’s settings to reduce power consumption to extend battery life. Lower the frequency of image captures and video duration, and use settings that conserve energy when the camera is not actively detecting motion. Invest in high-quality, long-lasting batteries or consider using rechargeable batteries coupled with a solar power supply to maintain consistent performance without frequent replacements.
Conclusion
Trail cameras offer a versatile and efficient solution for enhancing property security. By strategically deploying cameras, homeowners and businesses can significantly bolster their surveillance capabilities, capturing critical footage that can deter and address potential threats. Key considerations for effective usage include understanding “how to use a trail camera for security,” ensuring proper placement, and integrating cameras with existing security systems for comprehensive coverage.
To maintain optimal performance, monitoring footage and adjusting camera settings in response to environmental changes or emerging security concerns is crucial. A consistent and thorough review of the security footage informs you of any suspicious activities and strengthens your overall security strategy. By taking these proactive measures, users empower themselves with the tools necessary to create a safer environment, leveraging technology to protect what matters most.