In today’s fast-paced world, ensuring the security of your home or business is paramount, and technology has made this more accessible than ever. Viewing Geeni camera footage on a PC offers unparalleled convenience, allowing you to monitor your surroundings from the comfort of your computer. Whether you are at work, traveling, or simply in another room, accessing your security camera feeds through your PC ensures you are always informed.

Geeni cameras are renowned for their key features such as remote monitoring, smart home integration, and user-friendly interfaces. These cameras support various utilities, including home security, pet monitoring, and baby monitoring. By understanding how to view Geeni camera on PC, you can experience enhanced security and peace of mind. This article will guide you through the necessary steps and tools needed for this setup, ensuring you can efficiently monitor your camera feeds on a larger screen.
Understanding Geeni Cameras
Overview of Geeni Cameras
Geeni cameras come in a variety of models, each designed to cater to different security and monitoring needs. The Geeni Rook offers crystal-clear 1080p HD video and night vision capabilities, making it perfect for round-the-clock home security. The Geeni Look, with its sleek design, is ideal for indoor surveillance, and it includes two-way audio so you can communicate remotely.
For those with pets, the Geeni Pet camera provides specialized features like pet motion detection, ensuring you can keep an eye on your furry friends even when you are away. The Geeni Baby camera is equipped with temperature sensors and lullabies, offering a comprehensive solution for baby monitoring. These diverse models can be utilized for various purposes, from ensuring the safety of your home to monitoring pets and babies, providing peace of mind no matter where you are.
Compatibility and Requirements
To view Geeni camera footage on a PC, certain hardware and software requirements must be met. Firstly, you need a PC with a stable internet connection to ensure seamless streaming of live feeds. On the software side, the primary requirement is the Geeni app, which needs to be installed on your computer. This app is available for download from the official Geeni website. Additionally, you will need a Geeni account, which can be created through the app or the Geeni website.

Once these prerequisites are in place, you can easily link your Geeni camera to the account and access the feeds from your PC. Meeting these requirements ensures that your setup process is smooth, allowing you to efficiently monitor your camera feeds without any technical hitches.
Tools and Software Needed
Geeni App for PC
The Geeni app is integral for viewing your Geeni camera feeds on a PC. This app is designed to be user-friendly and is compatible with various platforms, ensuring broad accessibility. Whether you are using a Windows or macOS system, the Geeni app can be downloaded and installed with ease.
Availability of Geeni App on Different Platforms
The Geeni app is available for Windows and macOS users. For Windows, the app can be downloaded from the Microsoft Store, ensuring compatibility with a wide range of Windows versions. For macOS users, the app is accessible through the Mac App Store, compatible with recent versions of macOS. This cross-platform availability ensures that users can access their camera feeds irrespective of their operating system.
Steps to Download and Install the Geeni App on PC
- Visit the Official Geeni Website: Navigate to the official Geeni website to find the download link for the Geeni app. Ensure you select the correct version for your operating system.
- Download the App: Click on the download link and wait for the download to complete. The file size is typically small, so the download should not take long.
- Install the App: Once the download is complete, locate the installer file in your Downloads folder and double-click it to start the installation process. Follow the on-screen instructions to complete the installation.
- Log In or Create an Account: After installing the Geeni app, open it and log in with your Geeni account credentials. If you do not have an account, follow the prompts to create one.
- Link Your Camera: Once logged in, follow the instructions to link your Geeni camera to the app. Ensure your camera is connected to the same Wi-Fi network as your PC during this process.
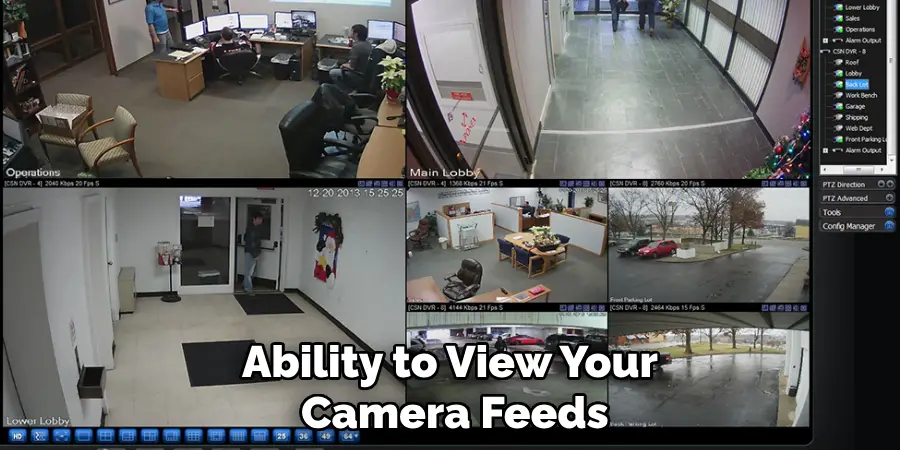
- Access Camera Feeds: After linking your camera, you will be able to view live feeds directly through the Geeni app on your PC. Navigate through the app interface to access various features such as video playback, motion detection settings, and more.

By following these steps, you can effortlessly set up and use the Geeni app on your PC, enabling you to monitor your surroundings with convenience.
Alternative Methods
While the Geeni app is the primary method for viewing camera feeds on a PC, there are alternative methods available for enhanced flexibility.
Using an Android Emulator (e.g., BlueStacks)
An Android emulator like BlueStacks allows you to run the Geeni app on your PC as if it were on an Android device. To use this method, download and install BlueStacks from its official website. After installing BlueStacks, search for the Geeni app in the Google Play Store within the emulator, download it, and log in with your Geeni account. This method replicates the mobile app experience on your PC.
Accessing via Web Browser (if applicable)
In some cases, Geeni may offer a web portal for accessing camera feeds directly through a web browser. Check the Geeni website for information on the availability of this feature. If supported, simply navigate to the web portal, log in with your Geeni account, and access your camera feeds without needing to install additional software.
Using either of these alternative methods provides flexibility and ensures that you can always monitor your Geeni camera feeds, even if the Geeni app for PC is unavailable.
How to View Geeni Camera on PC: Preparation Steps
Setting Up the Camera
To get started with your Geeni camera, the first step is connecting it to your home Wi-Fi network. Begin by plugging in your camera and ensuring it’s powered on. Follow the instructions in the Geeni app to put the camera into pairing mode. Open the Geeni app on your smartphone or PC, navigate to the “Add Device” section, and select the appropriate camera model. The app will guide you through the process of connecting the camera to your home Wi-Fi network, including entering your Wi-Fi password.

After successfully connecting the camera to the network, it’s essential to ensure the camera is properly installed and functional. Place the camera in a location that provides a clear view of the desired monitoring area. Secure the camera mount as needed and adjust the angle to capture the best possible footage. Finally, test the live feed through the app to confirm that the camera is working correctly and positioned optimally.
Creating a Geeni Account
Creating a Geeni account is straightforward and enables you to link and manage your Geeni devices. Start by opening the Geeni app and selecting the “Create Account” option. You will be prompted to enter your email address and create a password. After filling in the necessary details, check your email inbox for a verification email from Geeni. Click the verification link in the email to confirm your account.
Once your account is verified, return to the Geeni app and log in with your new credentials. To link your camera to your Geeni account, follow the instructions on the app’s home screen. Select “Add Device” and pick the camera model you are setting up. Ensure that the camera is in pairing mode and connected to your home Wi-Fi network. Follow the on-screen prompts to complete the linking process, and once linked, you can access and manage your camera feeds through the Geeni app.
How to View Geeni Camera on PC: Viewing Geeni Camera on PC
Using the Geeni App on PC
Logging into the Geeni App on the PC
To log into the Geeni app on your PC, start by launching the app that you’ve previously downloaded and installed. Enter your Geeni account credentials—your registered email address and password—on the login screen. If you have two-factor authentication enabled, make sure to complete that process as well. Once you’ve successfully logged in, you’ll be greeted with the main dashboard of the app.

Navigating the App Interface to View Camera Feeds
Navigating the Geeni app interface on your PC is intuitive and user-friendly. On the main dashboard, you will see a list or grid of your connected cameras. Simply click on the camera you wish to view, and you’ll be taken to the live feed screen. Here, you can see real-time footage from your camera, with options to record, take snapshots, or adjust settings such as motion detection. The sidebar typically offers additional navigation options like device management, account settings, and support resources.
Using an Android Emulator
Installing BlueStacks or Another Emulator
If you prefer using an Android emulator, installing one like BlueStacks is straightforward. Visit the official BlueStacks website and download the installer package for your operating system. Once downloaded, run the installer and follow the on-screen instructions to complete the installation process. BlueStacks may take some time to set up, so be patient.
Setting Up the Geeni App Within the Emulator
After BlueStacks is installed and launched, you will need to sign in with your Google account to access the Google Play Store. Once logged in, navigate to the Play Store and search for the Geeni app. Click the install button and wait for the download and installation to complete. Open the Geeni app within BlueStacks and login with your Geeni account credentials. The app interface within the emulator will mimic the mobile version, making it easy to navigate.
Accessing the Camera Feed Through the Emulator
With the Geeni app set up within BlueStacks, accessing your camera feed is just as simple as using your mobile device. From the Geeni app’s home screen, select the camera you wish to view. The live feed will display on your PC screen, offering the same features as the mobile version, including recording, snapshots, and settings adjustments.

Using a Web Browser
Checking for Geeni Web Portal Availability
Before using a web browser to view your Geeni camera feeds, you’ll need to check if Geeni offers a web portal. Visit the official Geeni website and look for any mention of web access for camera feeds. The availability of this feature might vary, so it’s essential to consult the latest information provided by Geeni.
Steps to Log In and View Camera Feeds via a Browser (if supported)
If the web portal is available, open your preferred web browser and navigate to the Geeni web portal login page. Enter your Geeni account email and password, and follow any additional authentication steps if required. Once logged in, the interface should show your connected devices, including your cameras. Select the camera you want to view, and the live feed will appear directly in your browser. This method provides a convenient way to access your camera feeds without needing to install additional software, making it ideal for quick checks or monitoring while on the go.
Troubleshooting Common Issues
Connection Problems
Experiencing connection problems with your Geeni camera can be frustrating, but there are a few common issues and solutions to consider. First, ensure that both the camera and your PC are connected to a stable internet connection. Test other devices to check that your Wi-Fi network is functioning correctly. If the camera frequently disconnects, try moving it closer to your router to improve signal strength. Additionally, ensure that there are no physical obstructions or electronic devices causing interference between the camera and router.
If connection problems persist, restart both your camera and router. Resetting the camera to factory settings and reconfiguring it within the Geeni app might also resolve connectivity issues. Finally, make sure that your router’s firmware is up to date, as outdated firmware can sometimes cause compatibility issues with connected devices.
App or Emulator Issues
Problems with the Geeni app or emulator can hinder your ability to view your camera feeds and manage your devices. If you encounter issues with the Geeni app crashing or freezing, begin by checking if there are any available updates for the app. App updates often include bug fixes and performance improvements. Navigate to the app store on your mobile device or the Google Play Store within your emulator to ensure you have the latest version installed.

Should updating the app not resolve the issue, consider reinstalling the Geeni app. For emulator-specific issues, such as BlueStacks not launching or running sluggishly, check for updates to the emulator software. Sometimes, uninstalling and then reinstalling BlueStacks can also help clear any cached data causing problems. Ensure your PC meets the system requirements for the emulator and consider closing other applications to allocate more resources to BlueStacks. If issues continue, consult the support resources available for both the Geeni app and your chosen emulator.
Additional Features and Settings
Adjusting Camera Settings
The Geeni app offers a comprehensive suite of camera settings to customize your surveillance experience. To modify video quality, navigate to the specific camera’s settings and select from various resolution options, allowing you to balance clarity with storage needs. Motion detection settings can be tailored by adjusting sensitivity levels and defining specific zones within the camera’s field of view, ensuring you capture only the most pertinent activity. Additionally, you can enable notifications to receive alerts whenever motion is detected.
Advanced features within the Geeni app can further enhance your camera’s functionality. These include configuring schedules for recording or motion detection, enabling night vision, and setting up privacy masks to exclude certain areas from monitoring. Accessing these settings is straightforward within the app’s interface, ensuring you can fine-tune your camera’s performance to suit your specific needs.

Recording and Storing Footage
Recording and storing footage from your Geeni camera provides peace of mind, knowing that all events are captured and retrievable. The app allows for both local and cloud storage options. For local storage, you can use a microSD card inserted into the camera. Video is recorded directly onto the card, making it easy to retrieve and manage directly from the camera.
Cloud storage offers an alternative and is ideal for users needing additional storage space or enhanced security. Subscribing to Geeni’s cloud service enables your footage to be stored securely online, accessible from any device via the Geeni app. Managing stored footage is user-friendly; you can browse, playback, and download recordings directly from the app. Whether you opt for local or cloud storage, these features ensure that your surveillance data is safely recorded and easily accessible.
Conclusion
In summation, this article has highlighted various methods and solutions for optimizing your experience with Geeni cameras on a PC. We delved into network troubleshooting tips, resolved app and emulator issues, and discussed how to adjust camera settings to suit your needs. Recording and storing footage, whether locally or through cloud storage, were also covered to provide comprehensive surveillance options. The importance of securing your camera feed and maintaining privacy was emphasized to protect your data.
Viewing Geeni camera feeds on a PC is straightforward and offers considerable benefits, such as larger screen monitoring and the flexibility to manage multiple devices easily. We encourage you to explore the additional features within the Geeni app to enhance your setup further and ensure your camera system remains secure. For more information on “how to view geeni camera on PC,” refer back to the detailed sections above and consider implementing the recommended practices for an optimized and secure experience.
