
If you’re looking to add an extra layer of security to your home, a video doorbell is a great option. Arlo’s video doorbell is easy to install, and it offers a variety of features that make it a top choice for home security. In this blog post, we’ll show you how to install Arlo video doorbell so you can start enjoying its many benefits. Keep reading to learn more!
Why Install Arlo Video Doorbell?
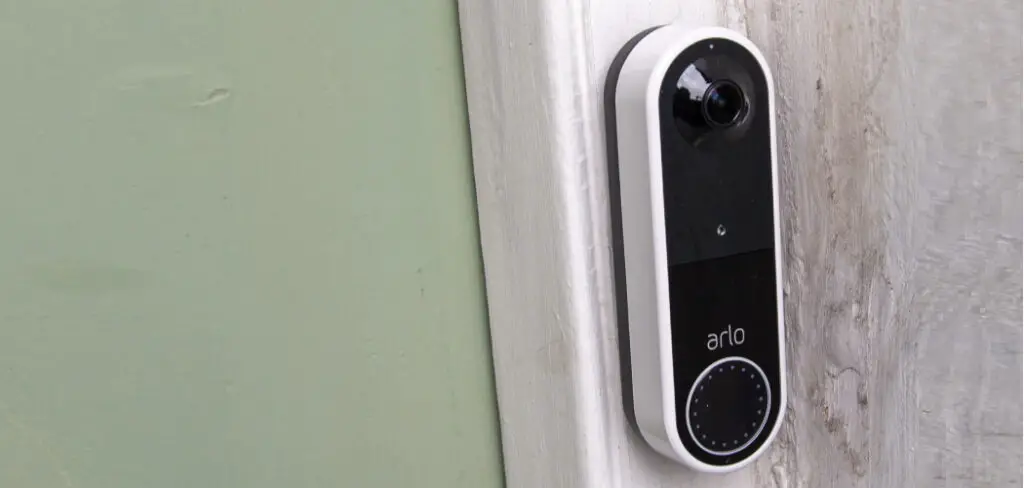
Arlo video doorbell is a great way to keep an eye on your home, whether you’re there or not. It gives you the ability to see and hear who is at your door, from anywhere. Plus, with Arlo’s motion detection and night vision capabilities, you can be sure that you’ll always know what’s going on around your home.
There are other reasons you might want to install an Arlo video doorbell. Some of the top benefits include:
Added Security:
Arlo’s video doorbell can act as an extra set of eyes on your home, day or night. With motion detection and night vision, you can be alert to activity even when not there.
Convenience:
With an Arlo video doorbell, you can see and speak to visitors without ever having to leave your comfort zone. So whether you’re in the kitchen or on the other side of the world, you can always watch who is at your door.
Peace of Mind:
Arlo doorbells give you the peace of mind that comes with knowing that you can see and hear what’s going on at your front door, no matter where you are.
Deter Burglars:
A video doorbell can be an excellent deterrent for burglars. However, seeing a camera at your door, especially one recording, will likely make them choose another home to target.
Security:
Arlo video doorbells provide an extra level of security for your home. With the ability to see and hear who is at your door, you can be sure that unwanted visitors won’t be able to sneak in.
What You’ll Need
What you need to install the Arlo video doorbell:
- A Compatible Device
- The Arlo App
- A Steady Internet Connection
- A Power Source
- A Drill
- A Screwdriver
- An Anchor
- A-Level (optional)
How to Install Arlo Video Doorbell Step by Step Guide
Step 1: Turn Off the Power
Make sure that the power to your doorbell is turned off before beginning the installation process. If you’re not sure how to do this, consult your doorbell’s manual or the manufacturer.
Step 2: Disconnect the Wires
Before you begin, disconnect the wires from the doorbell chime inside your home. To do this, remove the cover of the doorbell chime and unscrew the wire terminals. Once the wires are disconnected, you can proceed with removing the old doorbell.
Step 3: Remove the Existing Doorbell
Remove your existing doorbell by unscrewing the two screws that hold it. If your home doesn’t have a doorbell wire, you can install one using the included wire extender.
Step 4: Mount the Base Plate
Use the screws provided in your kit to mount the base plate onto the wall where you want your Arlo Video Doorbell to be installed. Make sure the base plate is level before proceeding to the next step.
Step 5: Connect the Wires
Connect the wires to the terminals on the back of the doorbell, and then screw the terminals tight. Use the included wire extender if you don’t have a doorbell wire.
Step 6: Mount the Doorbell
Now that your Arlo Video Doorbell is all set up, it’s time to mount it on your door. Ensure that the doorbell is at least 4 inches from the ground and is in a well-lit area. Use the screws and wall anchors that came with your doorbell to secure it. Once the doorbell is mounted, you’re ready to start using it!
Step 7: Turn on the Power
Screw in the provided faceplate until it is finger-tight. Next, connect the power cable to the back of the Arlo Video Doorbell and screw it in clockwise until it is secure. Finally, push the green button on the side of the doorbell to turn on the power.
If you have an existing chime, you can connect it now. If not, you can skip to the next step. Now you should see a live video feed of your doorstep on your Arlo app.
Step 8: Test the Two-Way Audio
To test the two-way audio, press and hold the doorbell button on your app. This will open up a two-way audio connection so you can talk to whoever is at your door.
Now that you’ve installed your Arlo Video Doorbell, you can feel safe and secure knowing that you’ll always know who is at your doorstep. With two-way audio, you can even have a conversation with the person at your door, no matter where you are.
If you have any questions about how to install Arlo video doorbell, be sure to check out the company’s website or give their customer service a call. They’ll be more than happy to help you out!
How to Install Arlo Video Doorbell (Wire-Free)
1. Charge the Battery that Came with Your Video Doorbell
Before you begin the installation process, charge the battery that came with your Arlo Video Doorbell. To do this, remove the battery door and insert the battery into the charging port.
2. Connect Your Device to Your 2.4 G Hz Wi-Fi Network
Open the Arlo app and tap Add Device if you haven’t already. Select Video Doorbell and follow the in-app instructions to complete setup.
Make sure your mobile device is connected to your 2.4 G Hz Wi-Fi network before setting up.
3. Check Your Internet Connection Speed
Before you begin installing your Arlo Video Doorbell, you’ll need to ensure that your home’s internet connection is fast enough to support it. The doorbell requires a minimum speed of 2 Mbps, but 4 Mbps is recommended for optimal performance. You can check your internet connection speed by visiting an online speed test site like Speedtest.net.
4. Choose a Location for Your Doorbell
The next step is to choose a location for your doorbell. It’s important to pick a spot that has a good view of your front door and is within range of your home’s Wi-Fi router. If you’re unsure where to put it, try using the Arlo Doorbell Location Finder tool.
5. Drill a Hole for the Mounting Bracket
Once you’ve chosen a location, you’ll need to drill a hole for the mounting bracket. The hole should be 1-1/2 inches in diameter and no more than 2 inches deep.
6. Attach the Mounting Bracket
With the hole drilled, you can now attach the mounting bracket. Start by threading the mounting screw into the bottom of the bracket, then carefully inserting the bracket into the hole. Use a level to make sure it’s straight, then tighten the screw until the bracket is secure.
7. Test and Enjoy
Now that your Arlo Video Doorbell is installed, it’s time to test it out. Open the app and wait for the doorbell to connect. Once it does, you’ll be able to see and speak to anyone who rings your doorbell. Enjoy!
How to Install Arlo Wired Video Doorbell?
If you want to install an Arlo wired video doorbell, you need to purchase the Arlo doorbell kit. This kit includes the doorbell, a power adapter, screws, and wall anchors. Once you have the kit, follow these steps:
- Choose a spot for your doorbell. It’s important to pick a spot that has a good view of the entrance to your home.
- Drill a hole in the wall where you want to place the doorbell.
- Run the included power cord through the hole and connect it to the doorbell.
- Mount the doorbell using the screws and wall anchors.
- That’s it! Your Arlo doorbell is now installed and ready to use.
If you have any questions about how to install Arlo wired video doorbell, please feel free to reach out to us. We’re always happy to help.
You Can Check It Out to Do You Install a Ring Doorbell On Brick Without Drilling
Frequently Asked Question
Does Arlo Doorbell Require Wiring?
Arlo Doorbell does not require any wiring, making it easy to install. You can fix it to the doorframe using the provided screws and wall plugs. Once installed, you will need to connect it to your home Wi-Fi network.
Do You Need an Existing Doorbell for Arlo Doorbell?
No, you do not need an existing doorbell for the Arlo Doorbell. The device includes all of the hardware you need to install it, including a chime and mounting bracket.
Can I Connect Arlo Wireless Doorbell to Base Station?
Yes, you can connect the Arlo wireless doorbell to the base station. The doorbell has a built-in battery, and it will work even if there is a power outage.
Does Arlo Doorbell Require a Base Station?
Arlo Doorbell does not require a base station, but it does need to be connected to the internet. The Arlo app will guide you through the process of connecting your doorbell to your home network.
Why Is My Arlo Doorbell Not Working?
If your Arlo video doorbell isn’t working, you may need to reset it. Hold down the orange button on the back of the doorbell for 10 seconds to do this.
You Can Check It Out to: Unlock a Screen Door
Conclusion
If you are looking for an easy-to-install video doorbell, the Arlo Video Doorbell is a great option. The Arlo Video Doorbell can be installed in minutes and does not require any wiring. You will have peace of mind knowing that you can see who is at your door no matter where you are. Thanks for reading our post about how to install Arlo video doorbell.
You may also read: How to Open a Locked Window Without Breaking It
1 thought on “How to Install Arlo Video Doorbell”