
Installing security cameras is a way to help keep your home and family safe. While there are many options on the market, Blink cameras are a great choice for those who want an easy installation process. In this post, we will show you how to install blink camera on brick wall. Keep reading for more information!
Why Is It Important to Install a Blink Camera on a Brick Wall?
Installing a Blink camera on a brick wall is important for a few reasons. First, brick is a very sturdy material and can provide a good foundation for your security camera. Second, brick walls are often found near entrances and exits to a home, which makes them an ideal spot for monitoring activity. Finally, brick walls can be difficult to penetrate, so a security camera mounted on one can help deter criminals from trying to break in.
Things You’ll Need
To install your Blink camera on a brick wall, you’ll need the following supplies:
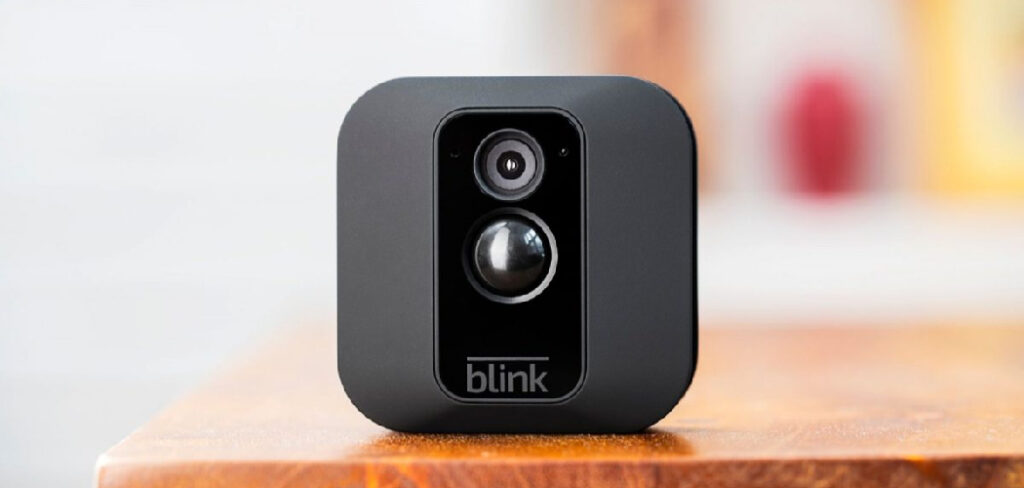
Blink Camera:
You can purchase a Blink camera as a standalone unit or as part of a kit that includes multiple cameras. Make sure you have it on hand before starting the installation process.
Drill:
Since brick is a hard material, you’ll need a drill with masonry bits to make holes for mounting your Blink camera.
Screws and Anchors:
To ensure your camera is securely mounted, you’ll need screws and anchors specifically designed for brick walls.
Level:
A level will help ensure your camera is installed straight.
Ladder:
Depending on the height of your wall, you may need a ladder to reach the desired installation spot.
How to Install Blink Camera on Brick Wall 11 Step-by-Step Guide
Step 1: Get Your Tools Ready
You’ll need a screwdriver, drill, level, and ladder. Make sure you have everything on hand before beginning the installation process. Otherwise, you’ll have to stop in the middle and go get your tools. It’s also a good idea to have someone else there to help hold the camera and check for levelness. You’ll also want to have a pencil on hand to mark where you need to drill.

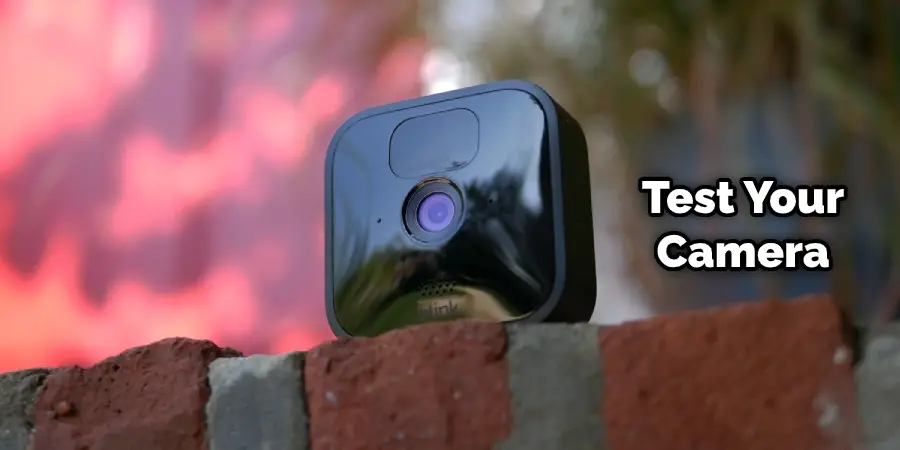
It’s also a good idea to test your camera beforehand to make sure it is working properly. This way, you won’t have to uninstall and reinstall it if you run into issues during the installation process.
Step 2: Select the Location
Once you have your camera, you will need to select a location to install it. The best place to install a Blink camera on a brick wall is near the entrance or exit of your home. This will give you a good view of any activity happening in and around that area. You may also want to consider the height at which you install the camera, as higher placements can provide a wider viewing angle. If you have multiple cameras, make sure they are spaced out evenly for maximum coverage.
But before you start drilling, hold the camera in place and check its field of view. Make sure it is aligned with the area you want to monitor and that there are no obstructions.
Step 3: Drill the Holes
Now it is time to drill the holes for the camera. You will need to use a power drill with a masonry bit. The size of the bit will depend on the size of your camera. Start by drilling two holes in the top left corner of the brick wall. Make sure that the holes are big enough for the camera to fit through. Use a level to ensure the holes are straight.
You may also want to drill a hole in the center of your installation location for the camera’s power cord. However, if you plan on running the cord along the wall or using an extension cord, you can skip this step.
Step 4: Mount the Camera
Once the holes are drilled, it is time to mount the camera. Put the camera through the holes and then use the screws that came with the camera to secure it in place. Make sure that the camera is level before you tighten the screws. It’s important to have someone hold the camera steady while you do this to ensure it stays level. But be careful not to over-tighten the screws, as this may cause damage to your camera. The camera should be securely mounted and not move or sway when pushed lightly.
It’s important to note that if you are using multiple cameras, it’s best to install them one at a time. This will allow you to make any necessary adjustments before moving on to the next camera.
Step 5: Connect and Secure the Power Cord
If you drilled a hole in the power cord in step three, now is the time to secure it in.
Step 5: Connect the Camera
Now, it is time to connect the camera to your home’s Wi-Fi network. The camera comes with a QR code that you can scan with your phone to set up the camera. If you don’t have a phone, you can also set up the camera using a computer. Either way, make sure the camera is connected to your Wi-Fi network for it to function properly. You can also set up motion detection and other features through the Blink app. You can also choose to save your footage to the cloud or an external storage device.
Step 6: Test the Camera
Before you fully secure the camera, it’s important to test it out first. Make sure that the camera is working properly and capturing footage. You can also adjust the viewing angle if needed before securing it. It’s also a good idea to check the camera’s night vision capabilities, especially if you plan on using it in low-light conditions. There’s nothing worse than installing a camera only to find out it’s not working properly. But don’t worry; Blink cameras are known for their reliability and performance. You can also test the camera by walking around the area to see if it captures your movement.
Step 7: Seal the Holes
Now that your camera is installed and tested, you can seal up the holes. If there are any gaps around the camera, use silicone caulk or weatherproof tape to fill them in. This will help protect your camera from any water or debris that may enter the holes. You can also use brick dust or paint to camouflage the holes and make them less noticeable. It’s important to keep your camera protected from the elements to ensure it has a longer lifespan. You can also consider installing a weatherproof cover for added protection. They are relatively inexpensive and easy to install.
Step 8: Mount the Camera Cover
Blink cameras come with a plastic cover that helps protect them from rain and other weather conditions. Make sure to install this cover over your camera, as it will also help hide any wires or cords. The cover should snap securely and be designed to stay on even in harsh weather. If you live in an area with extreme weather conditions, you may want to consider purchasing a separate weatherproof cover for added protection.
Step 9: Adjust the Camera Angle
If needed, you can adjust the angle of your camera by rotating its base. This will allow you to fine-tune the viewing angle and capture any blind spots that were missed before. Just be careful not to rotate the camera too much, as this can cause damage to the wires and connections inside. It’s important to regularly check and adjust your camera’s angle to ensure you are getting the best possible footage.
Step 10: Consider Additional Features
Blink cameras have a variety of additional features that you may want to consider using. This includes motion detection, live view, and cloud storage for footage. By setting up motion detection, you can receive alerts on your phone when the camera detects any activity. Live view allows you to check in on your camera at any time, even when no motion is detected. And with cloud storage, you can access and save footage from your camera without having to worry about physical storage limitations. These features can provide added convenience and security for your home.
Step 11: Regular Maintenance
Just like any other electronic device, it’s important to regularly maintain your Blink camera. This includes checking the battery level, cleaning the lens and cover, and making sure the camera is still securely mounted. You may also want to periodically check for software updates through the Blink app to ensure your camera is running on the latest version. By regularly maintaining your camera, you can prolong its lifespan and ensure it continues to function properly as a reliable security tool for your home.
Now that you have successfully installed your Blink camera on a brick wall, you can enjoy peace of mind knowing that your home is being monitored and protected. With regular maintenance and the use of additional features, you can add convenience and security to your home. So go ahead and install those cameras in other areas of your home and continue to keep an eye on things even when you’re away.
How High Should You Mount a Blink Camera?
Your Blink camera needs to be mounted high enough to get a good view of the area you want to monitor but not so high that it’s easy for someone to tamper with. We recommend mounting your Blink camera at least 7 feet off the ground. This will give you a clear view of the area while also making it more difficult for someone to reach the camera and disable it.
Keep in mind that Blink cameras can be used indoors or outdoors, so you’ll need to adjust the height accordingly. If you’re mounting the camera indoors, we recommend placing it on a high shelf or in a corner where it can get a good view of the room without being obstructed.
For outdoor cameras, you may need to use a step ladder to reach the recommended height. Whatever height you choose, make sure the camera is securely mounted and won’t be easily knocked over.
You Can Check It Out to: Mount a Blink Mini Camera
Special Considerations That One Needs to Take Into Account
Yes, there are a few special considerations that one should take into account when installing their Blink Camera on a surface, like bricks or concrete blocks. First, the camera must be positioned in such a way as to have an unobstructed view of the area desired for monitoring.
Additionally, if outdoor installation is desired, it is important to ensure the camera and mounting surface are adequately sealed off from water, as this can damage the camera. If installed on a brick or concrete surface, it is important to use the correct type of anchors and screws to ensure that the camera stays secure; using incorrect hardware can result in eventual detachment from the mounting surface.
Finally, be sure to follow all of Blink’s instructions for the installation and use of the camera, as this will help ensure safe and effective operation.
By following these simple guidelines, you can ensure that your Blink Camera is securely installed on surfaces such as bricks or concrete blocks. This will allow you to monitor your home or business with peace of mind, knowing that your security camera is safe.
How to Hide Wires Inside Walls After Mounting the Blink Camera on Exterior Wall?
Mounting a blink camera on the exterior wall of your home can be a great way to monitor activity in and around your house. This also means, however, that you’ll need to find ways of hiding the wires connecting it.
There are several tips when it comes to tucking those pesky cables away so that they blend into your existing décor. To start with, make sure the wall is clear of any objects and insulation materials like cardboard or foam that you plan to run the wires through. Once this has been done, use wire molding or plastic track outdoor rated cable raceway along the wall and paint them in a color that blends in nicely with the overall look of your home.
These forms of wire concealment can provide an aesthetically pleasing solution while also protecting your wiring from potential damage due to exposure and wear and tear over time.
You Can Check It Out to Remove Xfinity Door Sensor
Frequently Asked Question
Are Blink Cameras Easy to Install?
Blink cameras are easy to install. You just need to remove the screws on the back of the camera and then use the sticky tape to attach it to the wall.
How High Should You Mount a Blink Camera?
Installation of Blink Camera on a brick wall is a very easy process. The most important factor you need to consider before installing your camera is how high you should mount it. Most experts agree that you should mount your camera at least 7-10 feet off the ground for optimal viewing.
Do You Have to Pay a Monthly Fee for Blink Camera?
No, you do not have to pay a monthly fee for Blink Camera. The cameras are powered by two AA batteries, which will last for about two years.
Do Blink Cameras Record All the Time?
No, Blink Cameras do not record all the time. They only record when they sense motion or when you tell them to.
How Many Blink Cameras Can You Have on One Sync Module?
According to Blink, you can have up to four Blink cameras on one Sync Module. However, keep in mind that adding more cameras will use up battery power more quickly. If you are using solar panels to power your Blink camera, then you may want to limit the number of cameras to two or three.
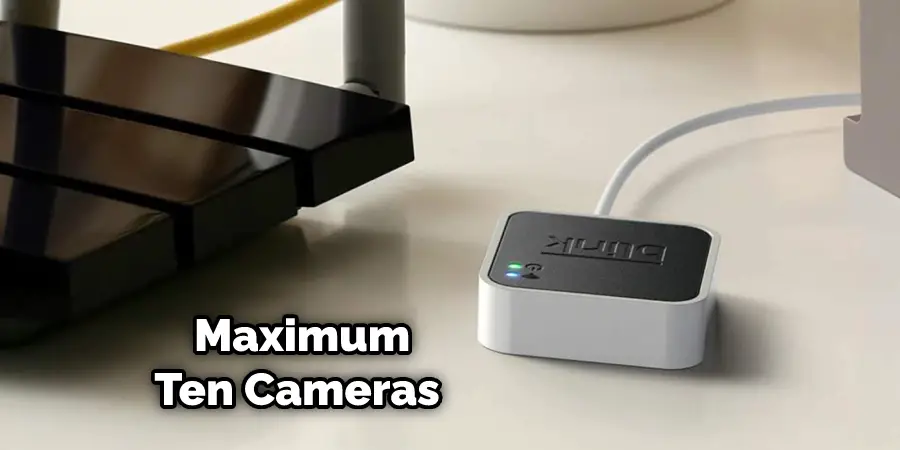
Also, keep in mind that each Blink camera requires its own Blink Sync Module. So, if you want to have more than four Blink cameras, you will need to purchase additional Blink Sync Modules.
What Does It Mean When Blink Camera Flashes Red?
There are a few different things that could cause your Blink camera to flash red. It could be an indication that the battery is low, or it could mean that there’s been some sort of motion detected in the area. If you’re not sure what the red light means, it’s best to contact customer support for assistance.
Conclusion
If you are looking for a camera that is easy to install and doesn’t require any drilling, the Blink Camera is a great option. This camera can be mounted on almost any surface, including brick walls. All you need is the double-sided adhesive tape to mount it. Since no wiring is required, installation is a breeze.
So if you’re looking for an easy way to add security to your home, the Blink Camera is definitely worth considering. Thanks for reading our post about how to install blink camera on brick wall.
You can also check it out: How to Change Outdoor Security Light Bulb