
Car keys can get lost or damaged, which makes it difficult to start and stop a vehicle. Even if you have an additional key made, many models require a special ignition lock cylinder that needs to be activated with the key in order for the car to finally turn on.
If your GM model doesn’t have that traditional cylinder, then learning how to remove the ignition lock without one is essential, especially if there’s no access or budget available for making a new one.
In this blog post, we will discuss various methods of removing an Ignition Lock Cylinder without any keys involved – saving time and money and giving peace of mind that you never need to worry about someone stealing your car because they can easily unlock it with some creative thinking! So keep on reading to learn more about how to remove GM ignition lock cylinder without key.
What Are Gm Ignition Lock Cylinders and How They Work
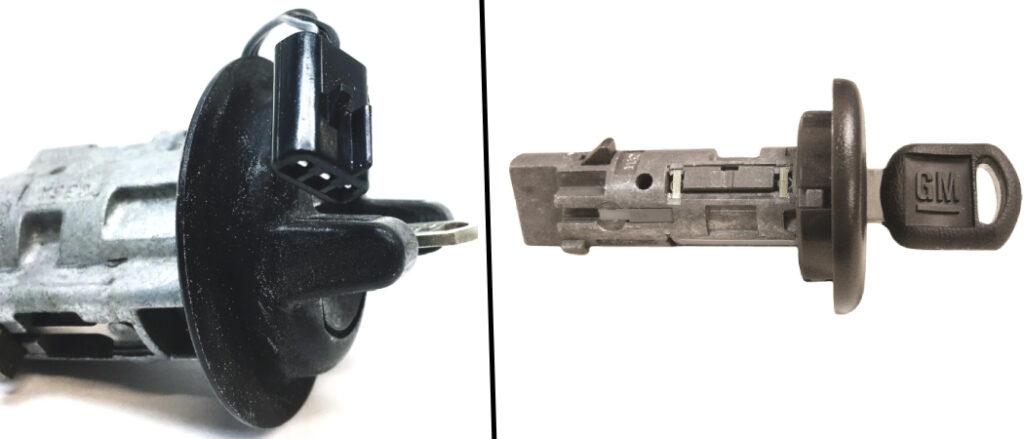
GM ignition lock cylinders are mechanical components that are part of a vehicle’s ignition system. They are located on the steering column and are responsible for allowing the driver to start the car by turning the key in the ignition.
Here’s how they work:
- The key is inserted into the lock cylinder and turned.
- As the key is turned, it rotates the lock cylinder, which is connected to a series of pins and springs inside the ignition switch.
- The pins and springs inside the ignition switch moved to align the tumblers in the lock cylinder, allowing the cylinder to turn and engage the starter.
- Once the lock cylinder has been turned and the engine has started, the driver can release the key, and the lock cylinder will return to its original position.
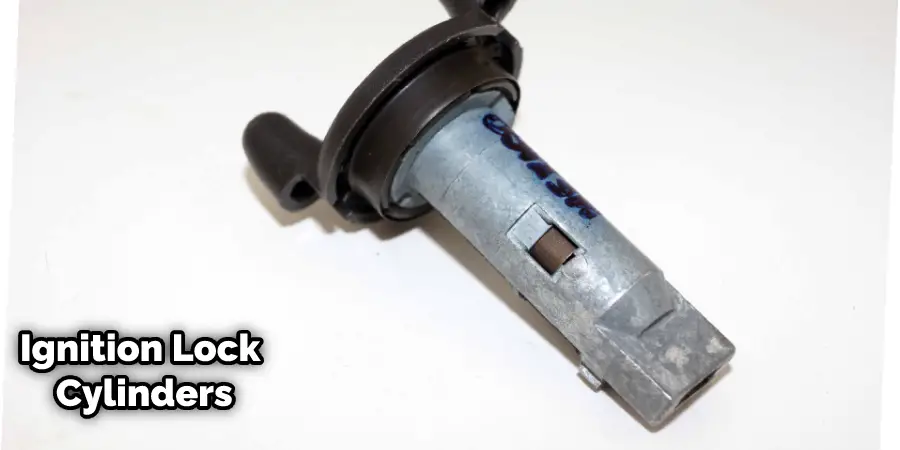
In summary, the lock cylinder is an important part of the ignition system that allows the driver to start and stop the car. It works by aligning tumblers and engaging the starter when the key is turned. If the lock cylinder is not working properly, the engine may not start, or the key may become stuck in the ignition.
Why You Need to Know how To Remove GM Ignition Lock Cylinder without Key
There are several reasons why someone might need to know how to remove a GM ignition lock cylinder without a key. Here are a few possible scenarios:
- Lost or stolen key: If you have lost your car keys or they have been stolen, you may need to remove the ignition lock cylinder to gain access to your vehicle.
- Malfunctioning lock cylinder: Over time, the lock cylinder in your vehicle’s ignition may begin to malfunction, making it difficult or impossible to start the car. In this case, you may need to remove the cylinder in order to replace it with a new one.
- Broken key: If the key has broken off inside the lock cylinder, it may be necessary to remove the cylinder in order to extract the broken key and replace it with a new one.
- Upgrading security: Some people choose to upgrade the security of their vehicle by installing a new lock cylinder. If you are upgrading your vehicle’s security, you may need to remove the old lock cylinder in order to install a new one.

In any of these situations, knowing how to remove a GM ignition lock cylinder without a key can be a valuable skill. It can save you time and money by allowing you to handle the task yourself, rather than relying on a professional locksmith or mechanic. However, it is important to note that removing the lock cylinder without a key may not be legal in all jurisdictions, so be sure to check your local laws before attempting to do so.
8 Steps on How to Remove Gm Ignition Lock Cylinder without Key
Step 1: Insert A-Head Screwdriver Into the Ignition Lock Cylinder:
Insert a small, flat A-head screwdriver into the ignition lock cylinder. The point of the screwdriver should be facing toward the back of the cylinder.
Step 2: Push Down On the Screwdriver to Release Spring Tension:
Firmly push down on the screwdriver and hold it in place for a few seconds as you release tension from the springs inside the lock cylinder.
Step 3: Turn the Screwdriver to Move the Lock Cylinder:
Slowly turn the screwdriver clockwise until it begins to move the lock cylinder away from the ignition switch. Keep turning until the lock cylinder is free and can be removed by hand.
Step 4: Gently Pull Out the Lock Cylinder:
Gently pull out the lock cylinder and set it aside. Do not force it, as this could damage the ignition switch.
Step 5: Test The New Ignition Switch:
Before installing a new lock cylinder, test the new ignition switch to make sure it is working properly.
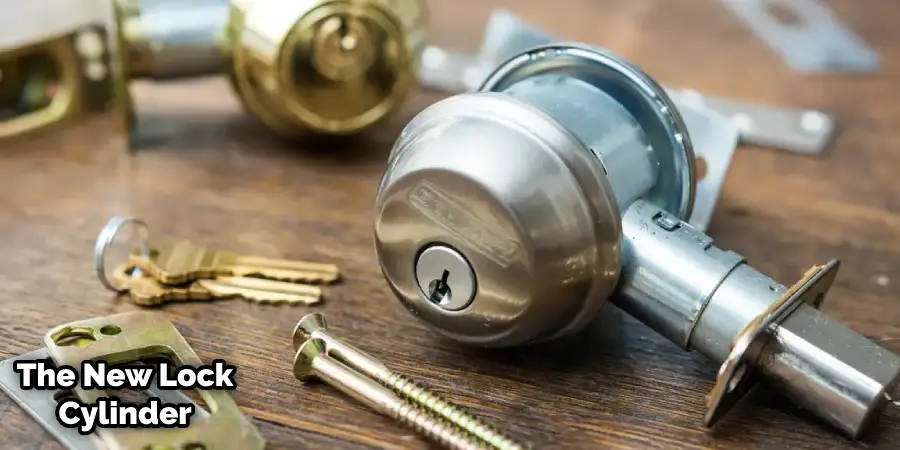
Step 6: Install The New Lock Cylinder:
Insert the new lock cylinder into the ignition switch and turn it clockwise until it is locked in place. Turn the key to make sure that it turns smoothly.
Step 7: Re-engage Tumblers:
Insert a flathead screwdriver into the tumbler slots of the lock cylinder and turn them clockwise to re-engage them.
Step 8: Test The New Lock Cylinder:
Insert the key into the new lock cylinder and turn it to verify that it is working properly. Once you have confirmed that everything is functioning correctly, you can reinstall the lock cylinder into the ignition switch.
Congratulations! You have successfully removed a GM ignition lock cylinder without using a key. With patience and careful attention to detail, this process is relatively easy to execute. However, if you are ever in doubt about your ability to complete the task safely and correctly, it is always best to seek professional assistance.
8 Common Mistakes Might People Do While Removing Gm Ignition Lock Cylinder without Key
1. Not Testing the New Ignition Switch:
Before installing a new lock cylinder, make sure to test the ignition switch for proper functioning.
2. Using Too Much Force:
Do not use too much force when removing or installing the lock cylinder, as this could damage the ignition switch.
3. Failing To Re-engage Tumblers:
Re-engage the tumblers after installing the new lock cylinder to ensure proper functioning.
4. Not Turning The New Lock Cylinder:
Turn the key in the new lock cylinder before reinstalling it to make sure that it turns smoothly and works properly.
5. Using An Improper Tool:
Make sure to use the correct tool for removing the lock cylinder. An A-head screwdriver is usually necessary.
6. Not Removing The Spring Tension:
Be sure to push down on the screwdriver and release the spring tension before attempting to turn it. This will make it easier to turn.
7. Not Checking Local Laws:
Removing the lock cylinder without a key may not be legal in all jurisdictions, so it is important to check your local laws before attempting the task.
8. Failing to Test The New Lock Cylinder:
Make sure to test the new lock cylinder before reinstalling it to make sure that it works correctly. This will ensure the best results.
At this point, you should understand the steps necessary for removing a GM ignition lock cylinder without using a key. With patience and attention to detail, you can be confident that you have successfully removed your lock cylinder while avoiding any common mistakes.
Safety Tips While Removing Gm Ignition Lock Cylinder without Key
1. Gather your tools:
Begin by gathering all the necessary tools you will need to remove your GM ignition lock cylinder without keys. These will include a set of flathead screwdrivers, socket wrenches, and Anders.
2. Disconnect the battery:
To protect yourself from any electrical shock when working around wires and components, disconnect the battery before beginning. This can be done simply by removing the negative and positive battery terminals.
3. Locate the screws:
Look for the two screws located on either side of the ignition lock cylinder. These will need to be removed using a flat-head screwdriver in order to gain access to the inner workings of the lock cylinder.
4. Wear Protective equipment:
When working with a GM ignition lock cylinder, it is important to wear protective gloves and eyewear. This will help protect you from any potential hazards that may occur during the process.
5. Disconnect the wires:
Once the screws have been removed, use a socket wrench to gently disconnect any wiring connecting the ignition lock cylinder to other components. Make sure to take note of the order in which they were connected so that you can easily reconnect them when you are finished.
6. Remove the Tumblers:
Once all the wires have been disconnected, carefully remove any tumblers found inside the ignition lock cylinder by using an adjustable wrench.
7. Remove the Lock Cylinder:
After all of the tumblers have been removed, the ignition lock cylinder can now be pulled out from the dashboard. sure to take caution when removing as you don’t want to damage any other components in the process.
8. Install New Lock Cylinder:
Once the old lock cylinder has been removed, you can now install a new one. Make sure to reconnect all of the wiring and tumblers in the same order that they were disconnected. Finally, reattach the two screws used to secure the ignition lock cylinder in place.
And you’ve finished removing your GM ignition lock cylinder without keys. Remember to wear appropriate safety gear when working with electrical components, and always be sure to disconnect the battery before starting any repair work. For more information or help with your vehicle, contact a certified mechanic.
Additional Tips and Advice for Successfully Removing the Ignition Lock Cylinder without A Key
Here are some additional tips and advice for successfully removing the ignition lock cylinder without a key:
- Use lubricant: Applying a small amount of lubricant to the lock cylinder can make it easier to remove. This can help to reduce friction and make it easier to turn the cylinder with pliers.
- Disconnect the battery: Before starting to remove the lock cylinder, disconnect the vehicle’s battery to avoid any electrical accidents.
- Follow the manufacturer’s instructions: Different GM models may have slightly different methods for removing the ignition lock cylinder. It’s important to follow the manufacturer’s instructions carefully to avoid damaging the vehicle or causing harm to yourself.
- Seek professional help: Removing the ignition lock cylinder can be a tricky process, and it’s not recommended for inexperienced individuals to attempt it on their own. If you’re not confident in your ability to remove the lock cylinder, or if you’re concerned about damaging the vehicle, it’s best to seek the help of a professional locksmith or mechanic.
- Be patient: Removing the ignition lock cylinder without a key can take time, especially if you’re doing it for the first time. Be patient, take your time, and don’t rush the process. This will help you avoid mistakes and ensure that the lock cylinder is removed safely and without damage to the vehicle.
By following these tips and advice, you can increase your chances of successfully removing the ignition lock cylinder without a key. Remember to always take the necessary precautions and seek professional help if you’re unsure about the process.
How to Install New Cylinder
Once you have successfully removed the old ignition lock cylinder, you can now proceed to install a new one. Here are the steps to follow:
- Purchase a replacement ignition lock cylinder: Before installing a new lock cylinder, you need to ensure that you have the correct replacement part for your vehicle. You can purchase a replacement ignition lock cylinder from a local auto parts store or online retailer. Make sure to get a lock cylinder that is compatible with your specific GM model.
- Align the new lock cylinder: To install the new lock cylinder, you need to align it with the ignition switch on the steering column. First, turn the new lock cylinder to the “accessory” position. Next, align the slot on the end of the lock cylinder with the alignment tab on the ignition switch. Once aligned, slide the lock cylinder into the ignition switch until it clicks into place.
- Reconnect the battery: Once the new lock cylinder is installed, you can reconnect the vehicle’s battery.
- Test the new lock cylinder: Before using the new lock cylinder, test it by inserting the key and turning it to the “start” position. The engine should start without any issues. Also, test the lock cylinder by turning the key to the “off” position and removing it.
- Reassemble the steering column: If you had to disassemble the steering column to remove the old lock cylinder, you could now reassemble it.
By following these steps, you can successfully install a new ignition lock cylinder in your GM vehicle. Remember to take your time and follow the manufacturer’s instructions carefully to avoid damaging the vehicle or causing harm to yourself. If you’re not confident in your ability to install the new lock cylinder, it’s best to seek the help of a professional locksmith or mechanic.
Conclusion
Removing a GM ignition lock cylinder without the key can be done with some patience and careful work. If you have limited experience, it may be best to consult an automotive professional for assistance in order to avoid damaging your vehicle or yourself.
With the right tools and knowledge, however, anyone can successfully remove their GM ignition lock cylinder without the key. Just remember to take your time when working on this project, as mistakes could cost more than just money – they could put both you and your car at risk! Thanks for reading this article about how to remove GM ignition lock cylinder without key.
